I live in Vienna in Austria. Vienna - or Wien as it is called in German - is the gorgeous capital of Austria. Vienna is synonymous with a high quality of life, good food, beer and wine, music and gemütlichkeit. I have been living in Vienna on-and-off for the past many years and after a stay in New York, I decided to settle down in this magnificent city.
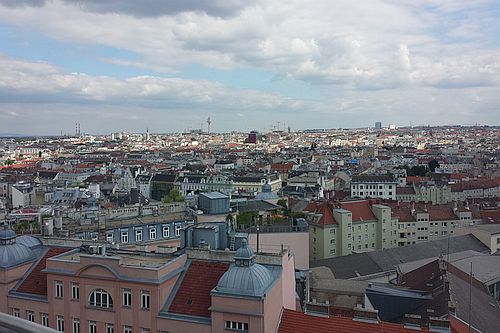
A view from above over the city.
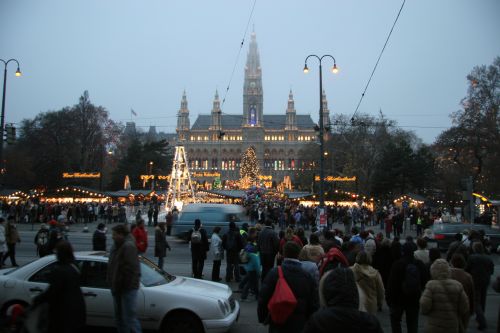
The city hall is located on the ring road and houses so many events all year.
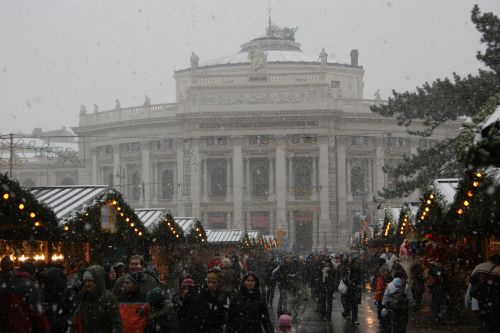
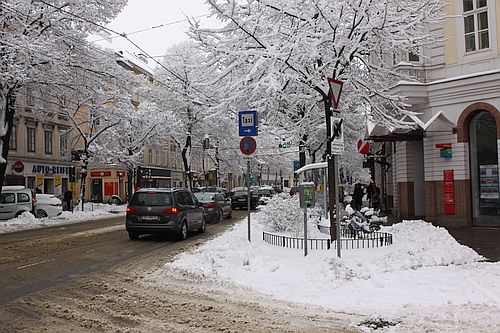
Vienna is also beautiful when the snow falls. In December, most of the inner city is dedicated to so many christmas markets that I've lost count years ago.
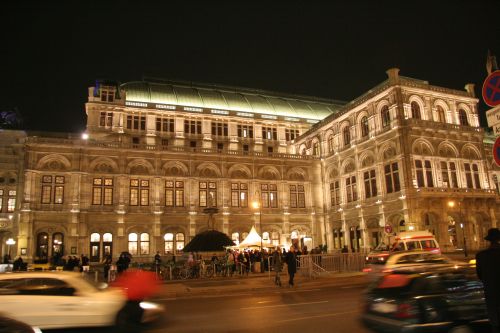
The old opera house is a landmark in the inner city. Located at the ring road close to Karlsplatz, a visitor cannot possibly avoid to take notice of this beautiful building.
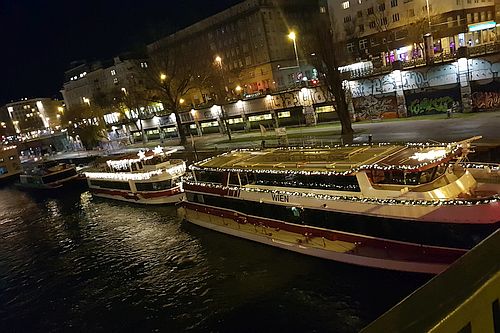
The Donau Kanal that divides the first and second district, is also used for fun purposes. In the summertime, small beaches with beach chairs are right at the waterfront. The "party ships" are open all year, also for Christmas.
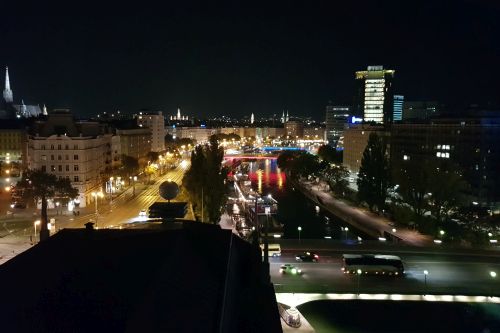
The view from the telescope dome at Urania is simply wonderful.
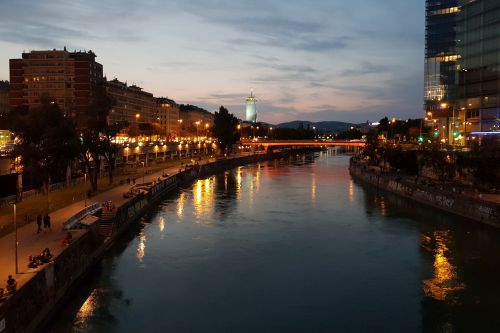
The Donau Kanal looks like a post card when the lights from the city reflect in the water.
At wintertime, Vienna actually feels like a small town - everything moves slowly, which has its own charm.
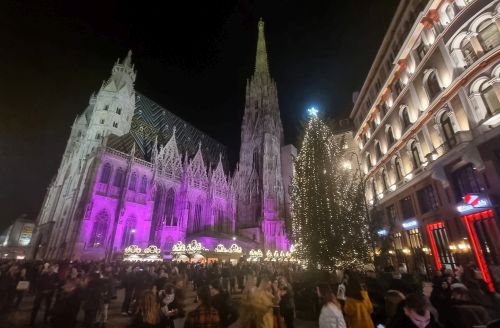
The Vienna Cathedral is beautiful, especially at Christmas time where a Christmas market is open all Decemeber in front of the church. The entire setting has a ghostly feeling.
Vienna is a very diverse city where each district has its own vibe and charm. This is from my perspective one of the greatest perks of this city, because you can settle down in a district that fits your mindset.

I live in an area of Vienna called Margareten. Located next to Naschmarkt, the door to The Balkans and the entire eastern region is wide open - I love it.
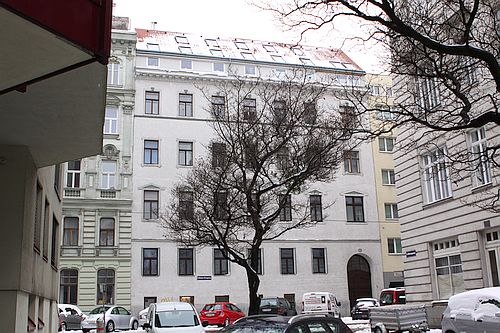
I live in a commonplace apartment building - one of several thousand in this city.

As an extra bonus, Chinatown is only a couple of blocks away and if you fancy chinese foods there are tons of diners, restaurants and supermarkets readily available.

I often buy fish at Naschmarkt. There are more places to go to and they all stock a wide variety of fresh fish.
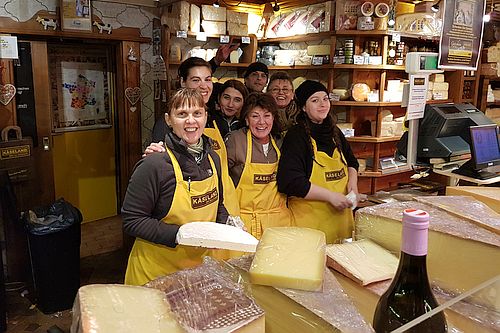
When I need some cheese, I go to my "Käse-girls", also at Naschmarkt.
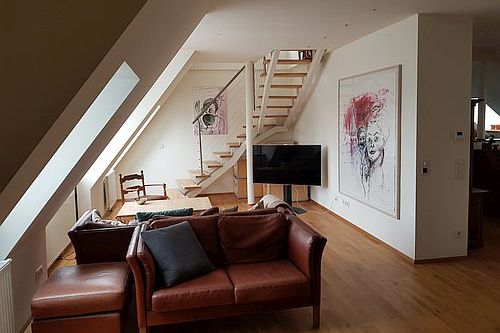
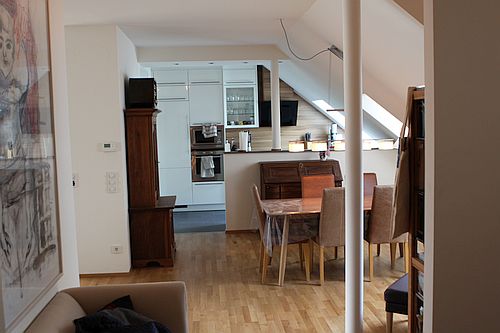
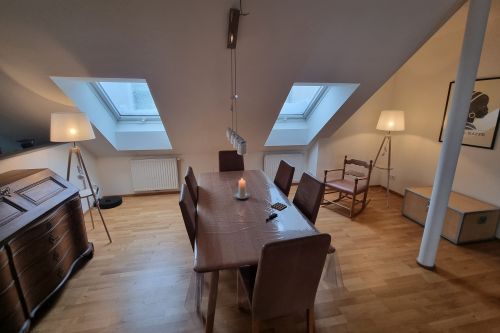
I live in a nice penthouse with a view over the rooftops to the small mountains surrounding the city. The apartment is what is referred to as a "dachboden ausbau". What this means is that the entire roof is removed from an old house, and a brand new apartment is built on top of the building.
I have completely renovated the apartment which also gives it a personal touch.
I love to cook fish in my kitchen - although we don't have any coastline in Austria, fresh fish is readily available.
An empty room in the apartment has been turned into a combo of a laundry room, workshop and storage.
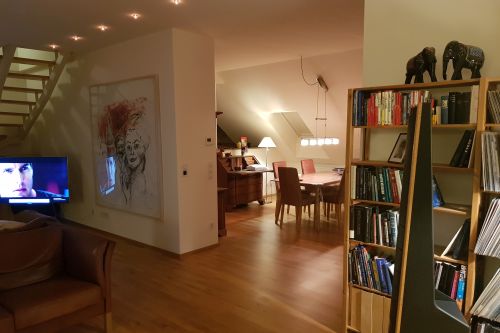
As the flat spans the entire roof, the living room is quite large and gives it a NYC loft feeling.
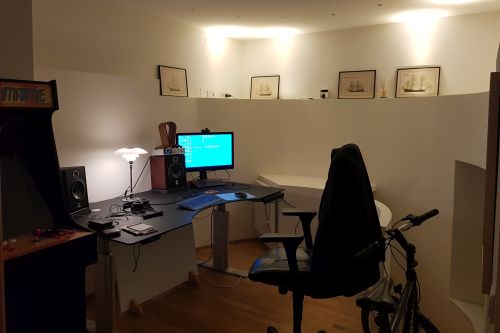
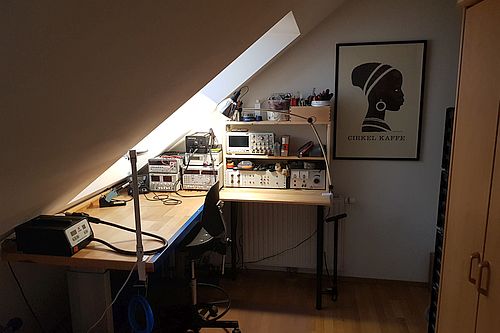
I love my home office which the former owner cleverly made from a converted storage room.
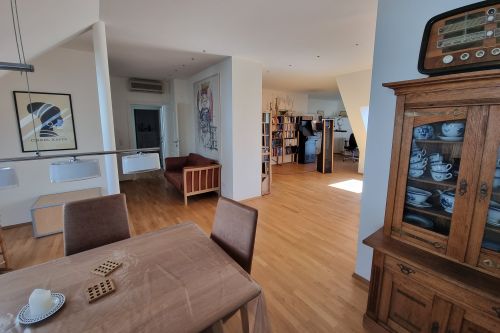
The open space is much more friendly then a lot of tiny rooms, most of which are never really used.
Now I just neeed to cook dinner.
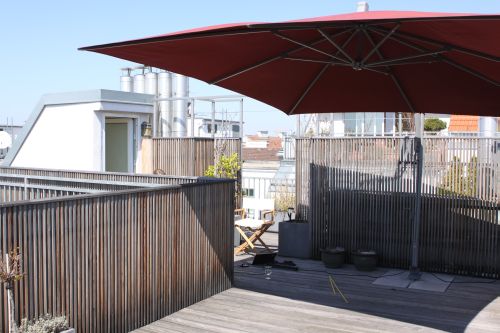
It often gets very hot on the terrace so a parasol is a must. On the positive side is that I almost live on the terrace when the weather allows it.
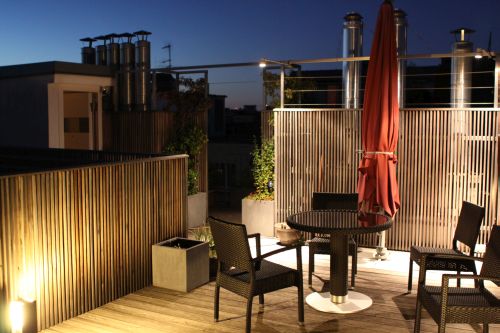
In the hot summer nights I often use the terrace until midnight.
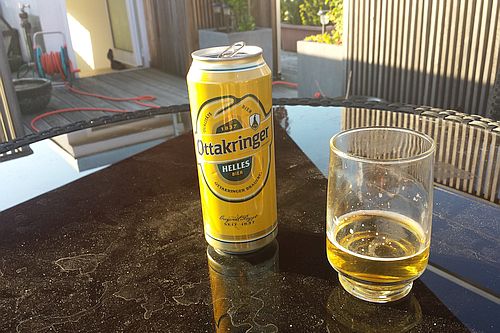
Just what I needed on a hot day!
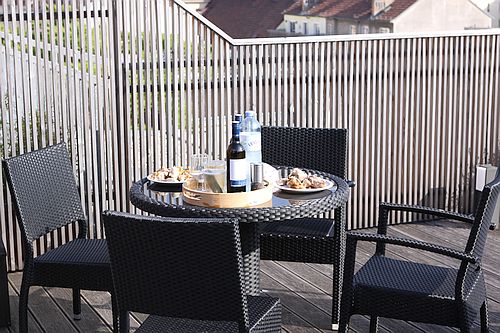
Eating outside simply is a must!
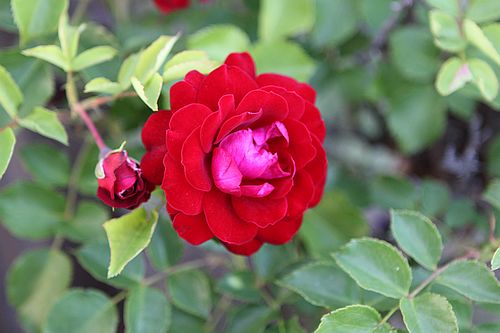
In the early summer, all the flowers bloom.
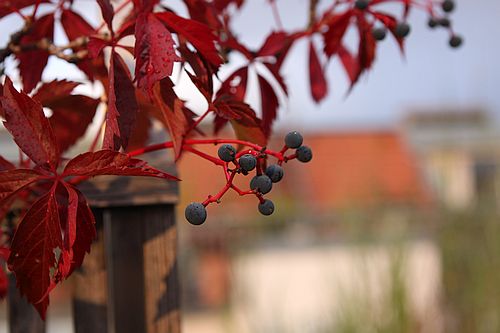
When the Autumn comes, the leaves on many plants turn a beautiful dark red color.
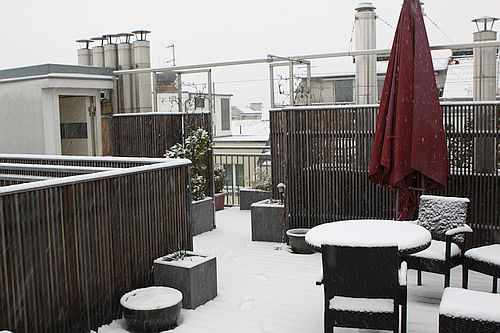
Unfortunately the winter in Vienna can be quite cold with loads of snow.
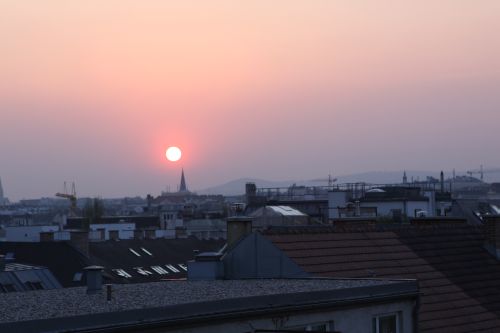
The sun sets over the mountains that surround the city. With a view over the rooftops to the small mountains surrounding the city, I cannot possibly complain.
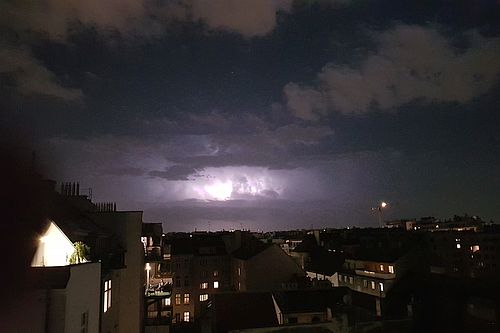
Thunderstorms are quite frequent in the summertime, and make a beautiful show for anyone to enjoy.
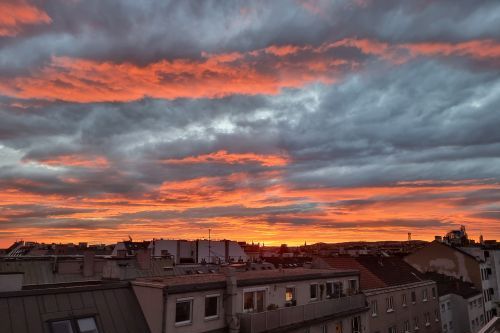
What a beautiful scenery - no words needed.
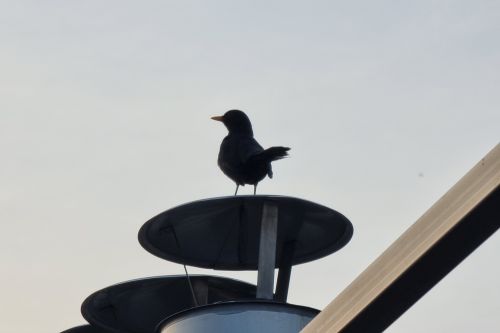
In the summer, the birds come close and sing.
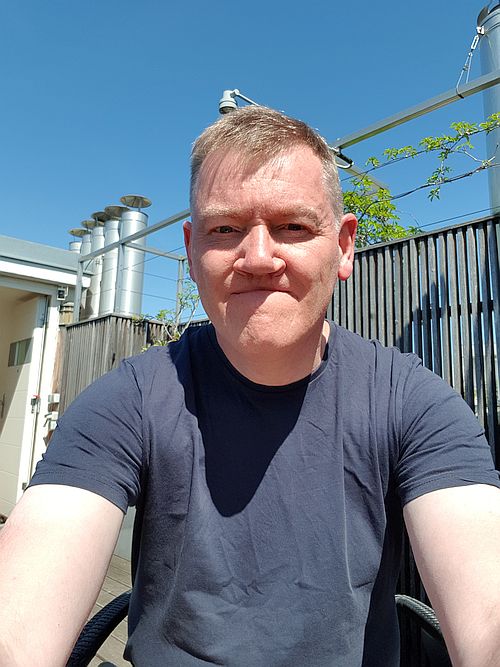
Selfie on the terrace.

The hectic pace in the City with its hustle and bustle is most fascinating - I love to walk thru the first district.

Wintertime at the terrace with the low sun at the horizon.

You can feel the thick ambience of happiness in the city center on New Year's eve.
I live close to one of the biggest open markets in Vienna. It is open daily and offers a huge variety of fresh produce.

Every year there is a host of Christmas markets in Vienna. I love to go and have a mulled wine and enjoy the vibe.
My Skype username is ringdk. Due to spam on Skype, I'm currently running Skype in a closed contacts mode, so you need to exchange contact info to call me or to use the chat option.
Skype meYou can send me a mail by clicking the button. If I do not answer, your mail has been deleted by my somewhat aggressive anti-spam filter.
My Telegram username is @ringvienna.

What I do for a living - the short version is that I develop computer software - that's it!
To elaborate on the above, I have to go into greater detail: I am the senior developer of the HELIOS accounting system, which is sold in Scandinavia. The HELIOS system is aimed at the automotive industry and is primarily used in repair shops and paint shops. It is often the only piece of software used for running the entire business, so it has to be fully featured and support the special needs of this particular industry.
My company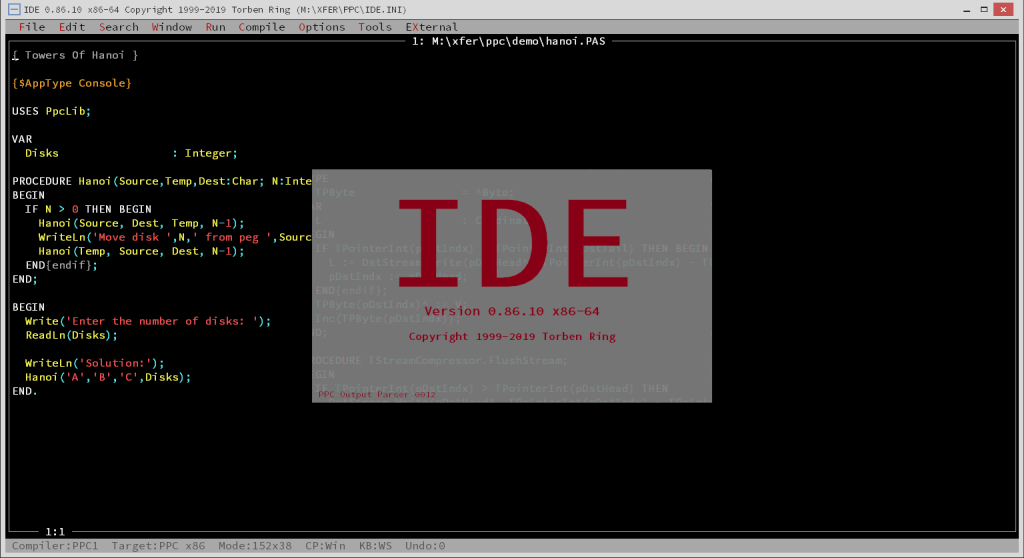
The Pascal-P Object Pascal compiler (PPC) is a Windows compatible x86 and AMD64 Object Pascal cross-compiler. It is completely self contained and generates Windows EXE files for 32-bits and 64-bits Windows. PPC comes with a Windows compatible IDE with an intuitive and easy to use text interface. PPC can also output PCode (a java like bytecode) which can be interpreted and thus can be used to add a programming language to an application.
Download PPC 1.98.1210
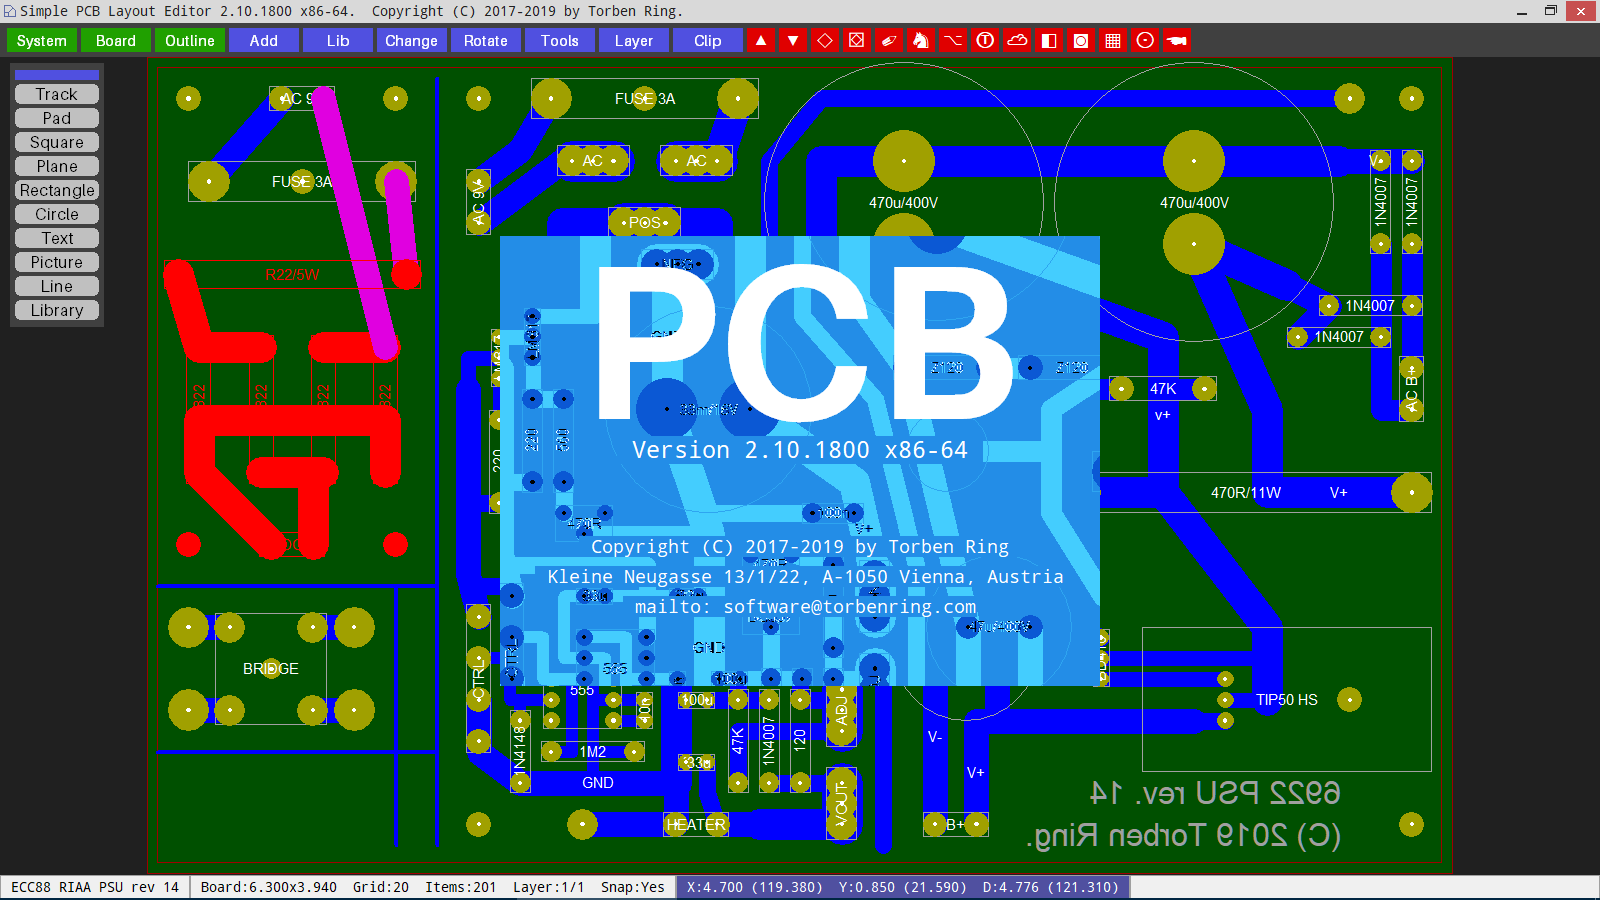
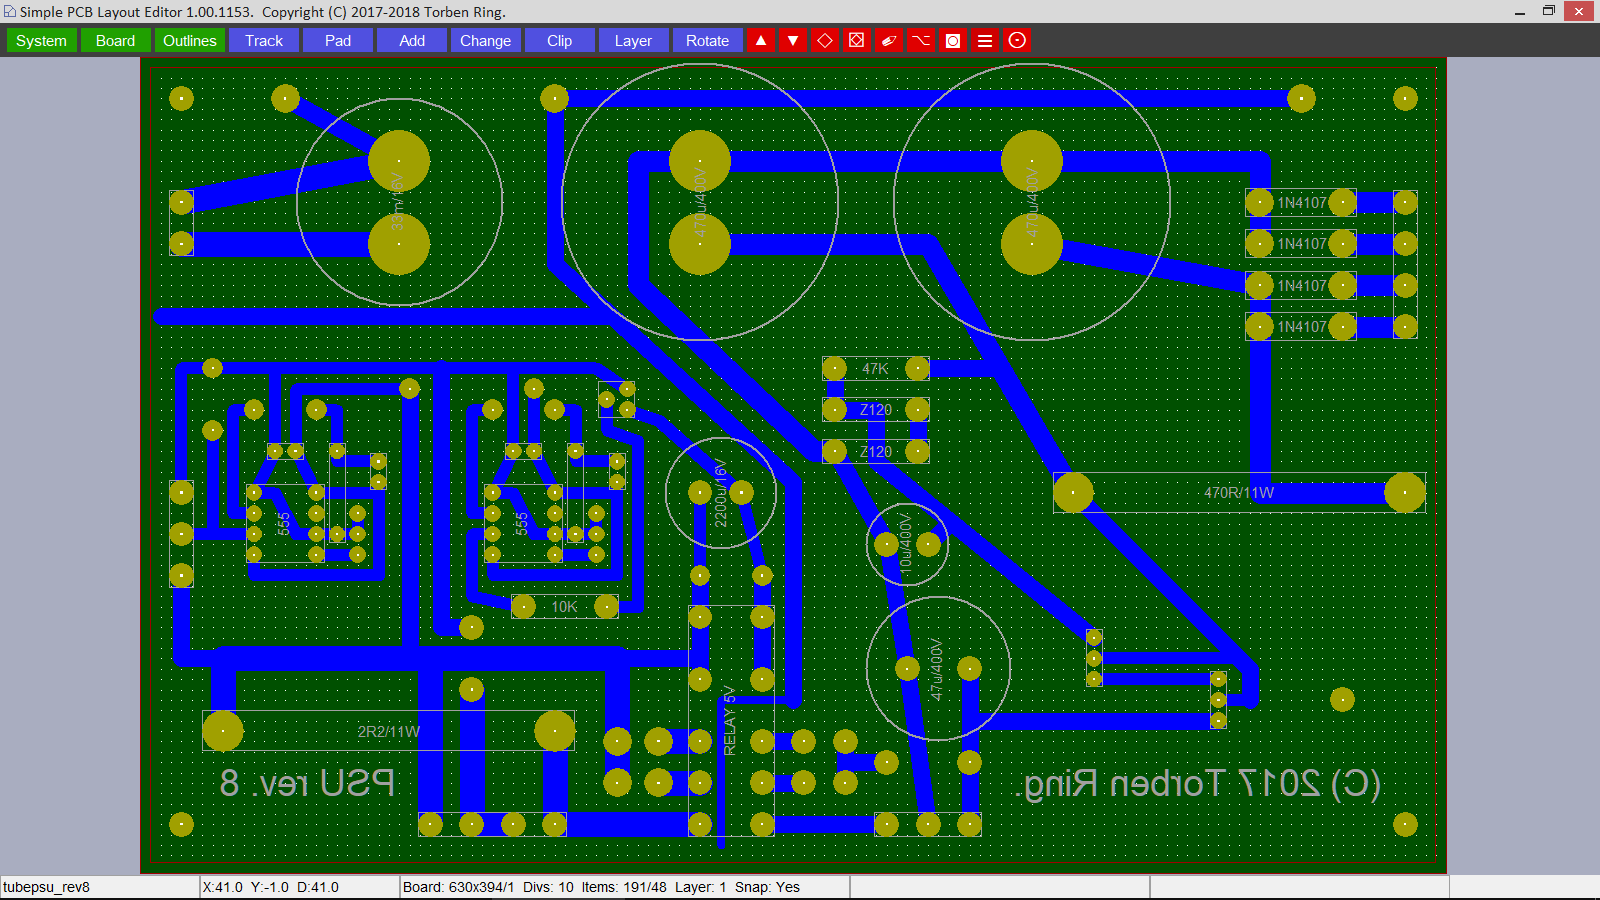
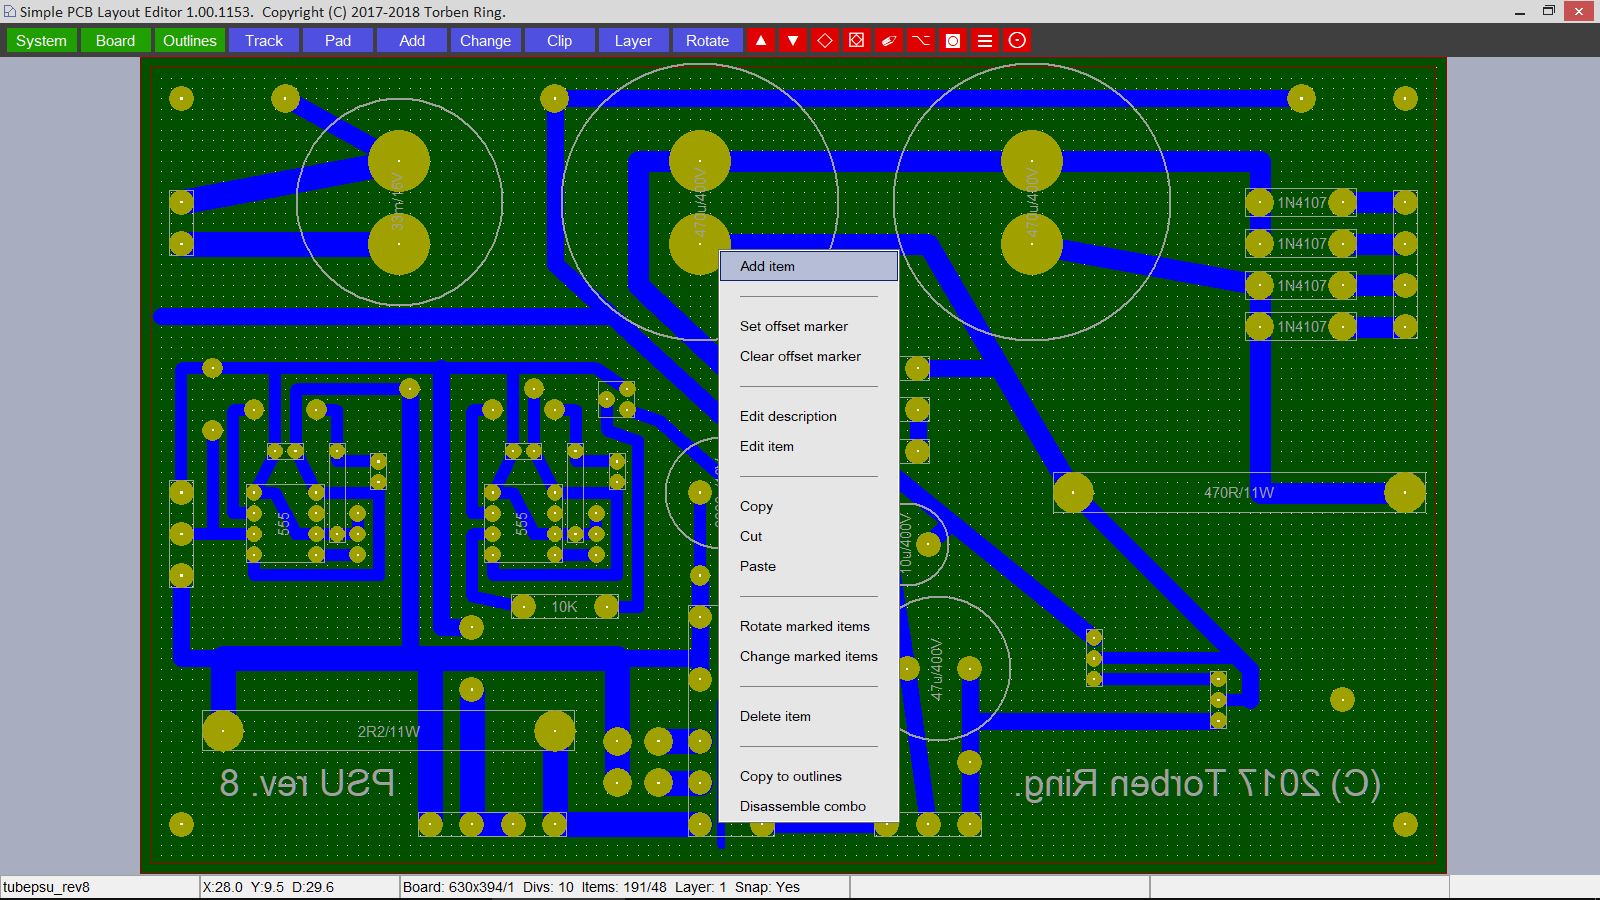
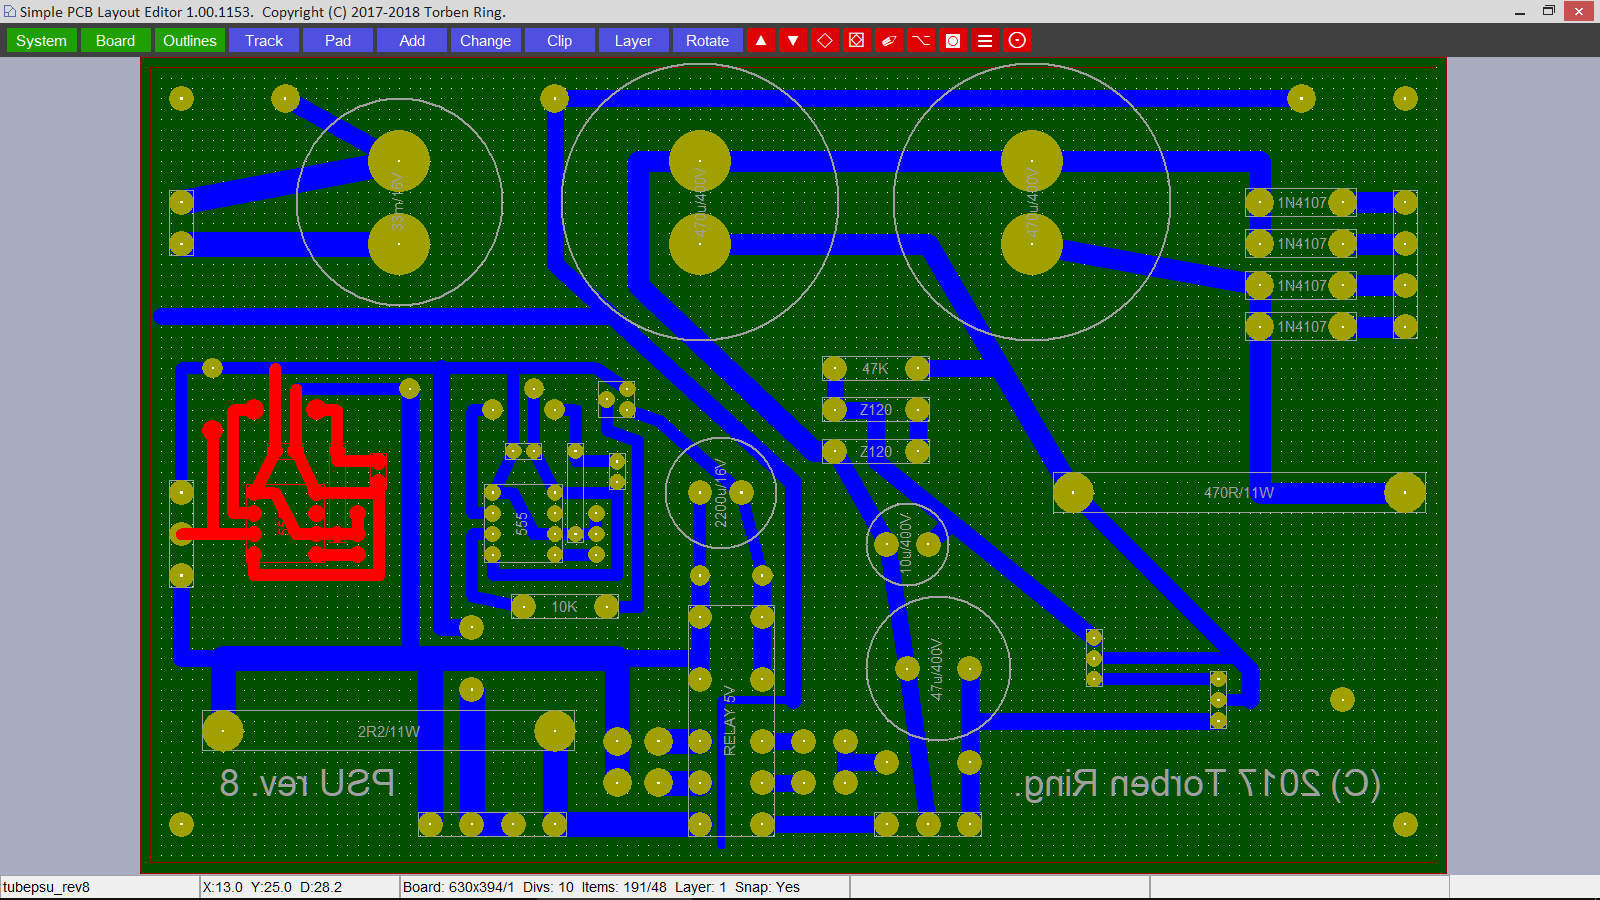
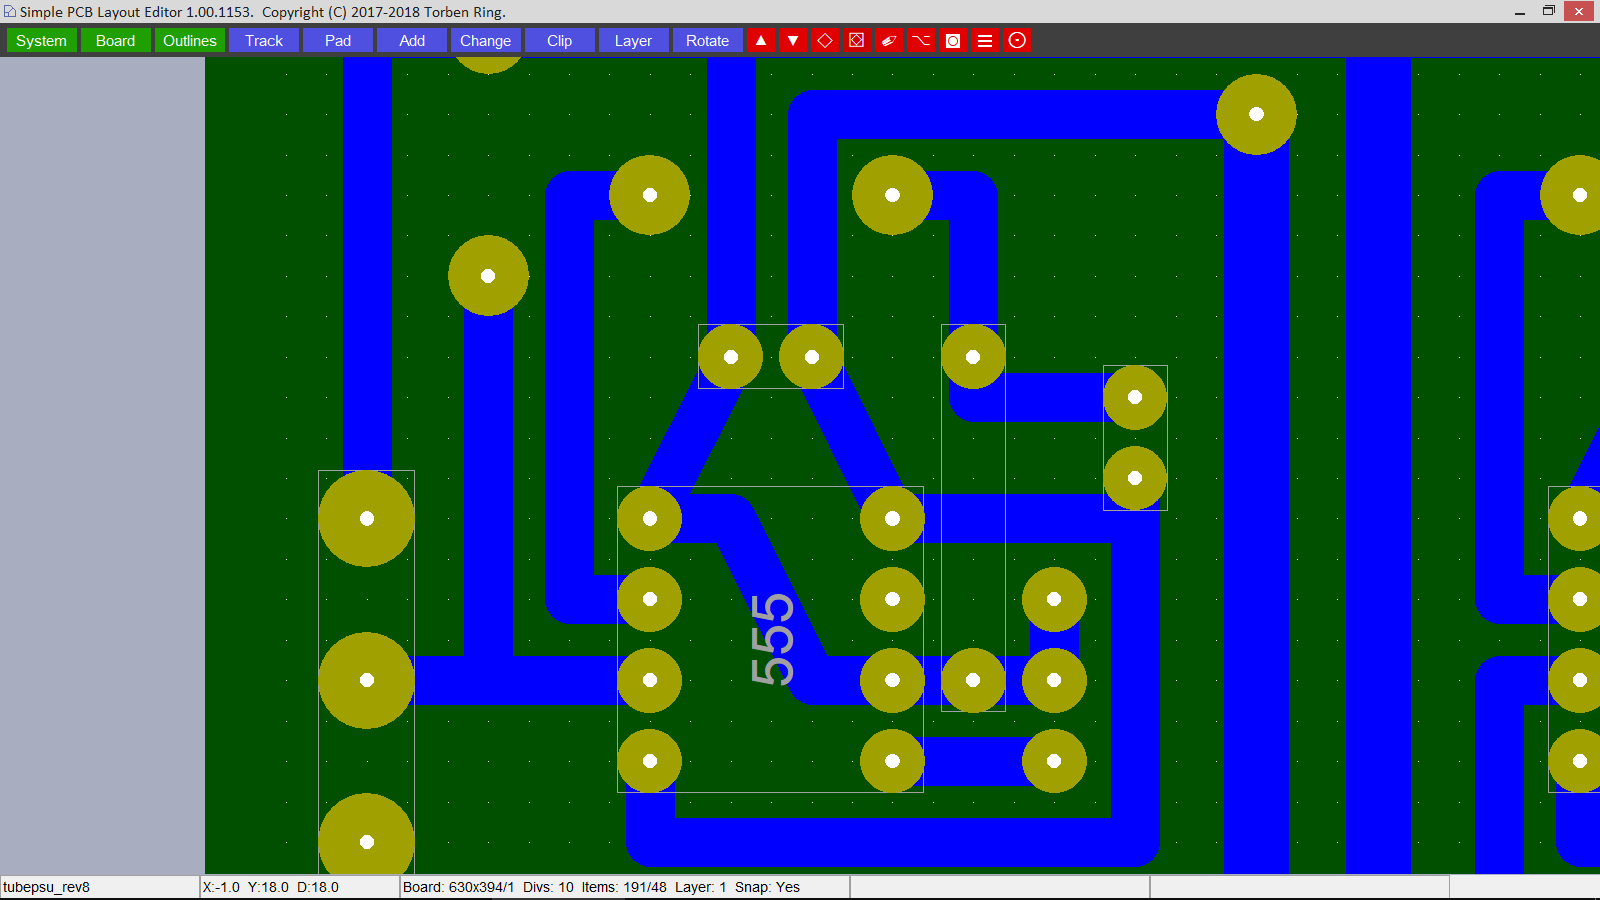
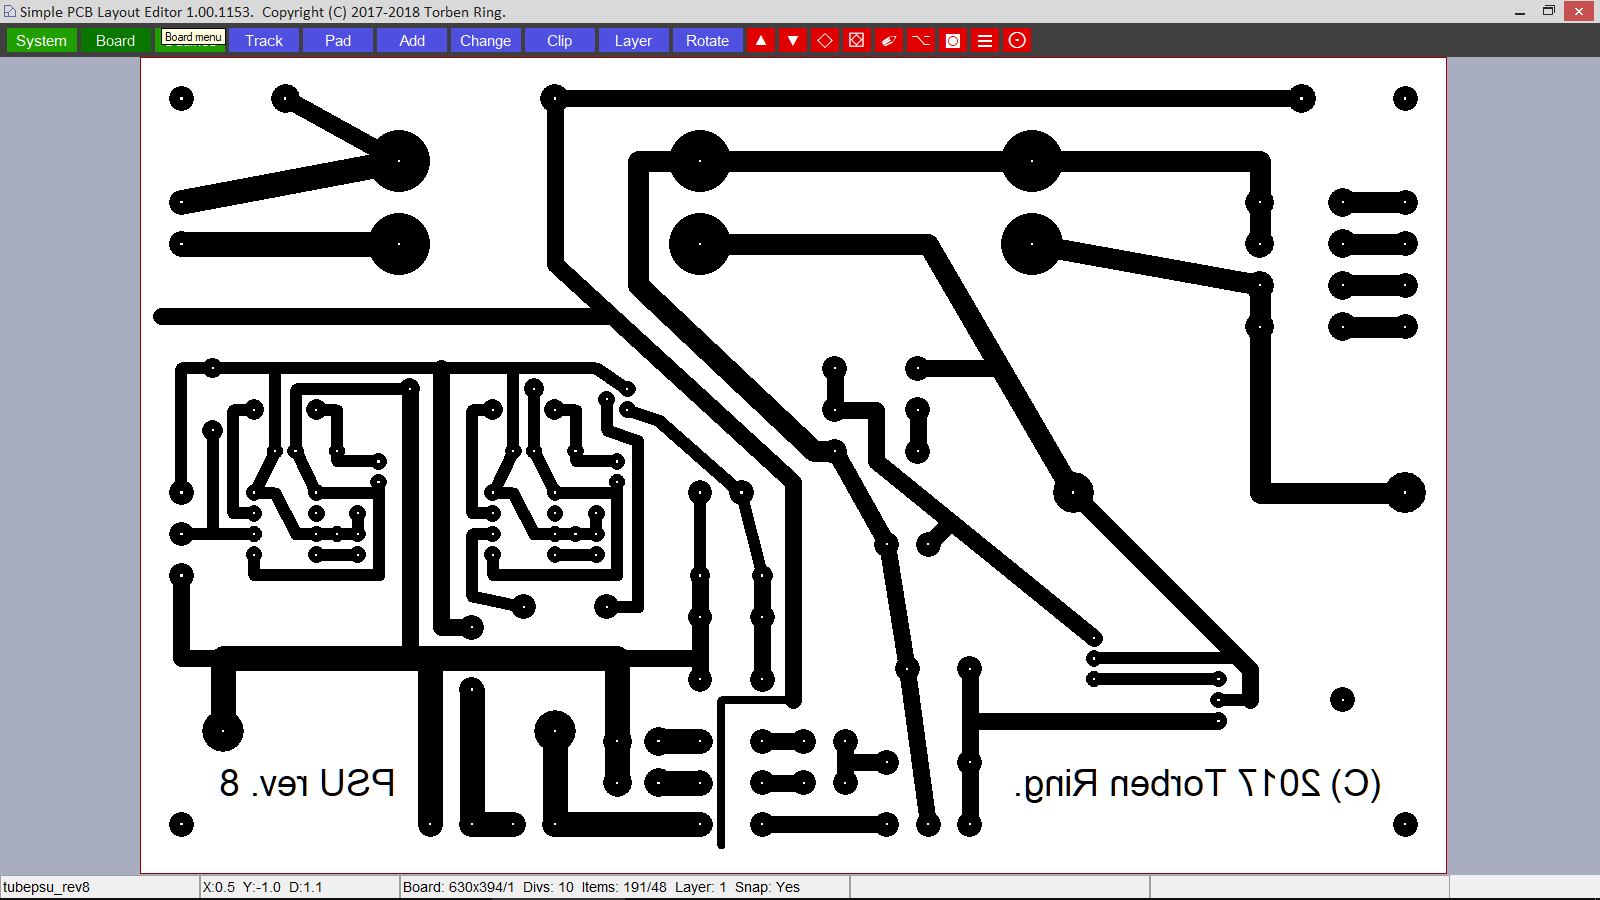
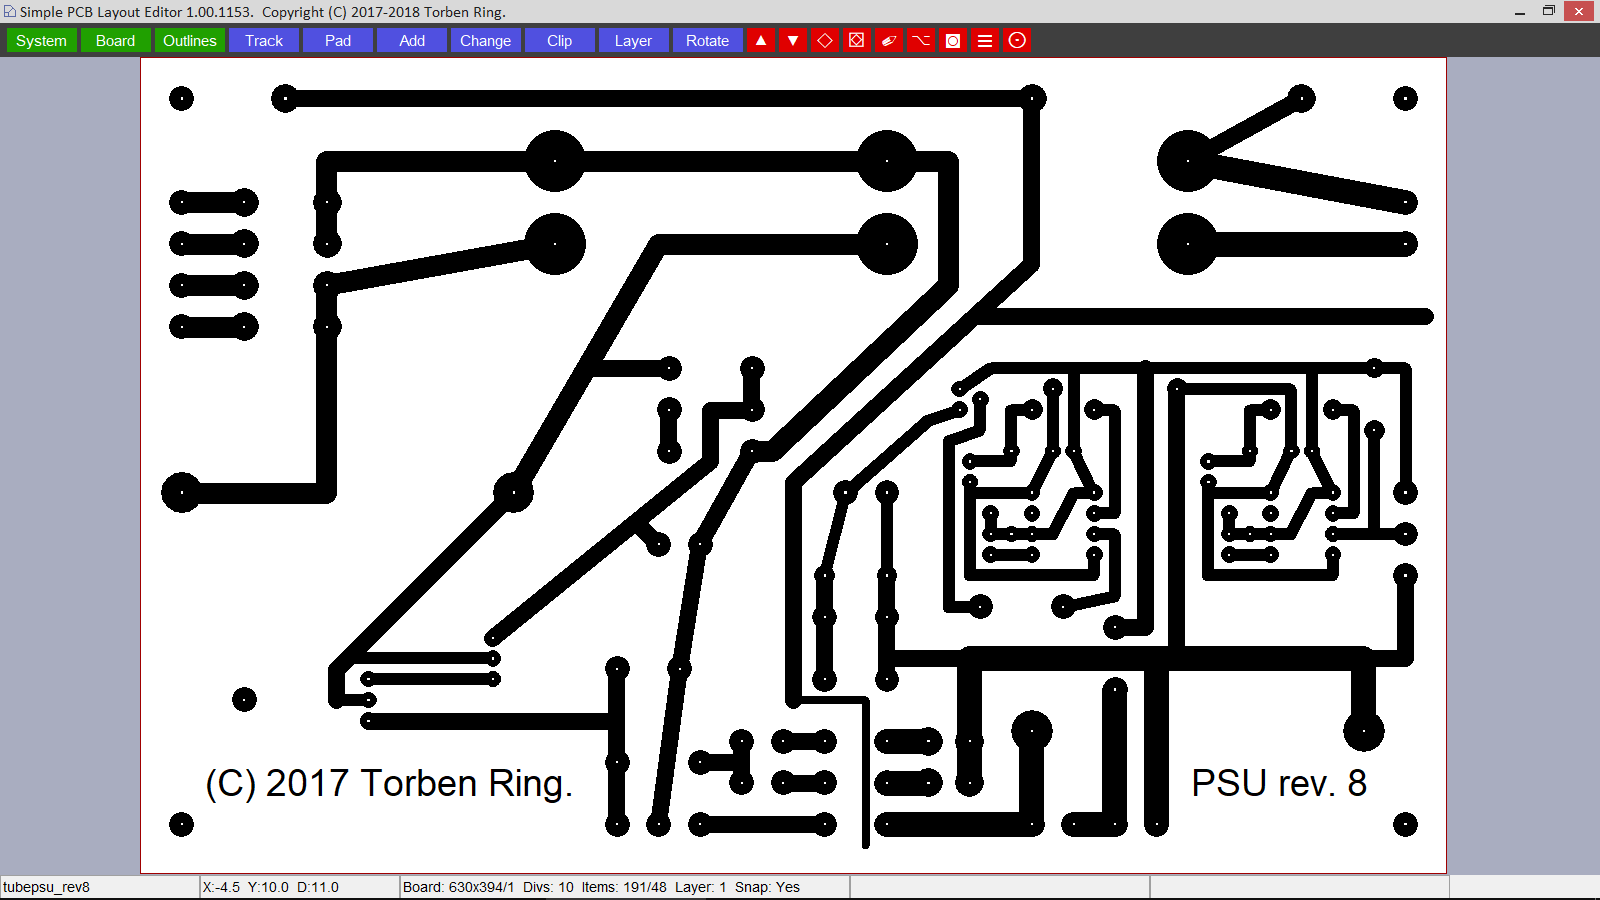
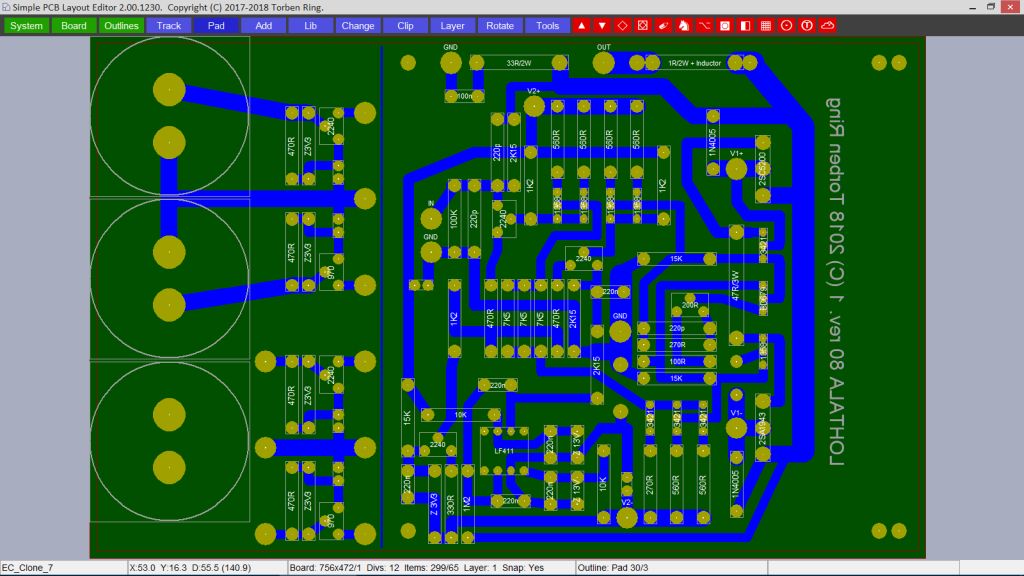
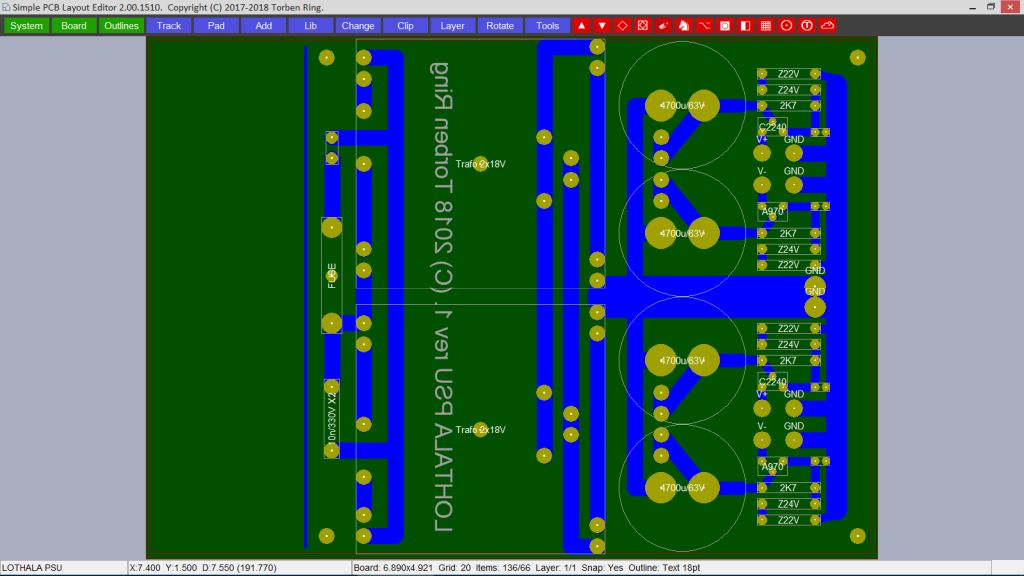
The Simple PCB Layout Editor makes it easy to do a prototype board. I developed the program as I found most of the commercially available PCB packages way too difficult to use, and many of those do not allow for a printout for a homemade PCB. And the PCB Editor is free.
Manual Download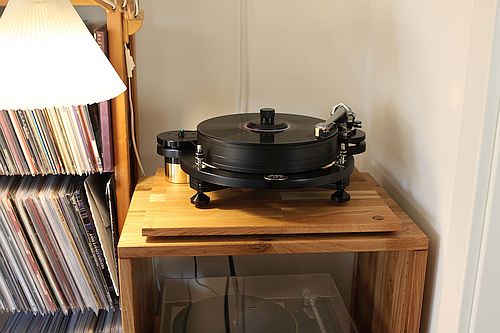
I like to listen to music - but not the common poor quality sound that comes from a set of cheap in-ears plugged into an iPhone. I am more into the heavy stuff where electrostatic speakers, class-A monoblocks and turntables are my foundation for a real joyride.
My Hi-Fi projects
A simple utility that will minimize most Windows applications to the tray by right-clicking the caption bar. I developed the utility especially for Mozilla Thunderbid when support for the legacy tray minimizer add-on was cancelled.
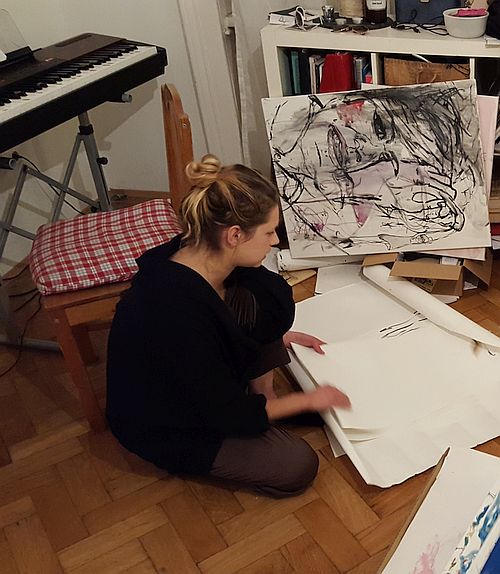
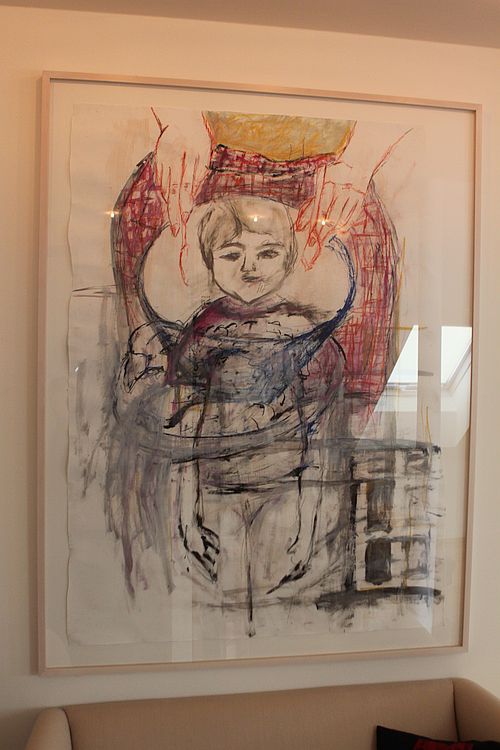
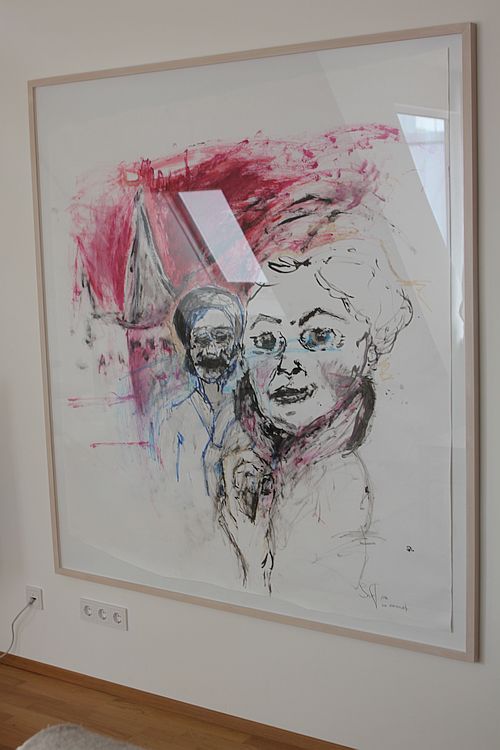
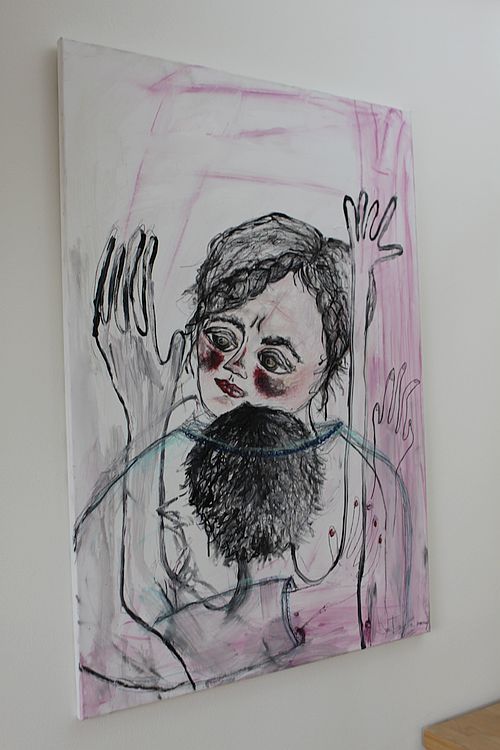
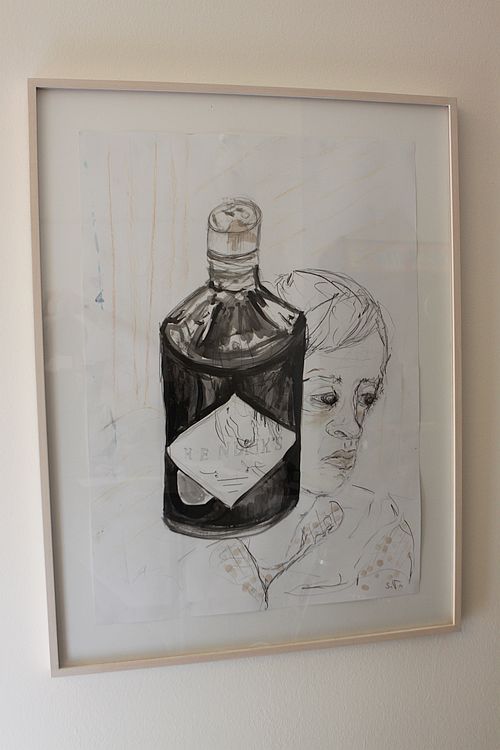
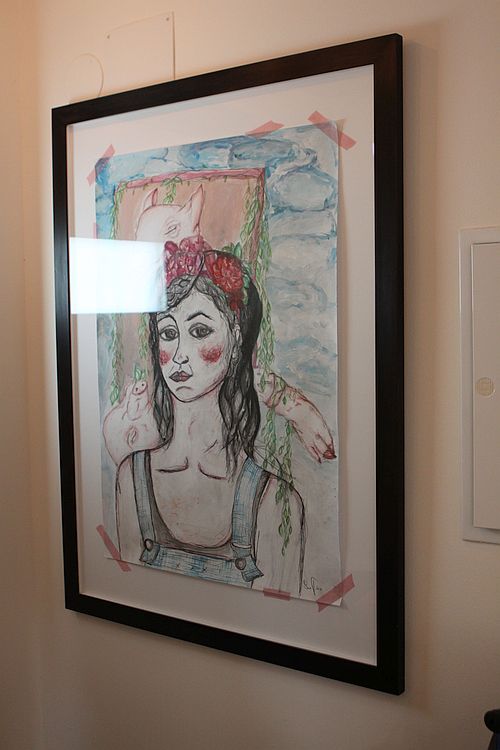
Download MinTray build 1014A very skilled young artist, Ina Fasching, lives on the same street as me. I actually met her as I went for a beer in a small "Beisl" across the street. I did not know what she actually did, but as I am a curious person I asked her: What do you do, when you are not serving me beer?
She told me that she was an art student at the famous art school here in Vienna. Of course I wanted to see her paintings, and I liked them very much.
Below some screen dumps from my PCB Editor. I plan to write a short manual, but for now intuition will have to do.
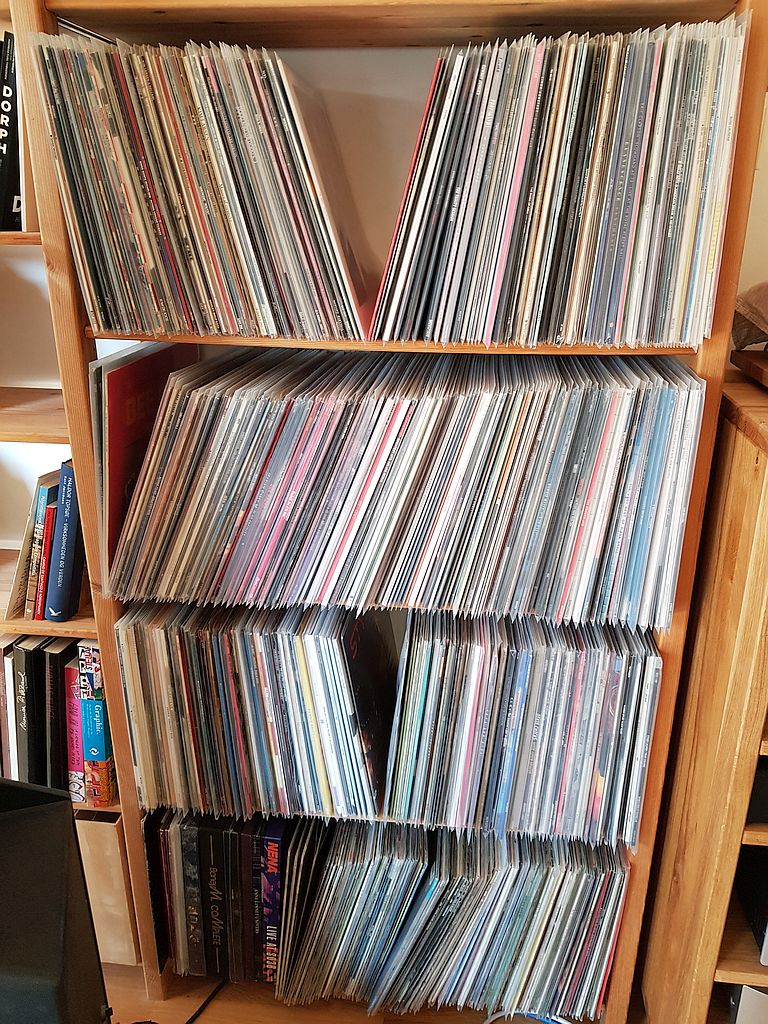
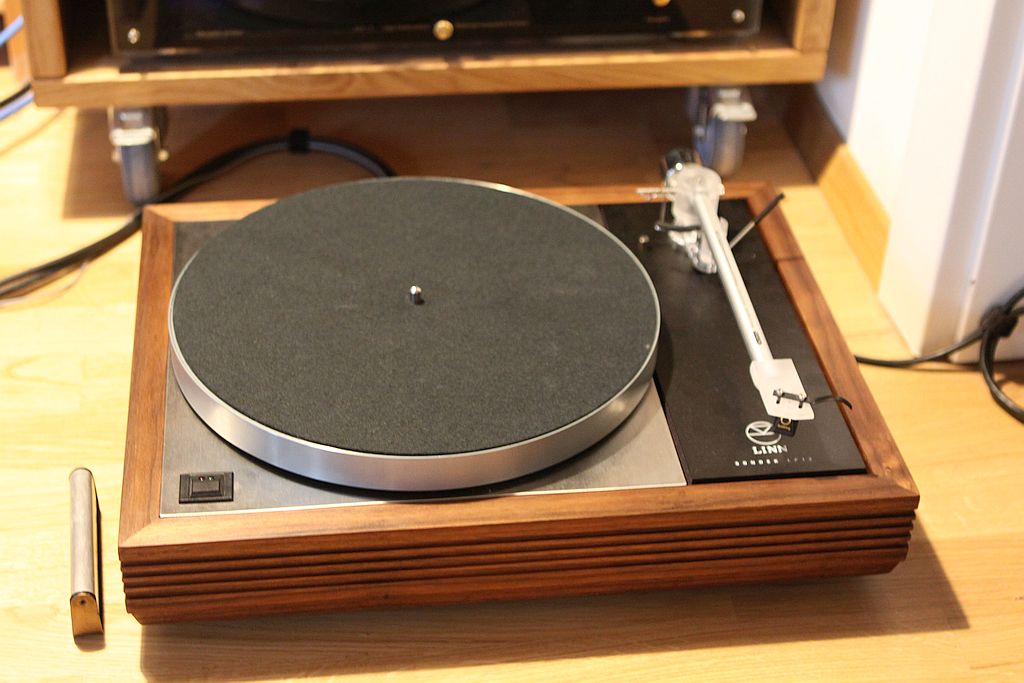
Even though digital music has been with us for decades now, I stil prefer the sound of my vinyls. Yes, I know - vinyls can be hard to deal with, they get dirty and are heavy, but still I love them. And the feeling of putting a real record on, is second to none.
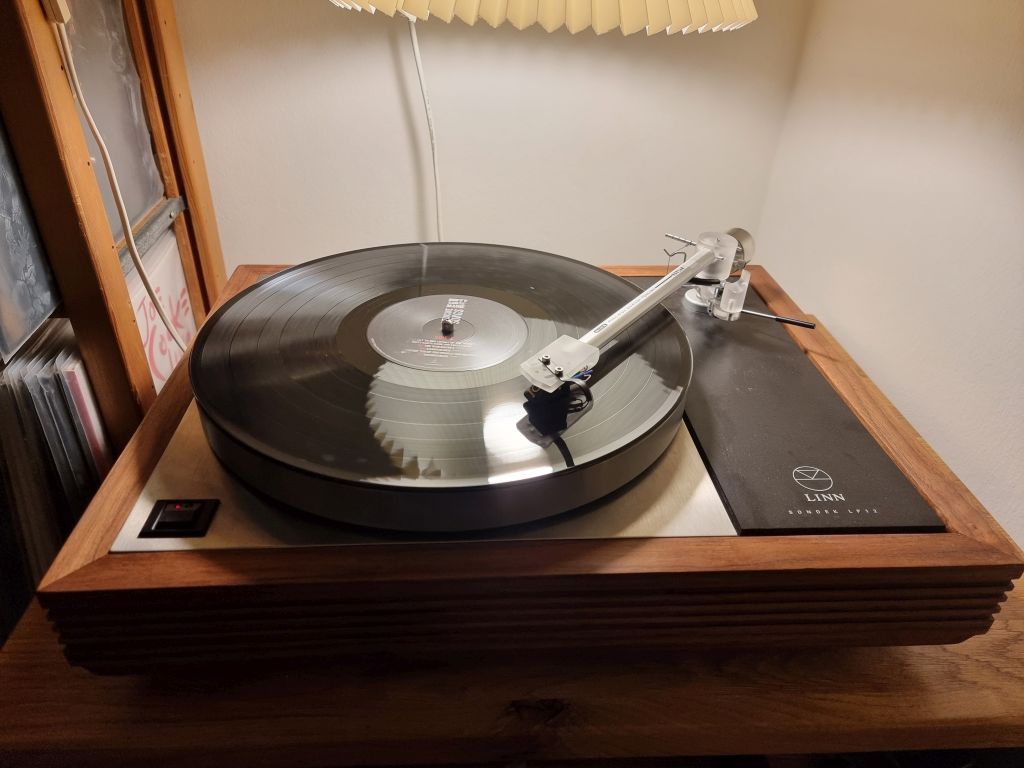
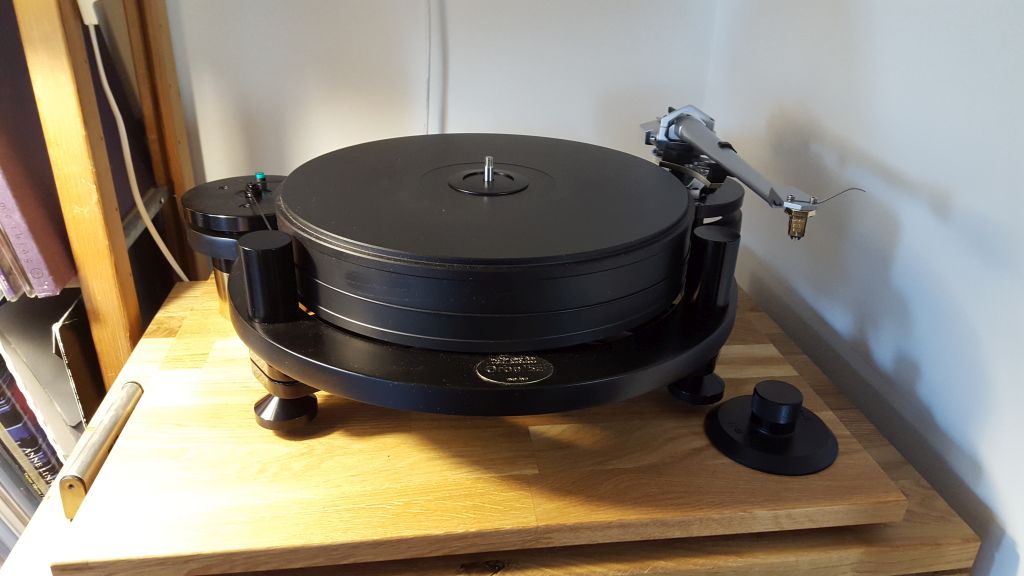
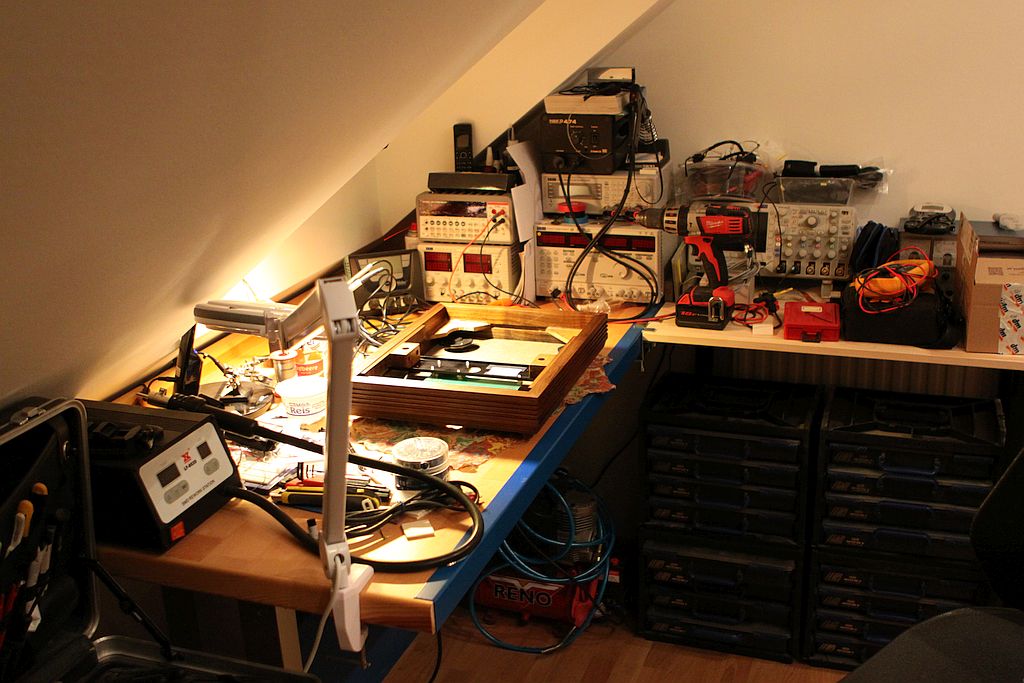
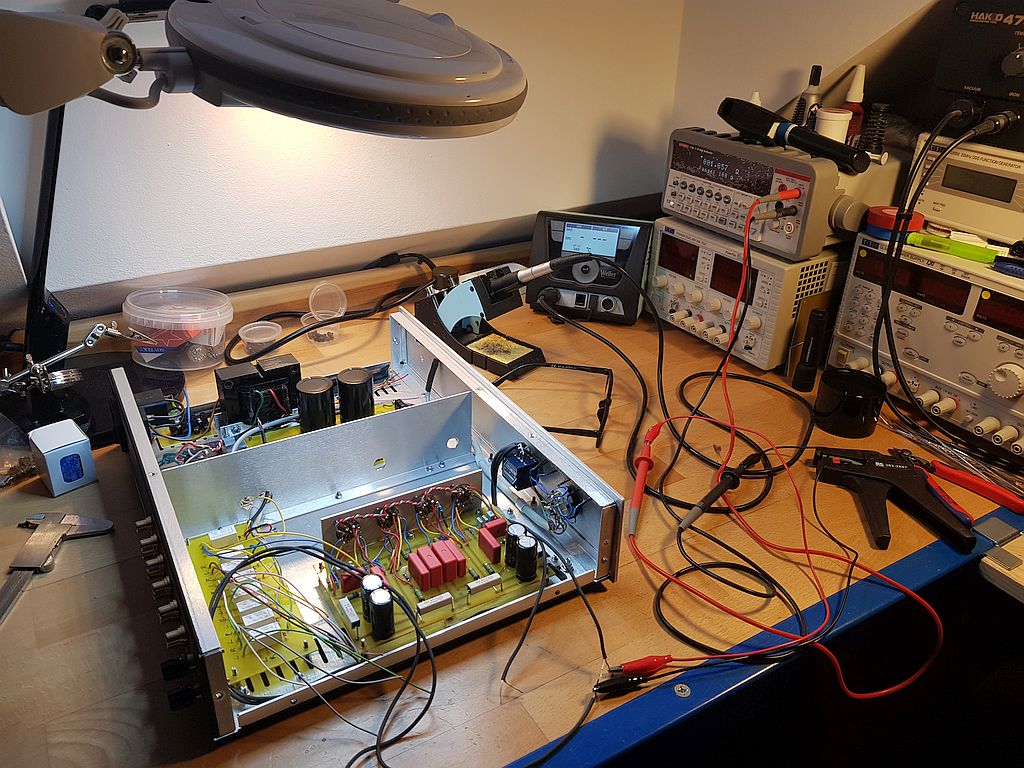
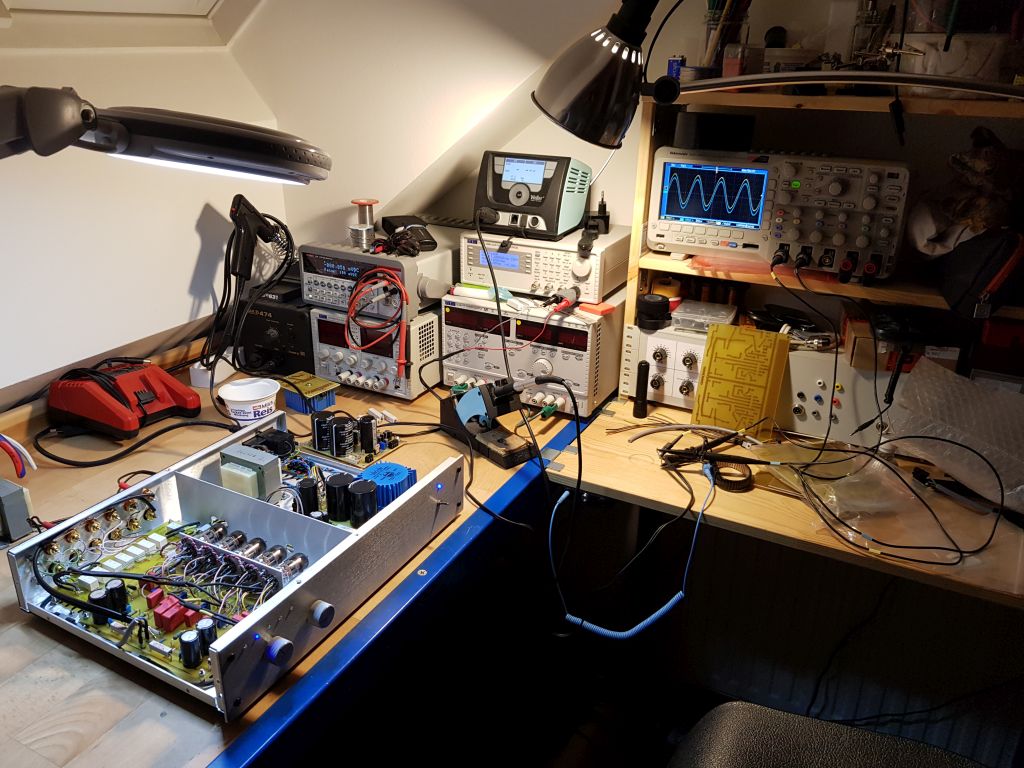
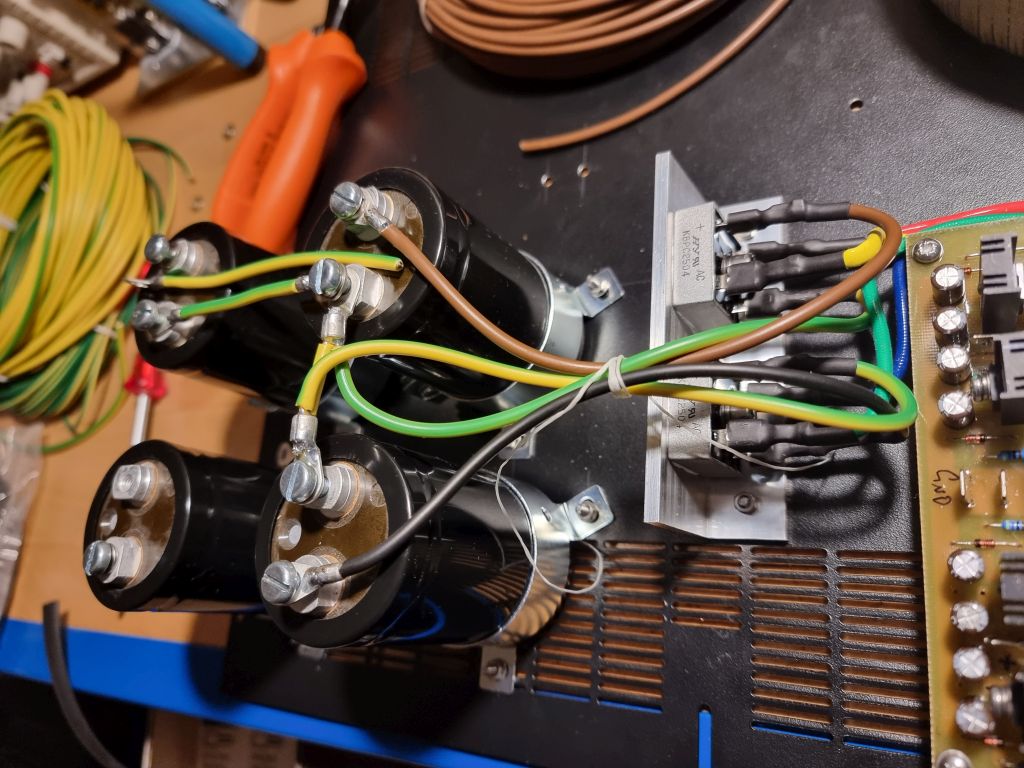
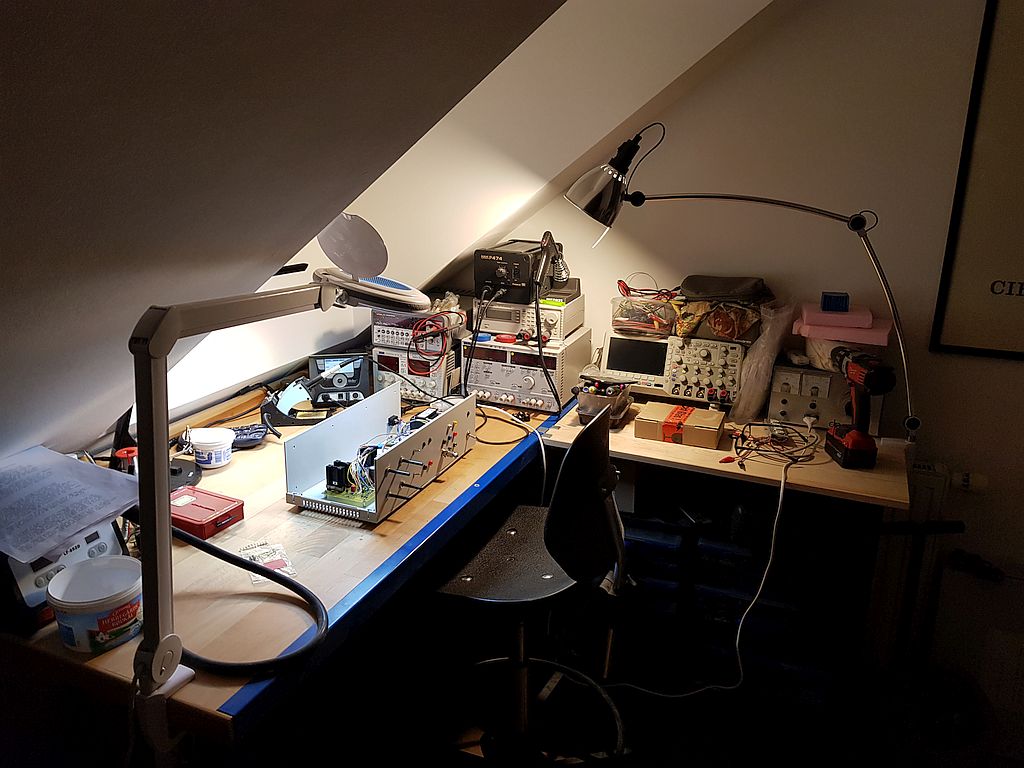
I like to build Hi-Fi equipment myself. It gives me the possibility to play with various setups and change things on the fly. At the same time, I have full control over the component and build quality.
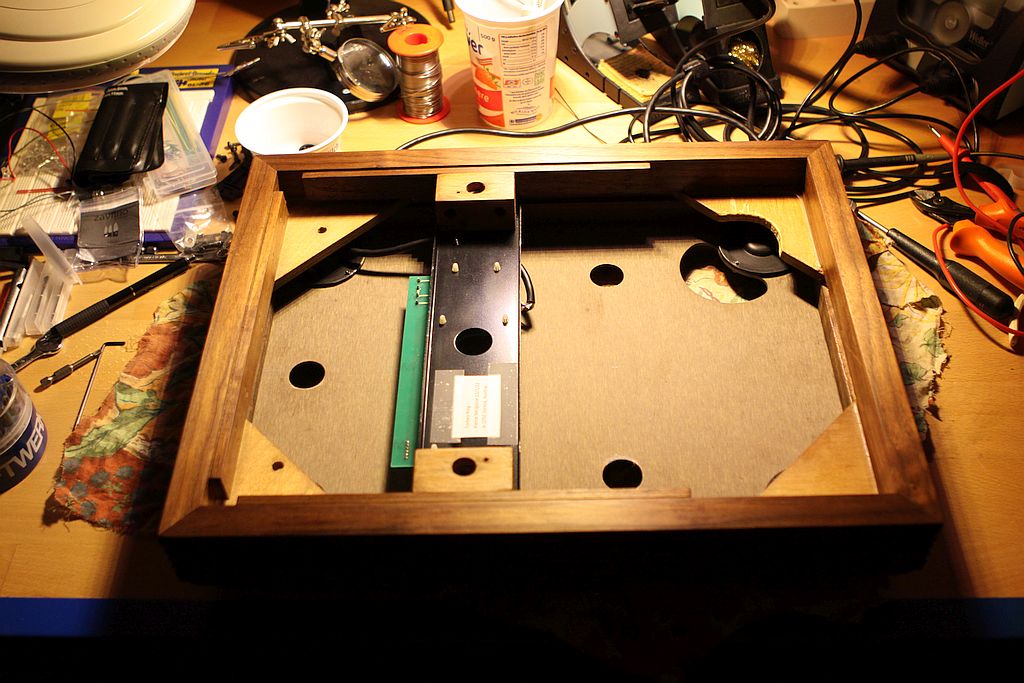
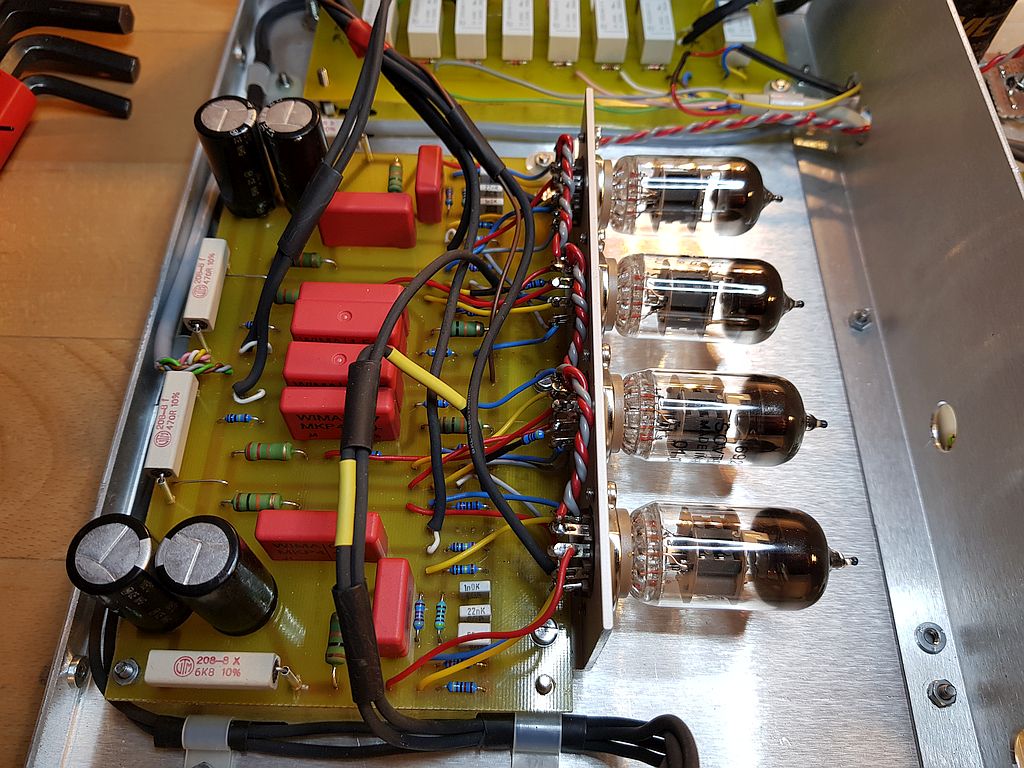
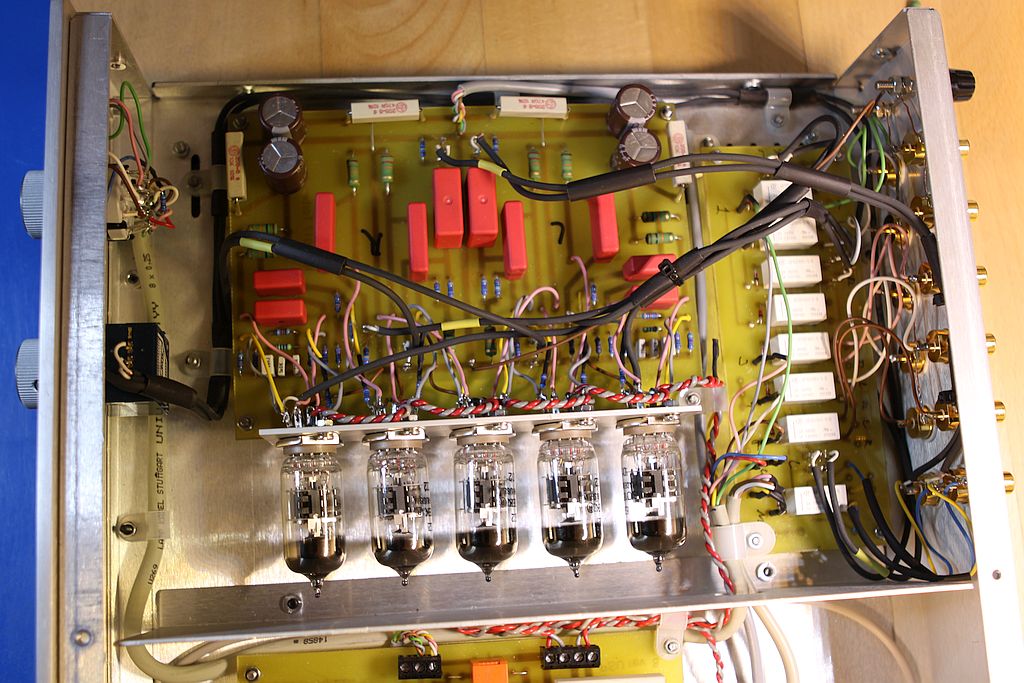
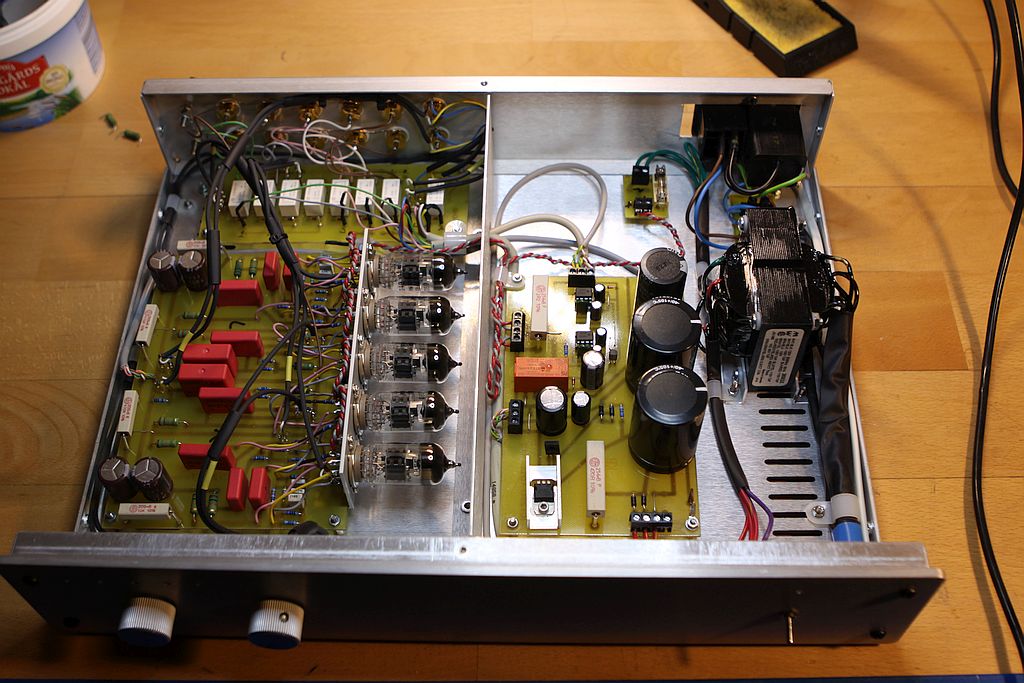
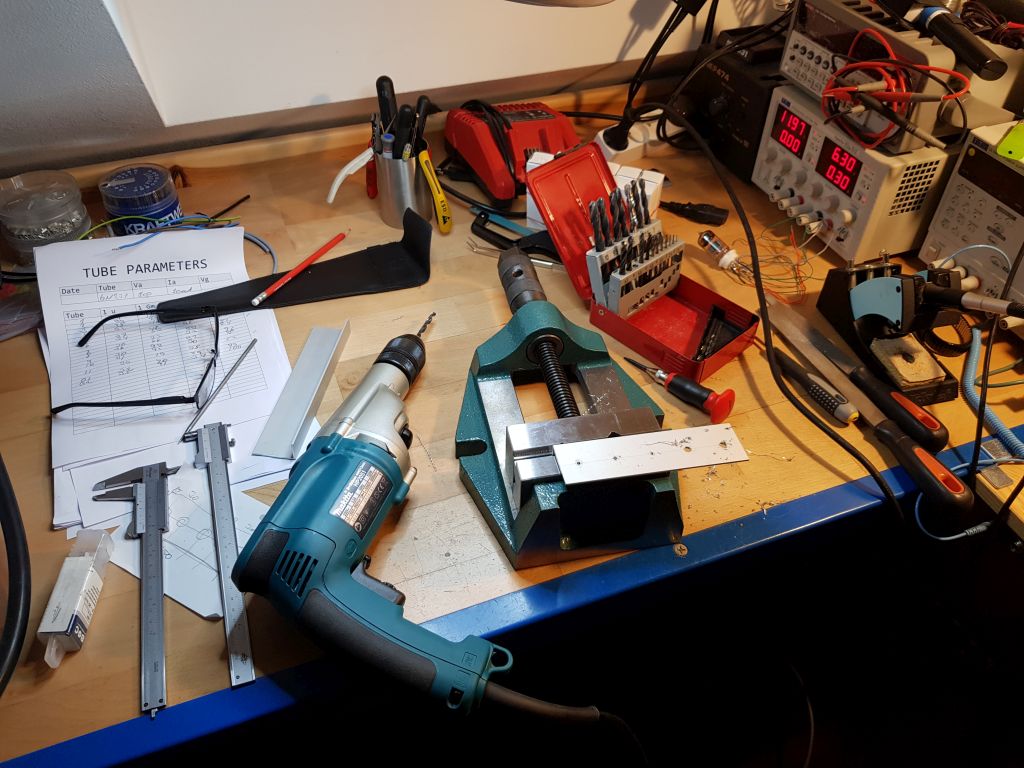
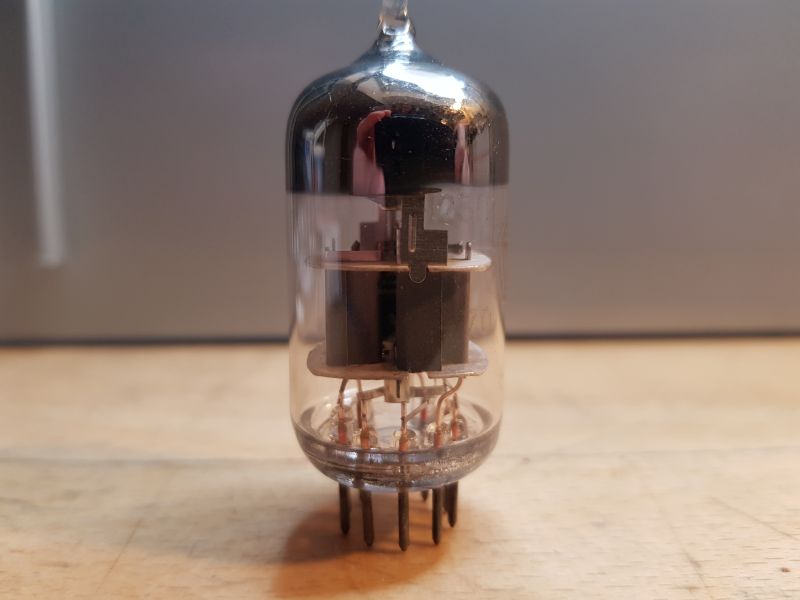
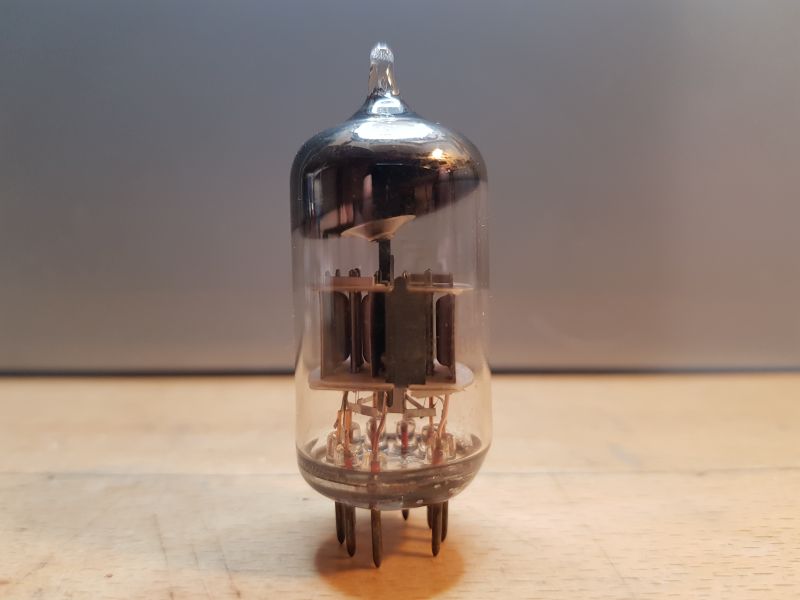
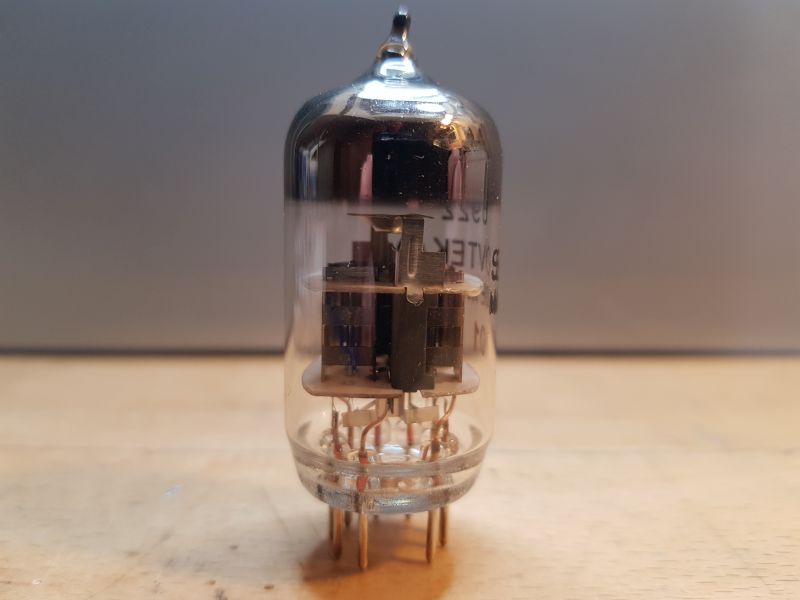
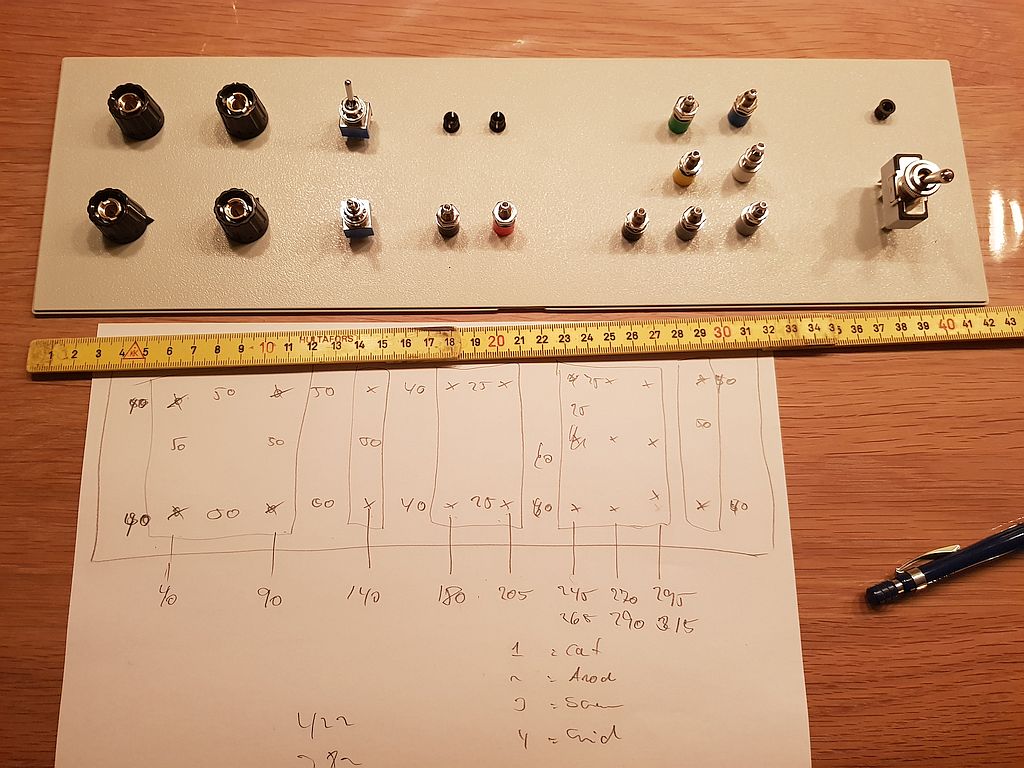
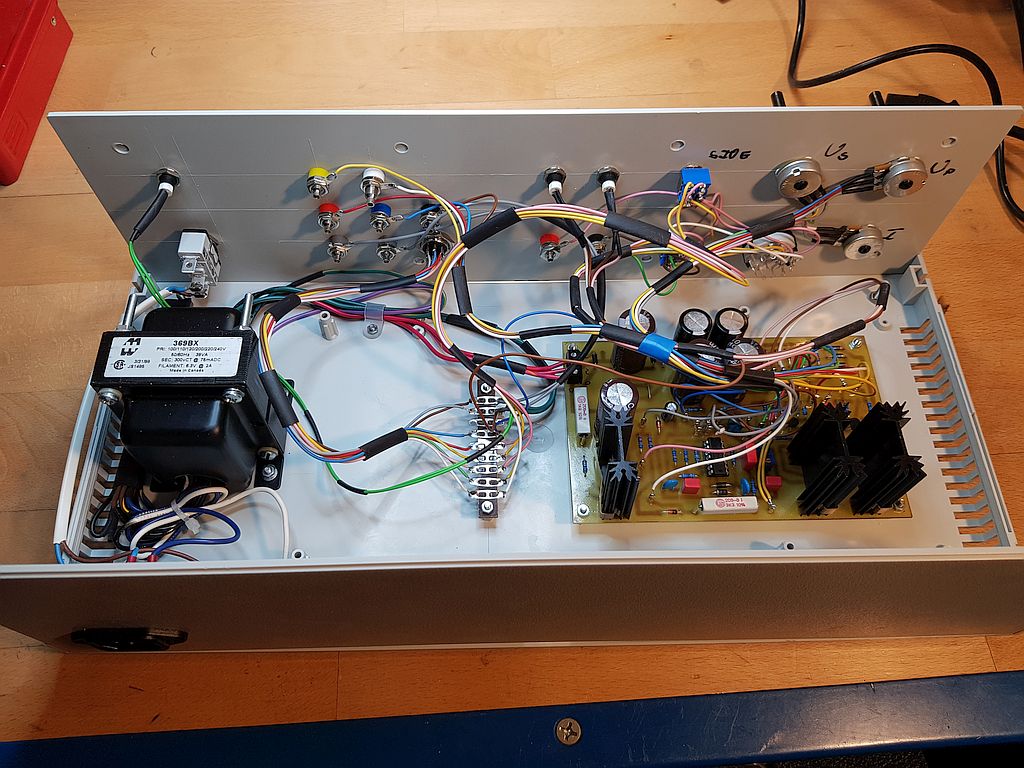
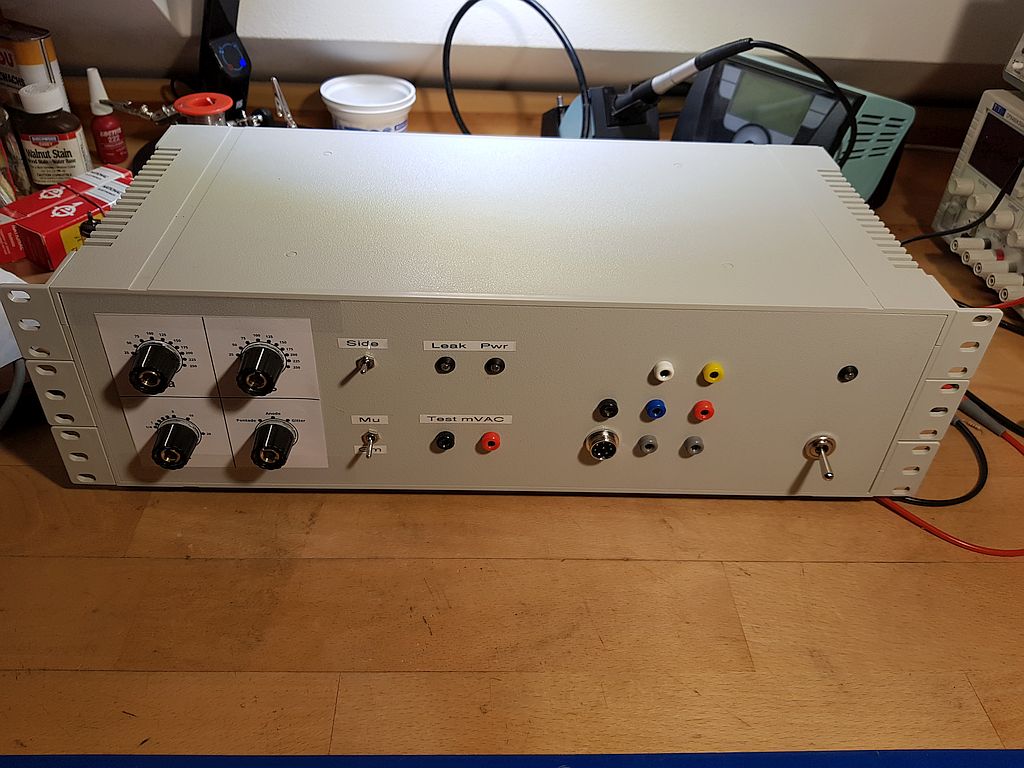
I have built a series of 4 and 5 stage tube preamplifiers with an integrated RIAA preamp. Small signal tubes are actually well-suited for HiFi preamplifiers, as coupling-transformers are not really needed. I have chosen the 6922/ECC88 tubes over the more common 12AX7/ECC83 for more reasons. First of all, the 6922 are low-u/high gm tubes, which makes it easier to control the output impedance of each stage. Secondly, the plate voltage is somewhat lower than the 12AX7 tubes require - the 6922 runs fine on a 100 volts plate B+.
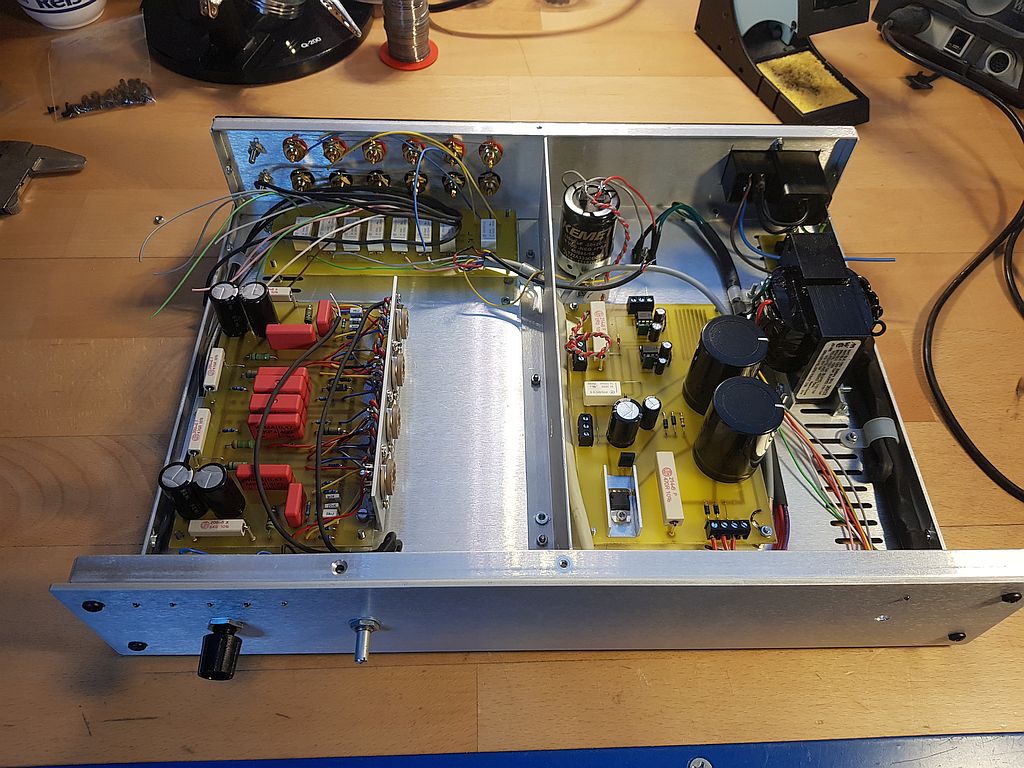
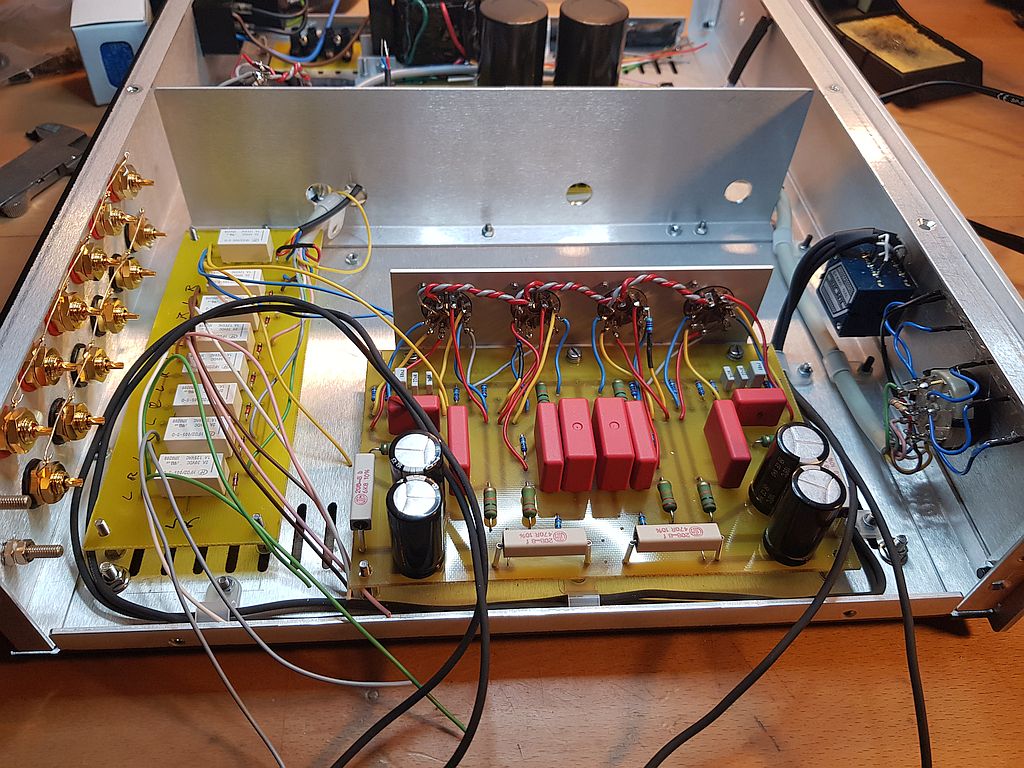


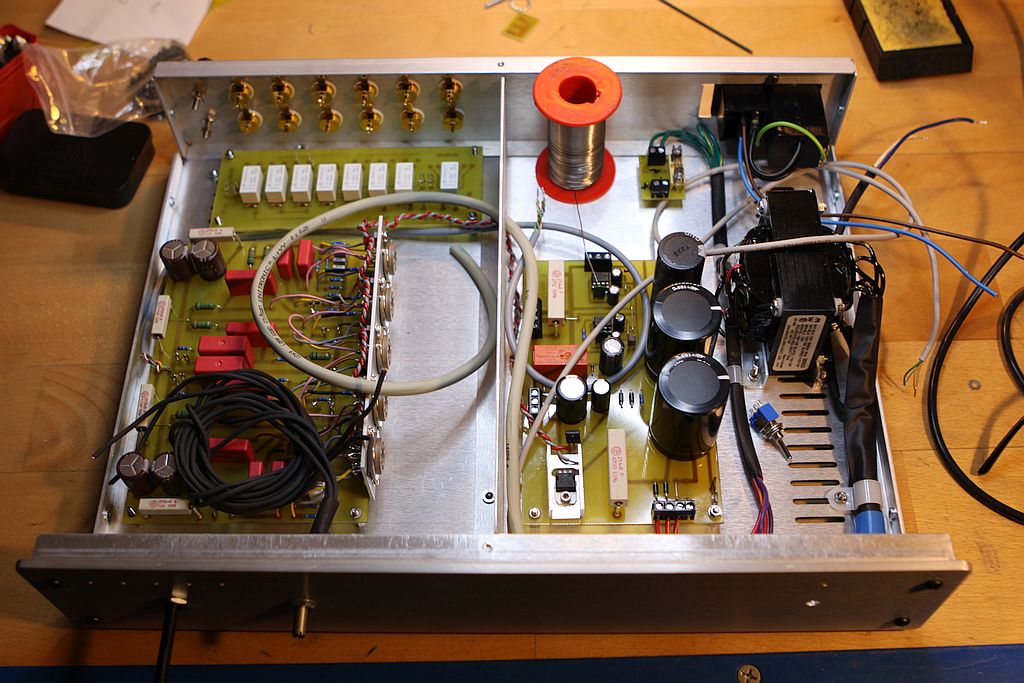

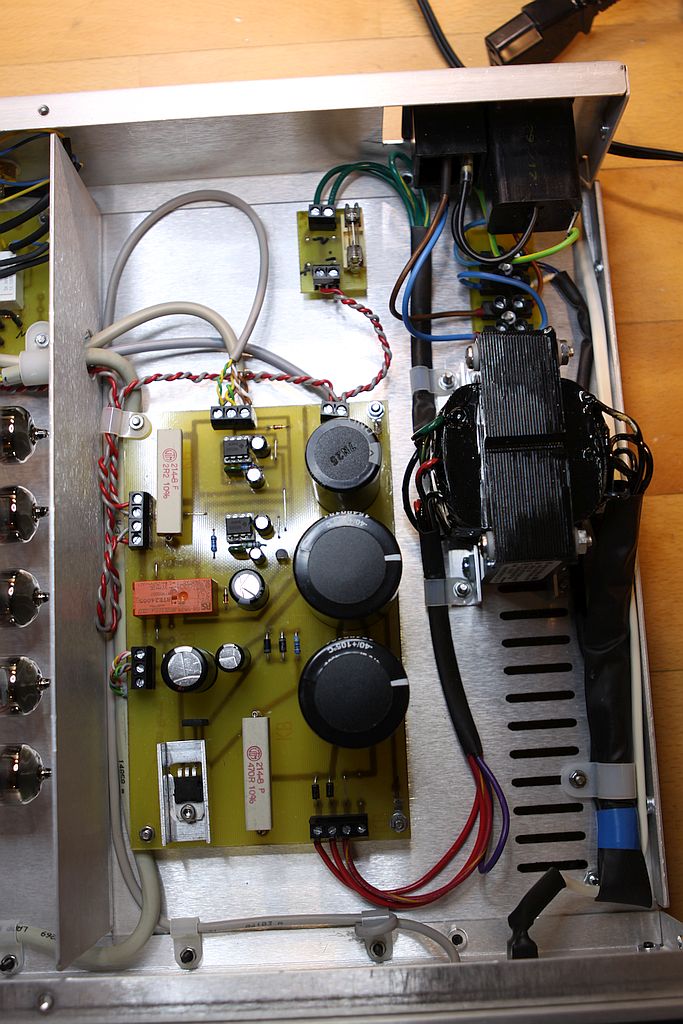
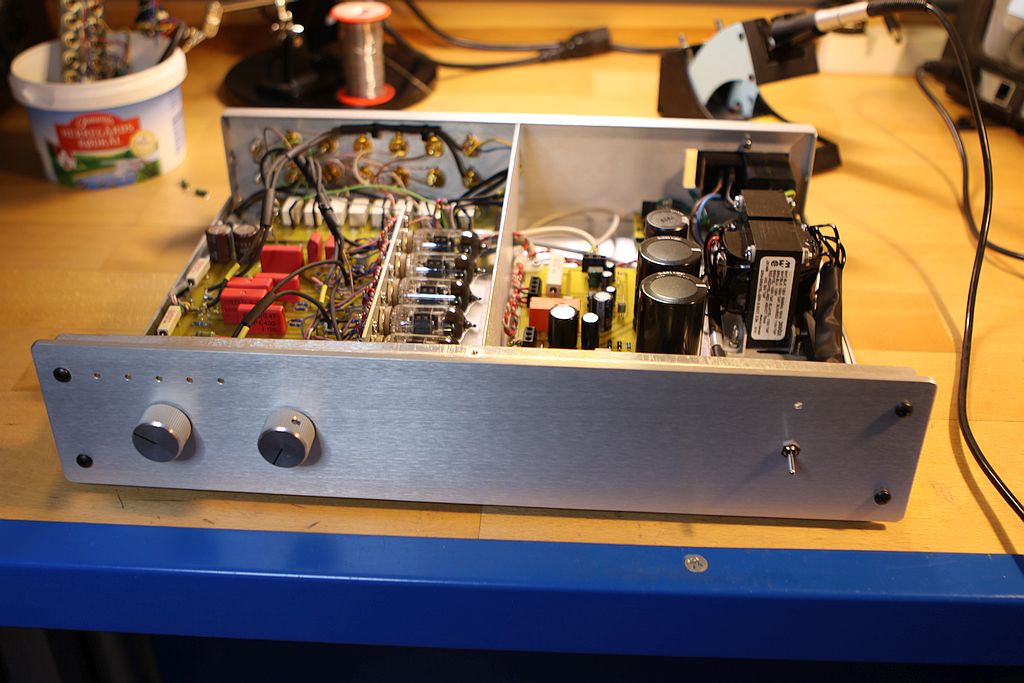
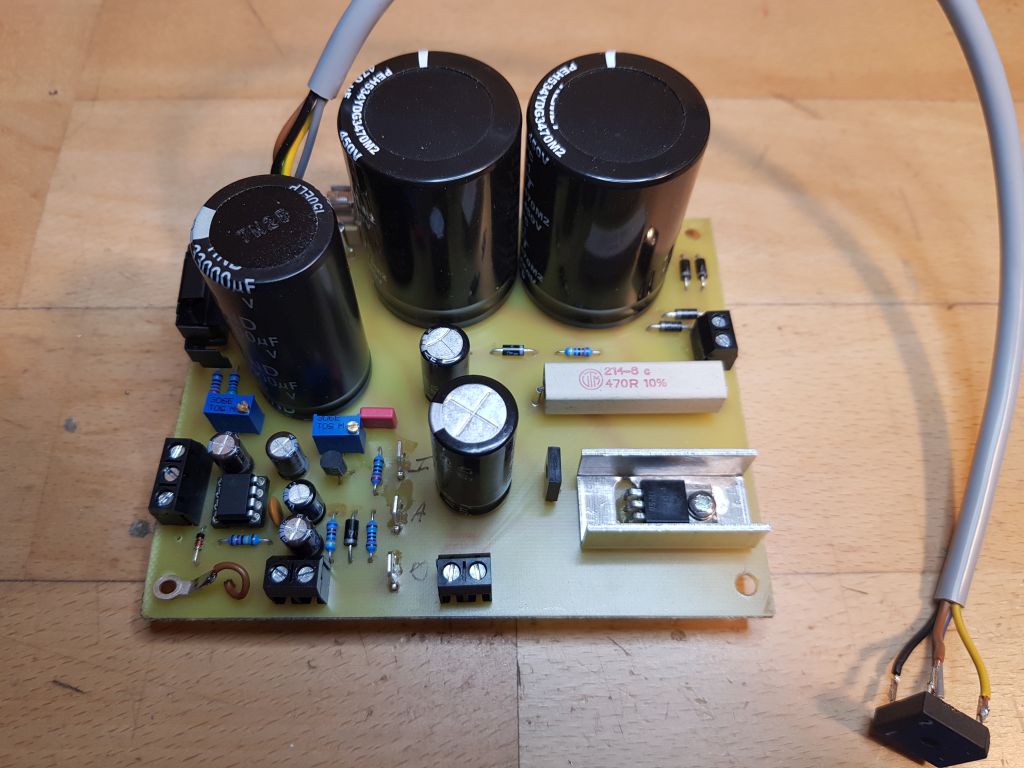
In the later versions, I have revamped the power supply to include a regulated heater supply.
The reason for this is that I want to be able to use different brands of tubes and they do not all draw the same amount of current.
With an unregulated heater supply, the voltage would then vary with the tubes used.
And when the heater voltage runs out of specifications, problems like cathode pollution would occur with an audible hiss as a result.
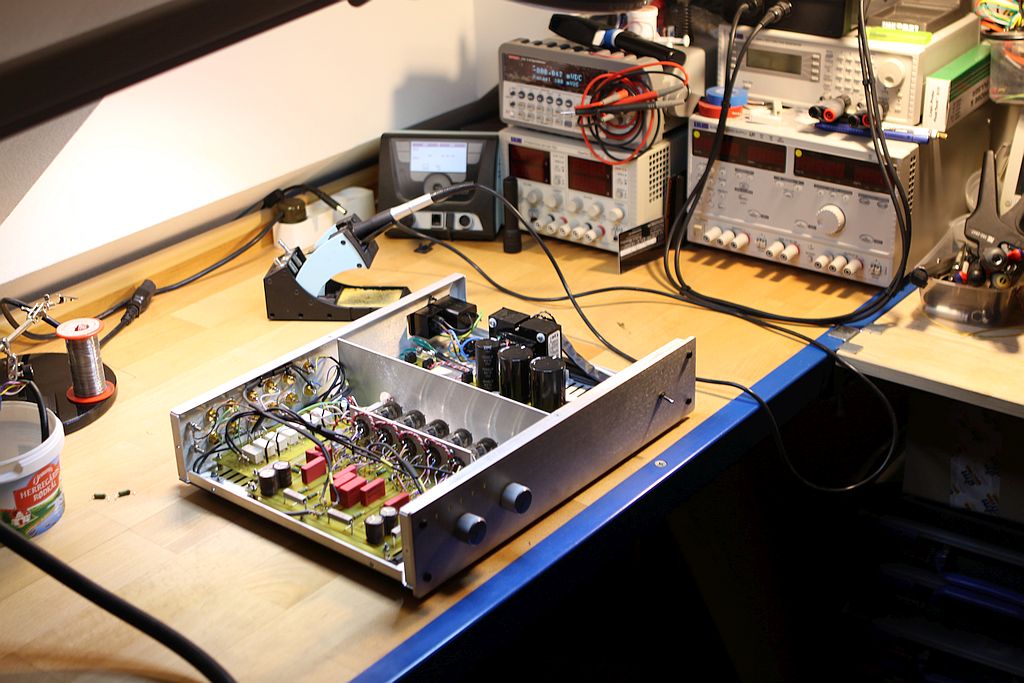
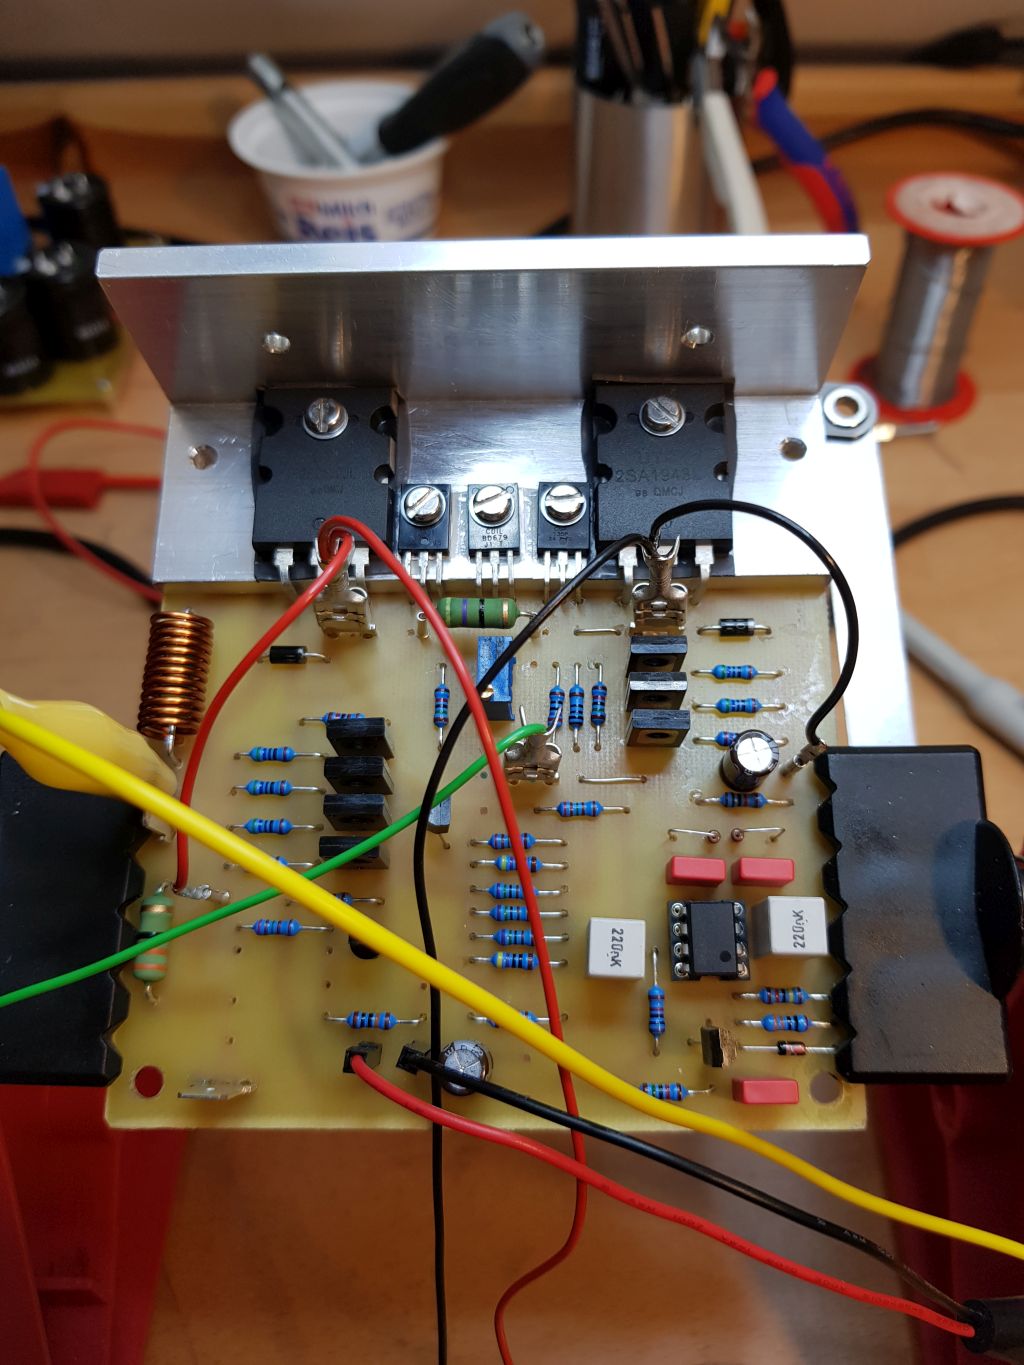
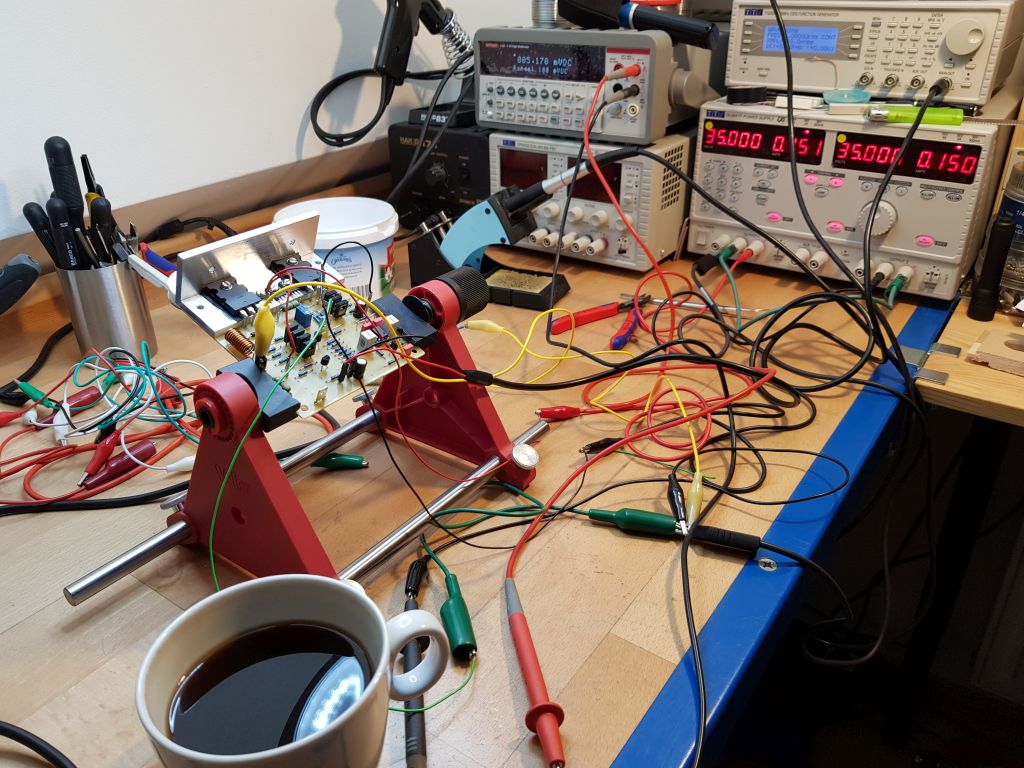
The first test-run of my new power supply was perfect - after a wrong track was corrected.
I've already made some new boards and have a version that runs perfectly without the need for board changes.
One amp has already been retrofitted with a clear reduction in noise - now I have to retrofit all my amplifiers.


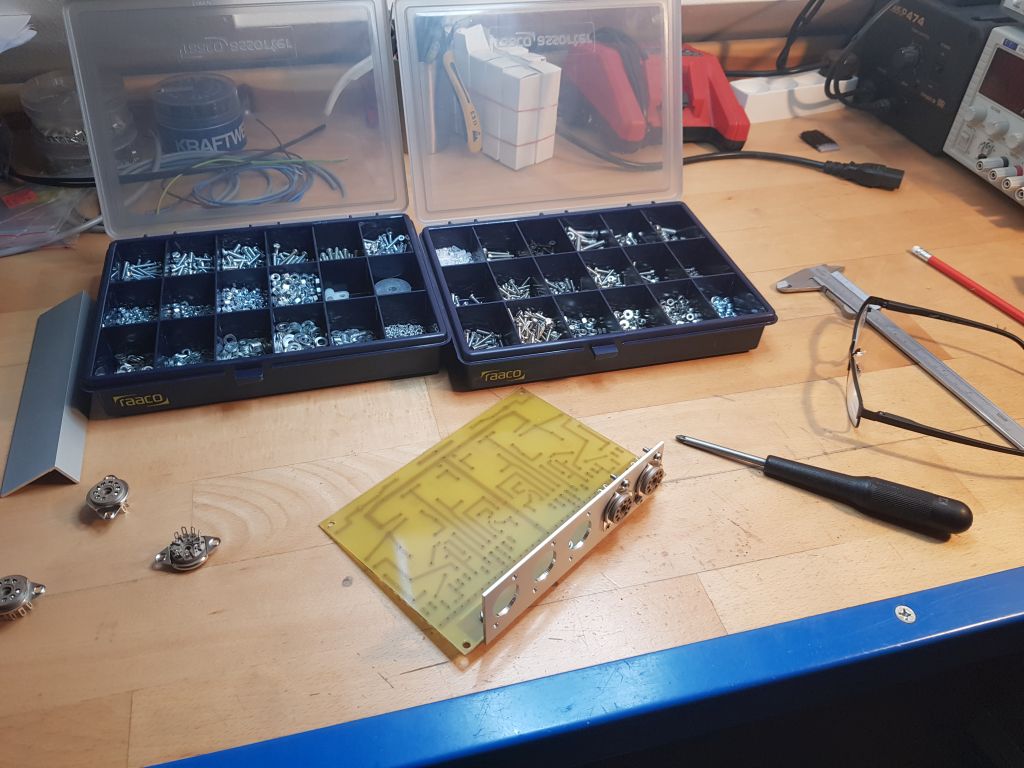
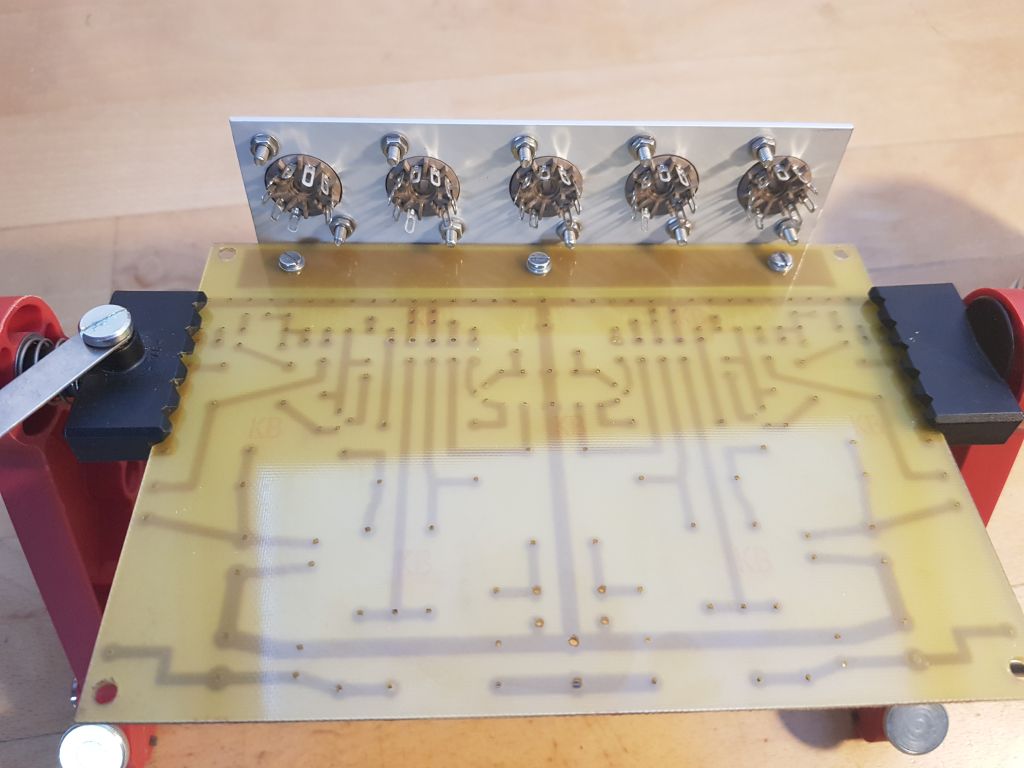
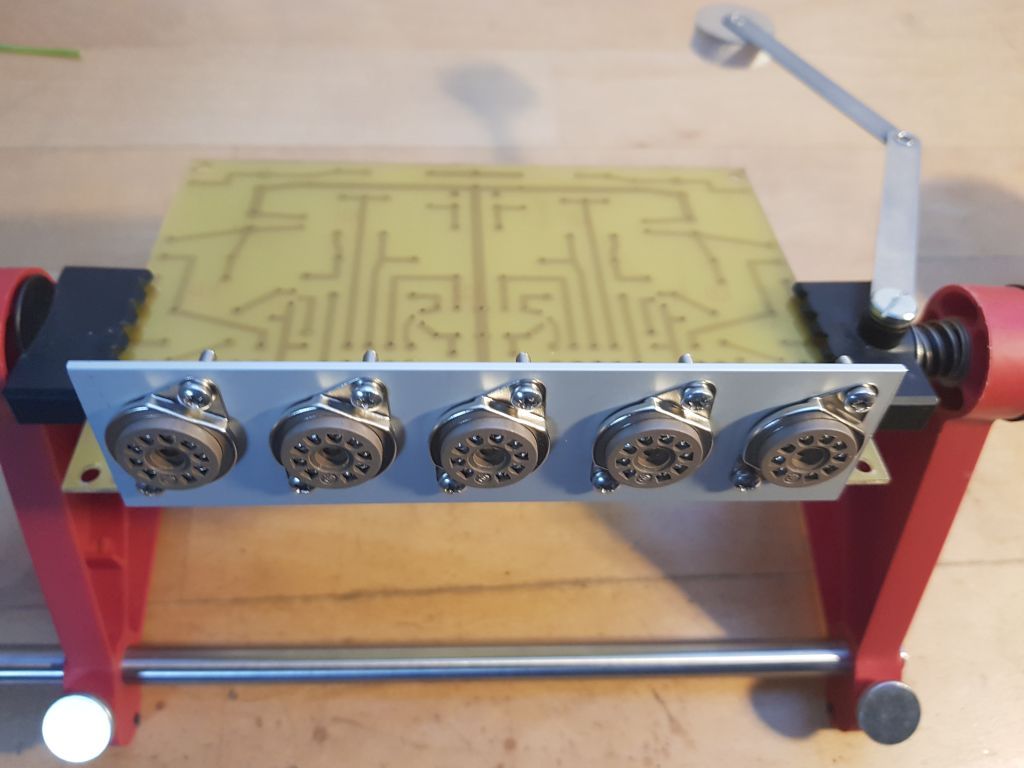
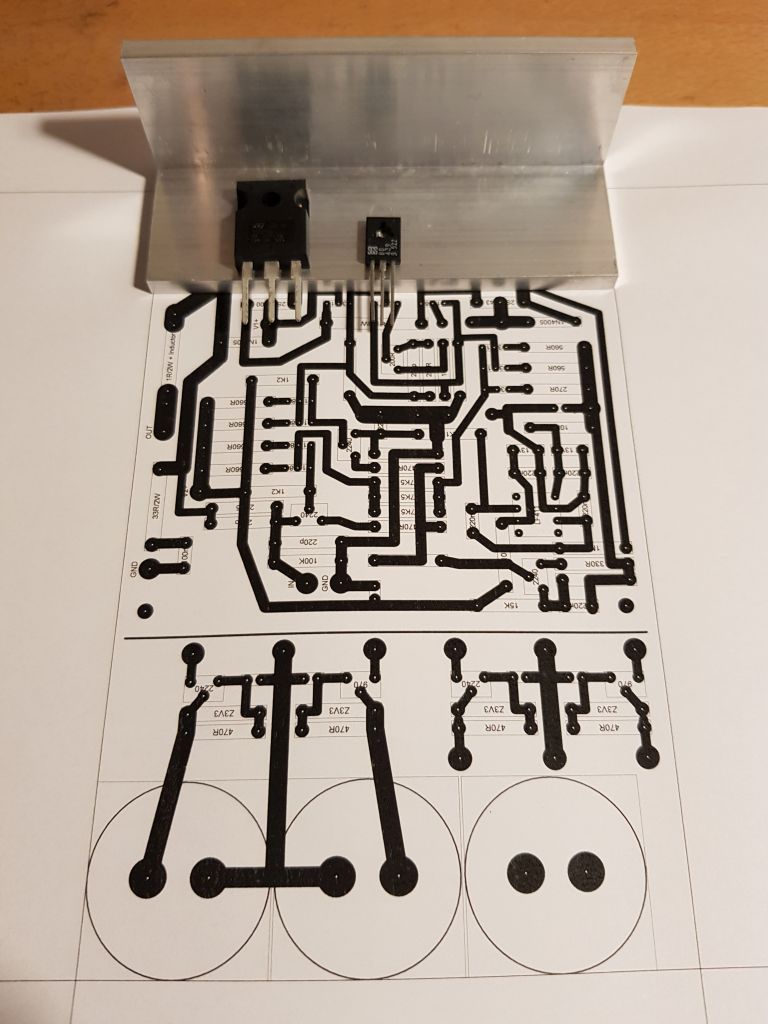
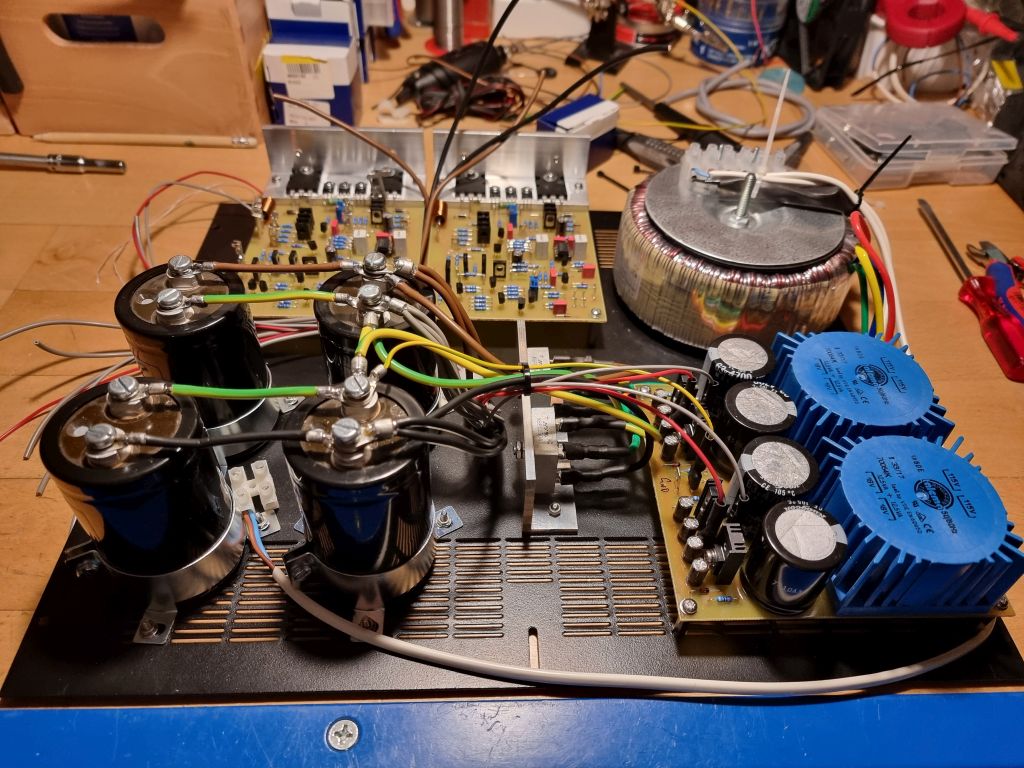
I am in the process of building yet another 5-stage 6922 amplifier. The hardware/PCB for the amplifier has been done, and I just need to mount all the components and wire the tube sockets. I have considered to make a design with PCB mounted tube sockets, but having repaired old tube-based televisions, I've seen first hand how a PCB gets destroyed by the heat emission from the tubes, so I dropped the idea. By using my design with the L-shaped bracket for the tube sockets, I will never have problems with an overheated PCB.

I've tested several tube brands in my 6922 preamplifiers, and have found the 6N23P Voskhod to be the most "musical" of them all. They are actually NOS and have been used in all kinds of equipment during the Soviet era and are readily available. The problem is that their specs are highly variable, so they all have to be tested and matched before use. There are several production runs of these tubes, pre-1980, 1980-2000 and post-2000. The post-2000 internals is like the Electro Harmonix 6922 which can be bought as new. The 1980-2000 build is by far the most abundant.
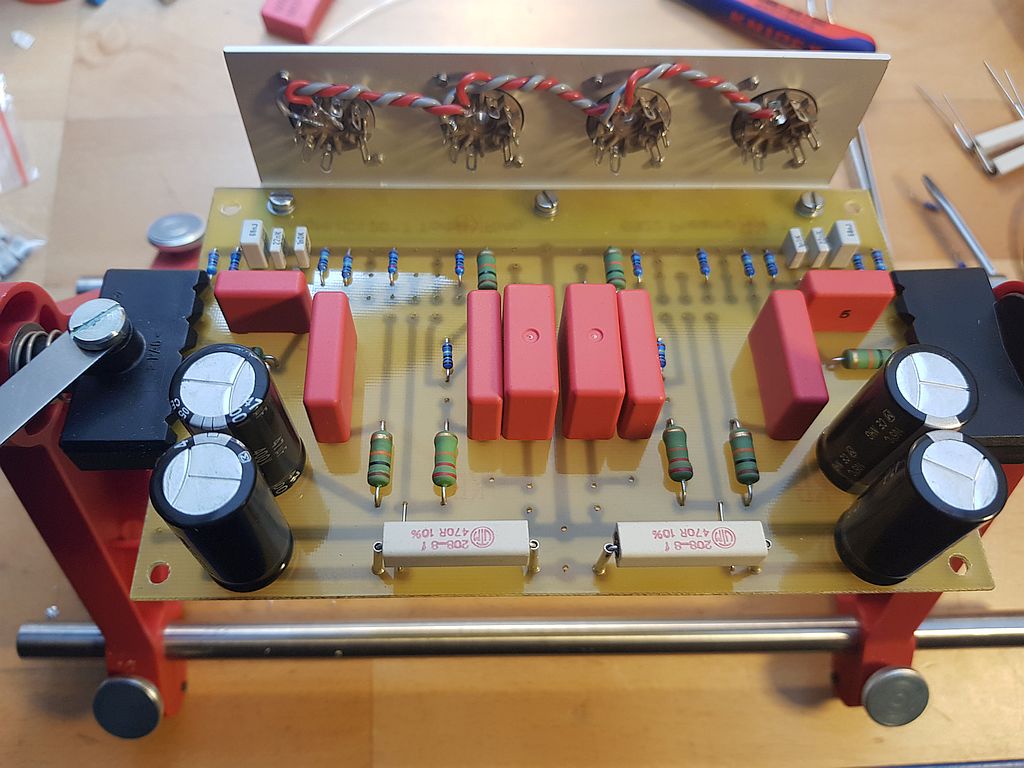
I am currently building my own version of the somewhat famous RCA power stage from 1970.
This stage is used in more commercially available amplifiers like the NAIM NAP-250.
I have made quite a few modifications to the original design, most importantly I have decoupled the input stage from the
driver/power stage of the amplifier to lower noise and improve stability.
I have never been a huge fan of the NAIM power regulator boards as they just give a higher output impedance than a more simple rectification circuit does.
So I have designed a low-impedance rectification circuit to feed the amplifier boards.

Jan Lohstroh and Matti Otala did back in the 1970's research on how to make a better sounding solid state power amplifier.
Back then, tube amplifiers were still in common use, and many did not like the "transistor sound" from the new emerging amplifiers.
The Lohstroh and Otala design has been in use ever since by the Norwegian company Electrocompaniet which has build a host of
wonderful sounding amplifiers. The only drawback to most of the Electrocompaniet amplifiers is that the often break. Where a Japanese made receiver goes on and on for
decades, a soldering iron is a must when you run one of those Norwegian amplifiers. Back when Per Abrahamsen was in charge of Electrocompaniet,
the company was quite willing to help with schematics to be able to service a blown amplifier,
but nowadays with the new owner, that has sadly enough changed for the worse, with a quite posh attitude by the company.
That is why I decided to build my own version of an Electrocompaniet amplifier, using the Lohstroh and Otala design, instead of buying a new
one from the company. This way I can remedy the most common faults in the design phase and be able to easily service the amplifier.
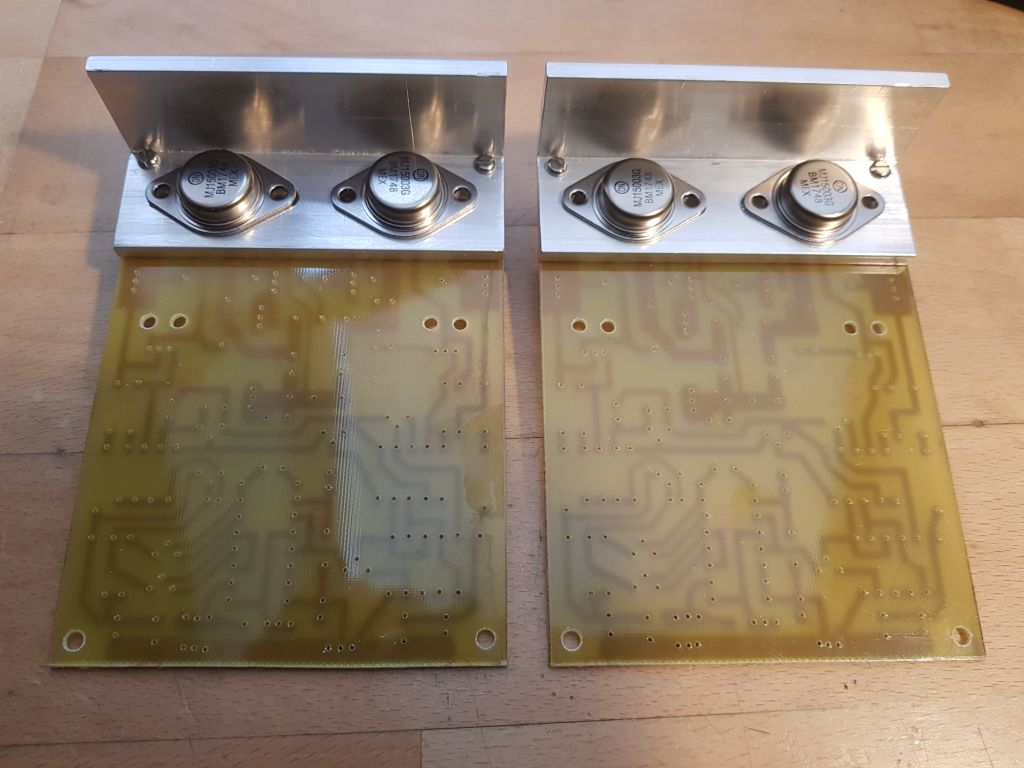
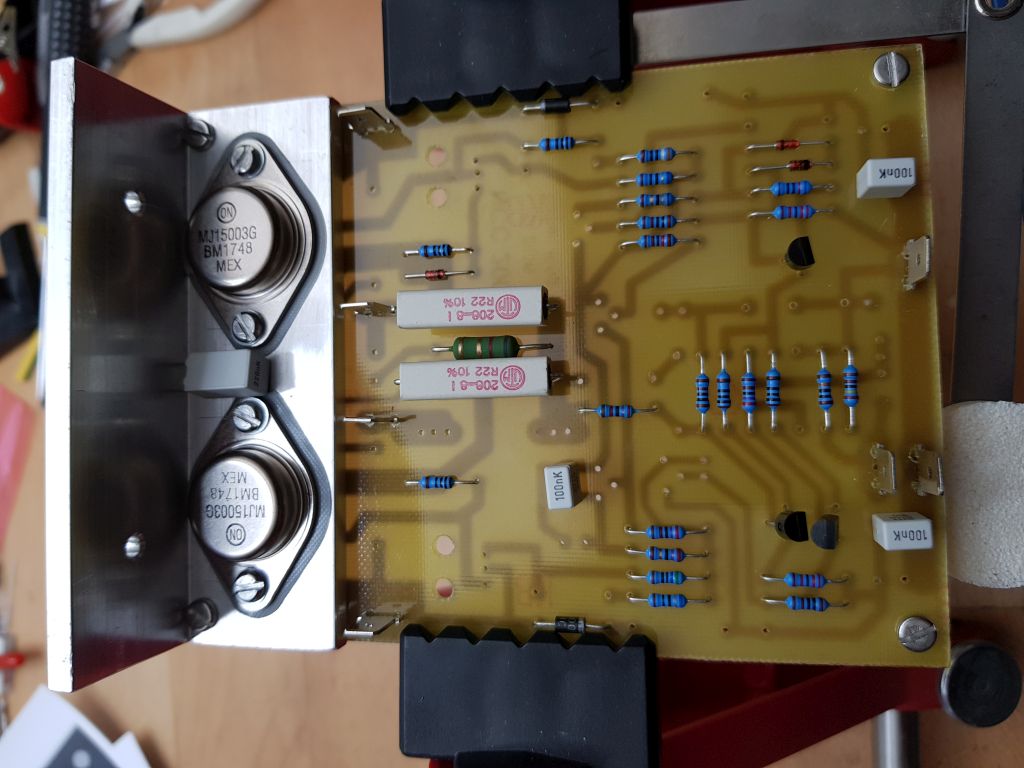
As the Lohstroh and Otala design runs hot, and the amplifier uses BJTs, it is of utmost importance to prevent thermal runanway.
Therefor the Vbe multiplier needs to be placed as close as possible to the output and driver stages and definitely on the same heatsink.
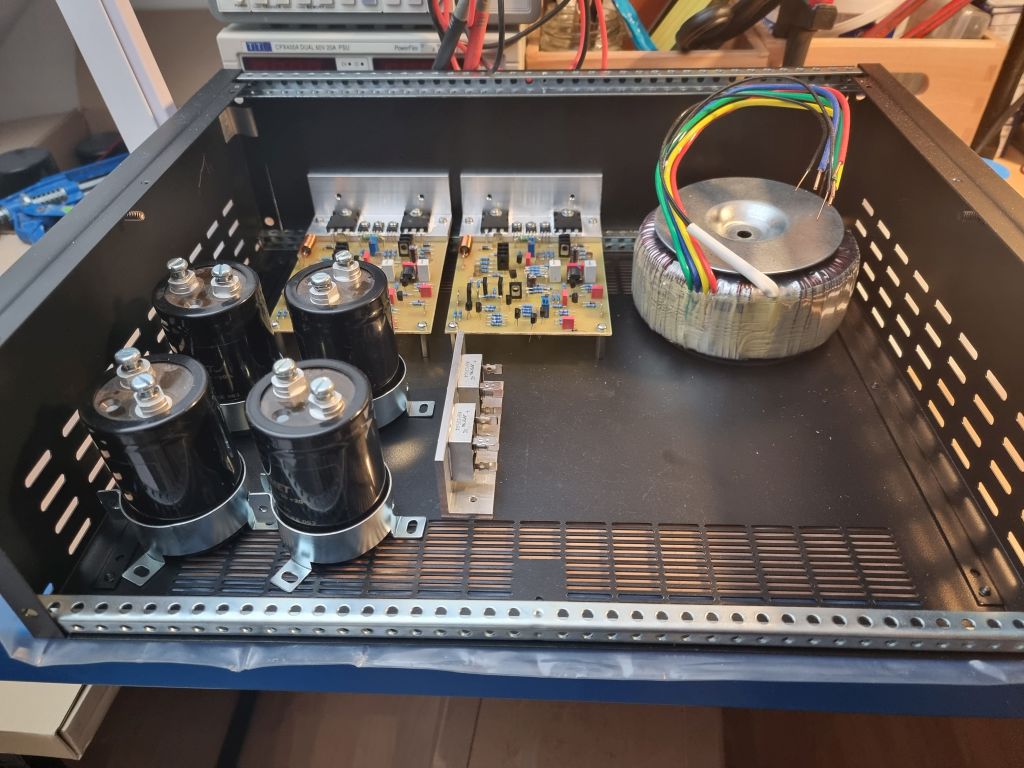
I decided to build the amplifier as a semi-dual-mono, where I only share the mains transformers.
By overrating those by a huge margin, the impact of not having ones for each channel is marginal.
I have made my first prototype build, and it ran perfect. Just some minor tweaks to the PCB are needed, and I am on the track to one
of the best solid state amplifier designs ever made.
My first version of the LOTHALA 80 is wonderful - but there is room for improvement. The issue lies in the long-tail differential
input stage, where one input is used for signal and output feedback, and the other is used to set the DC operating point via. an integrator (servo).
The input impedance is so low, that I used an op-amp in a buffer configuration to drive the amplifier. As such an op-amp buffer relies heavily
on negative feedback, this will impact the entire design. The soundstage is very wide, but clearly suffers from the negative feedback in the op-amp.
I decided to replace the op-amp buffer with a push-pull class A pre-stage which will then drive the long-tail differential pair - a somewhat
scaled down version of the Lohstroh & Otala design itself. My pre-stage has no feedback at all, and I hope this will open the soundstage
even more.
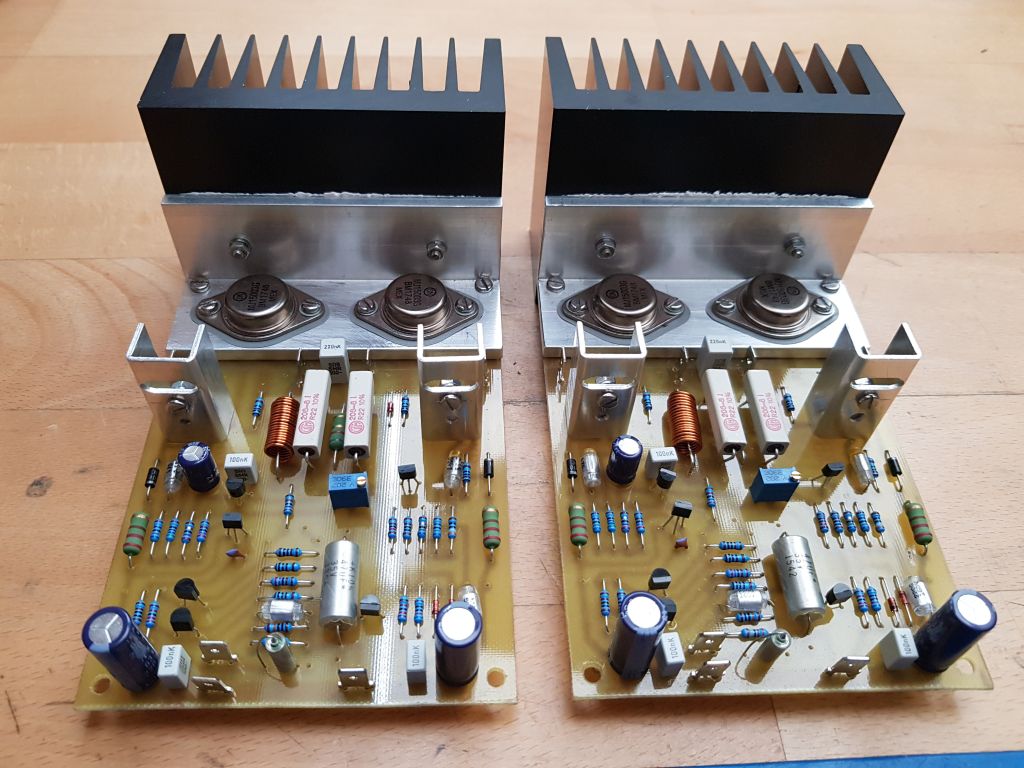
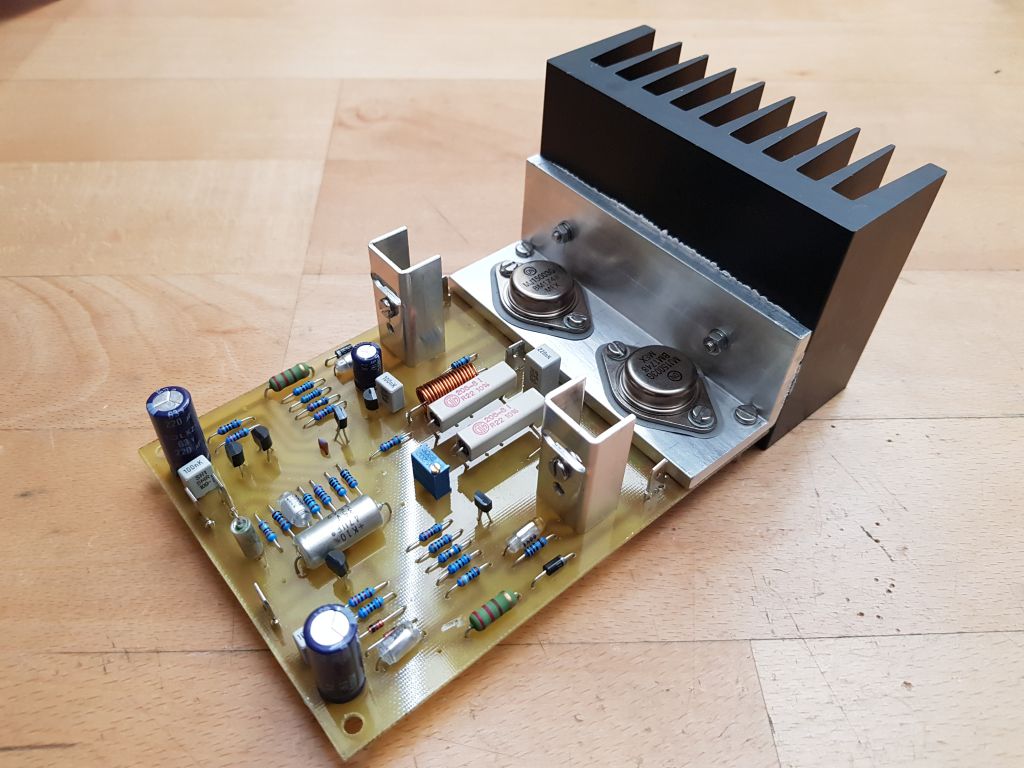
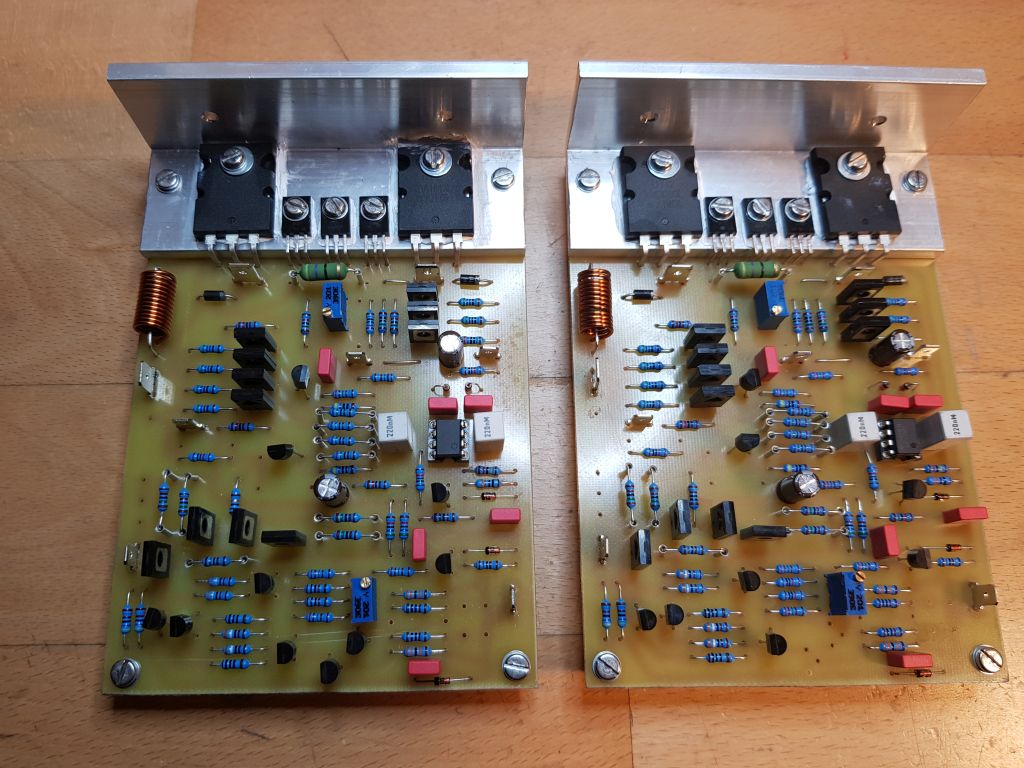
The two amplifier boards are now assembled and successfully tested - just perfect.
Now I need to get all the parts mounted in a suitable case, and I am done.
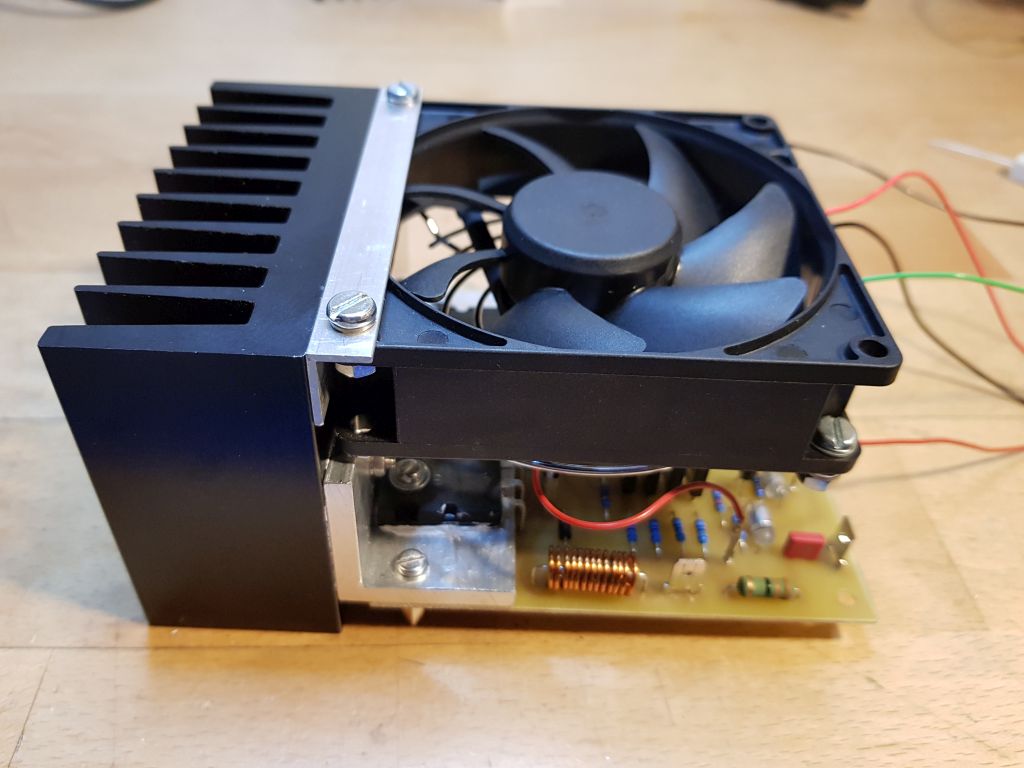
Instead of putting heatsinks on all the power parts in both my new pre-stage and the pre-driver-stage, I have opted to have both boards
air cooled by means of two low-rpm fans. This will ensure longeivity of my amplifier and avoid many of the problems that plague the
Electrocompaniet amplifiers. The tricky part in having an air cooled semi-class A amplifier is to set the operating point.
In the pre-stage, I have to set the balance in the long-tail input stage, and in the output stage, I have to set the Vbe voltage which
controls the idle current. Before I set this operating point, an equilibrium between heat dissipation and cooling has to be established.
That is why, I cannot use a temperature controlled fan that switches on and off -
something Electrocompaniet did to prevent burn-out of the ECI-4 amplifier they made some years ago.
Even with the fan, some of the power parts in the ECI-4 could reach a case temperature of almost 90 deg. celcius -
I will not even try to guess the junction temperature.
The reason for this is partly that Electrocompaniet simply botched a fan on the back of the heatsink fins - not very clever, indeed.
This problem is sadly enough quite common in many of Electrocompaniet's amplifiers - they run way too hot, and with in-case heatsinks it can only go wrong.
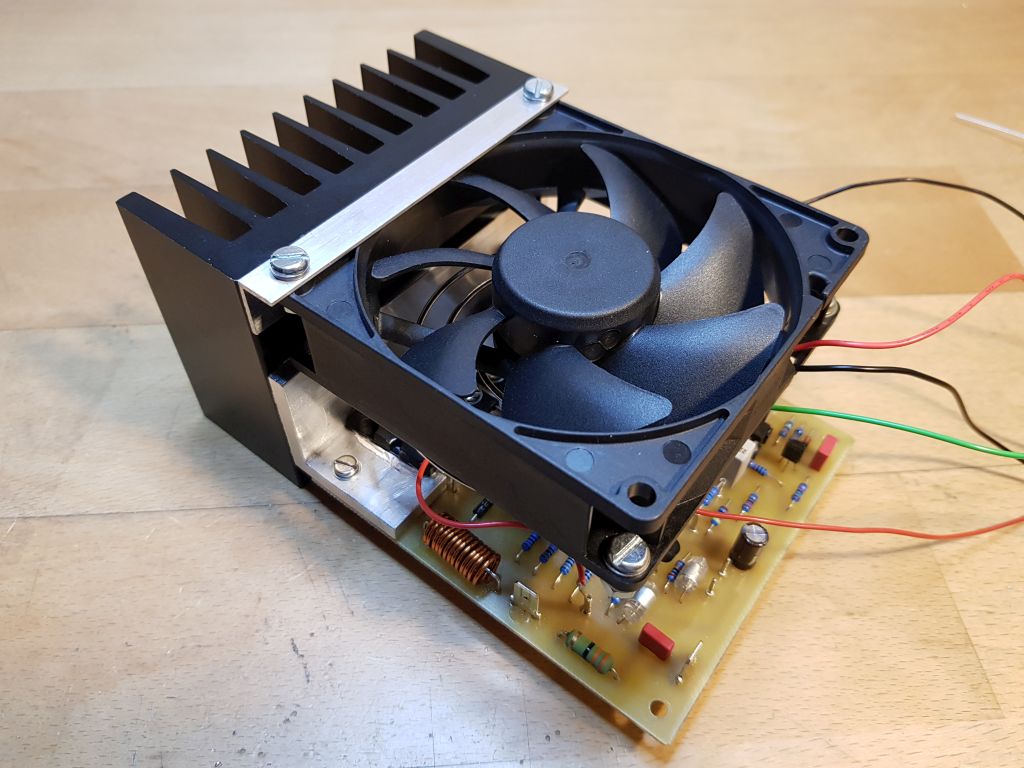
I have now finished the air cooled version of version 1 of my LOHTALA 80 amplifier boards.
This is how Electrocompaniet should have done it, to prevent the common burn-outs - but sadly they didn't.
The case temperature of all power parts are around 30 centigrades when idle and the two output transistors reach 45 centigrades when fully loaded,
so the junction temperatures are well under 100 centigrades - just perfect.
The most loaded resistors are raised 10mm from the PCB to ensure air flow around them.
My design is compact, stable and will run for decades at full power without a glitch.
Should the fan fail, the heatsink will prevent immediate overheating.
I'll cool my second version of my LOHTALA boards excatly the same way.

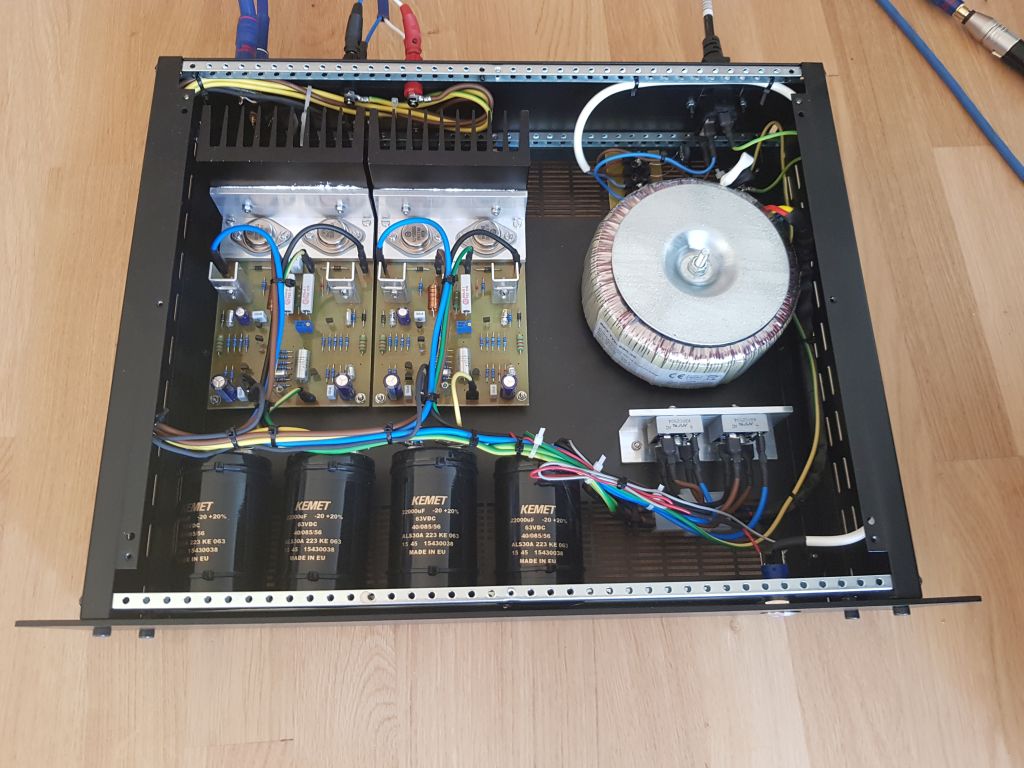
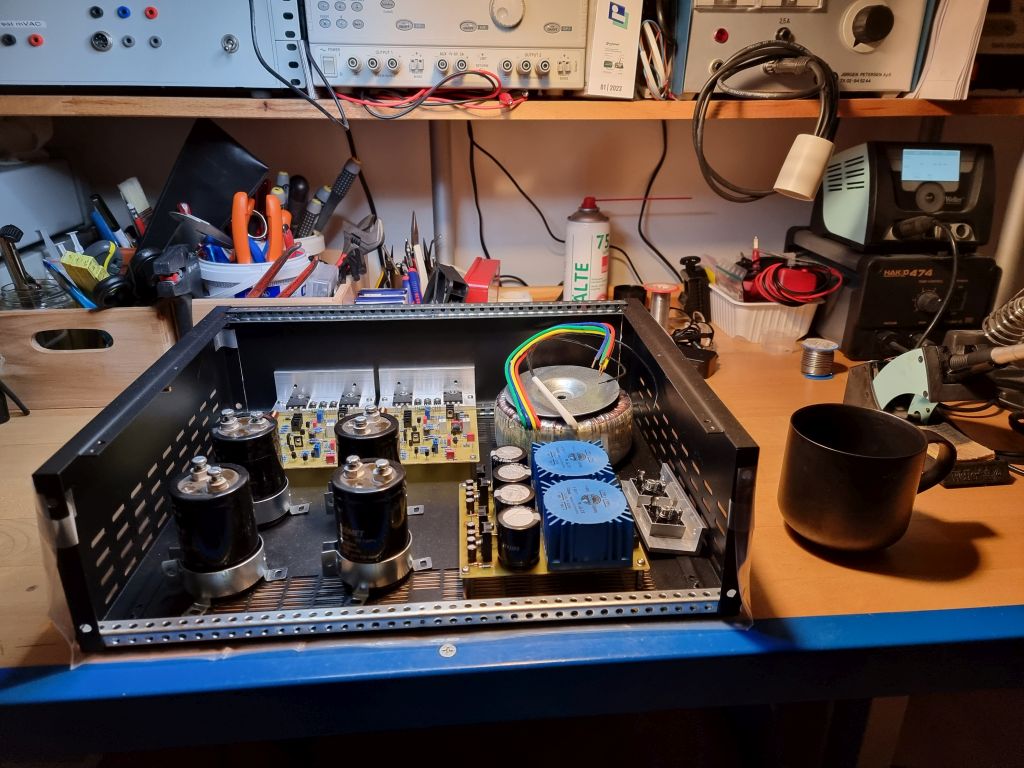
After some very busy years, I finally had the time to look at the second version of my LOHTALA 80 amplifier. As previously mentioned
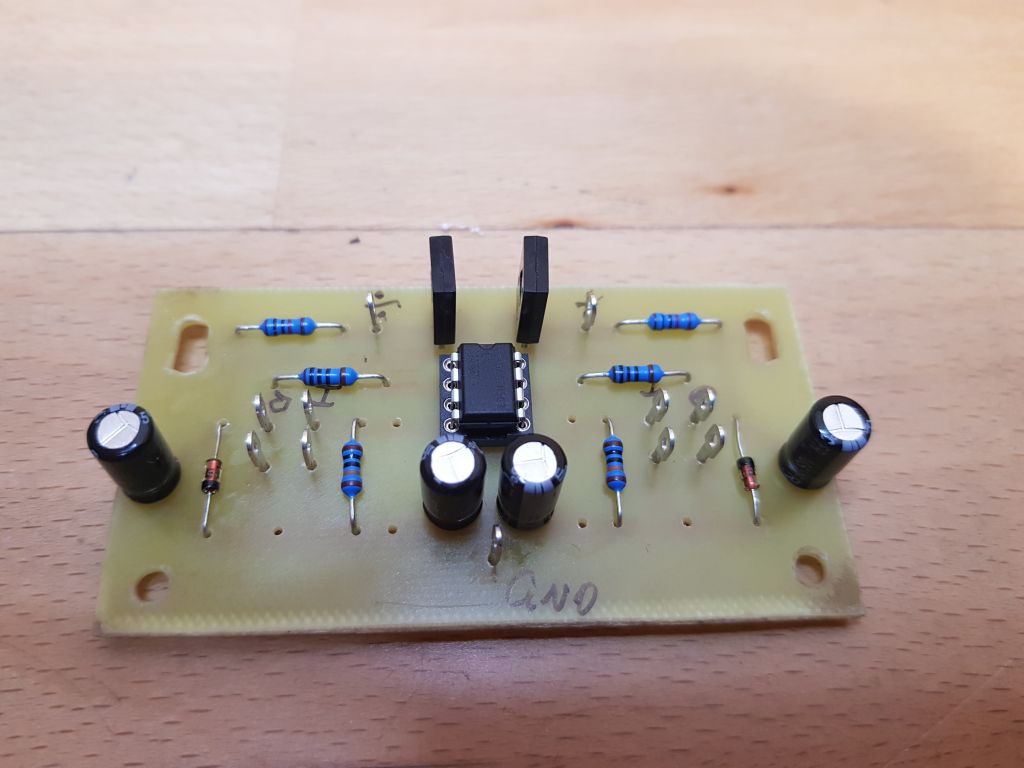
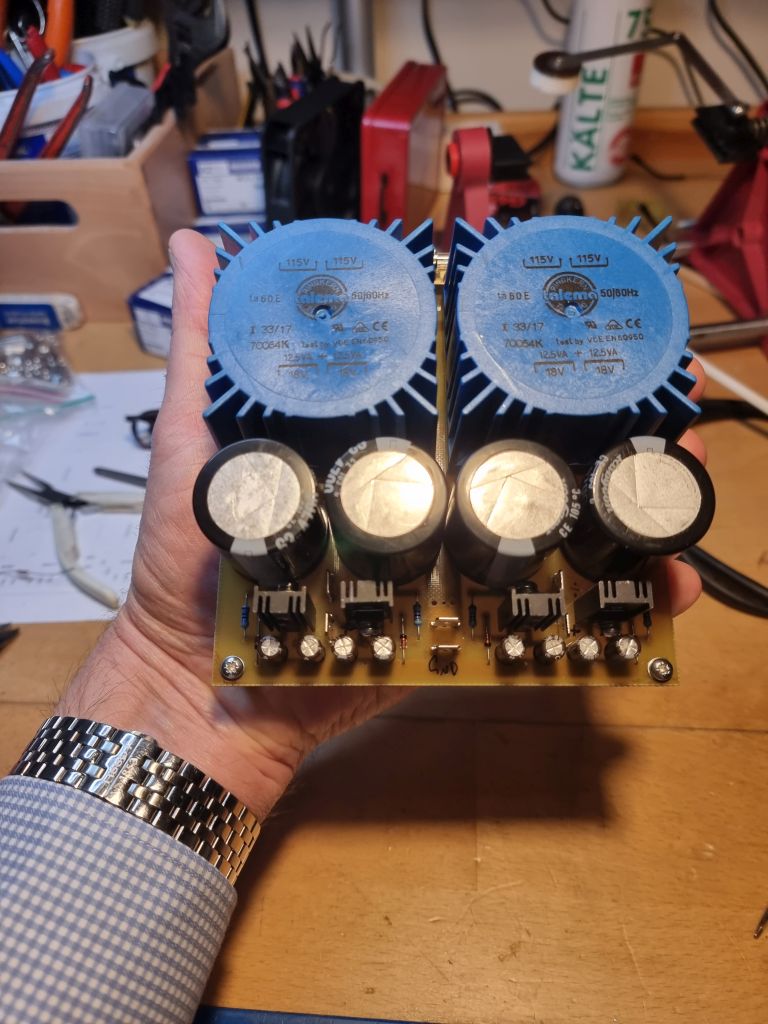
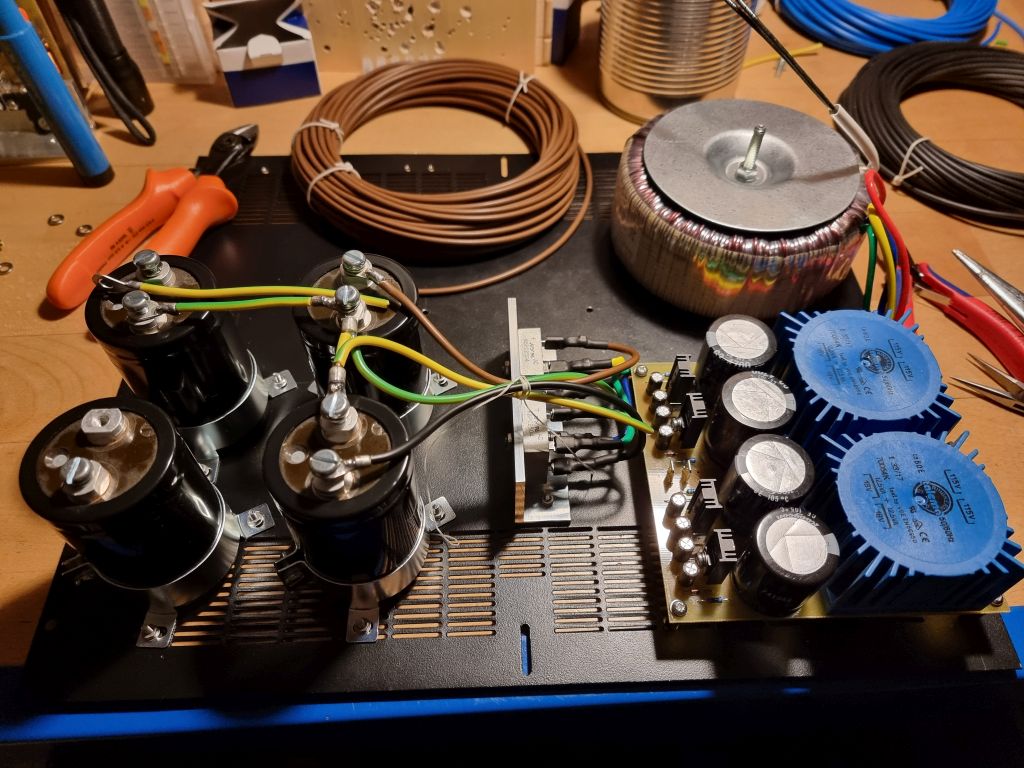
I had to add a pre-stage to drive the low-impedance long-tail pair in the power stage. I have also updated the driver power supply, and am currently assembling it.
Now the driver power supply has been assemled and tested. Notice the dual-mono design.
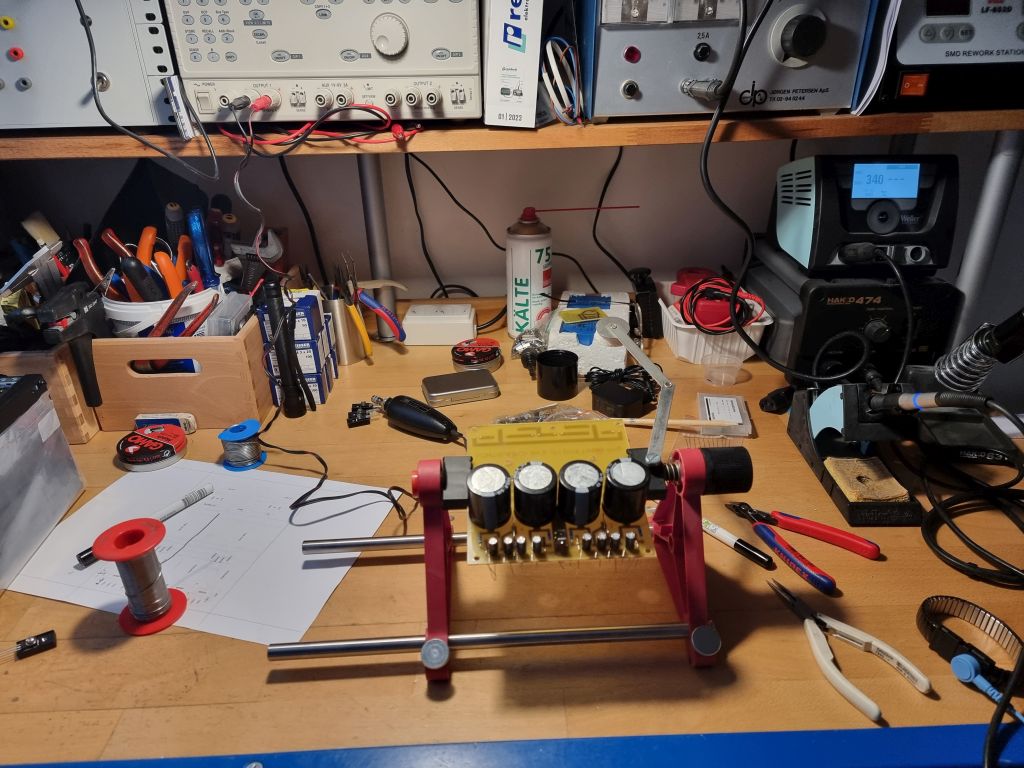
I plan to assemble and test the entire amplifier within the next couple of weeks, using my already finished amplifier modules.
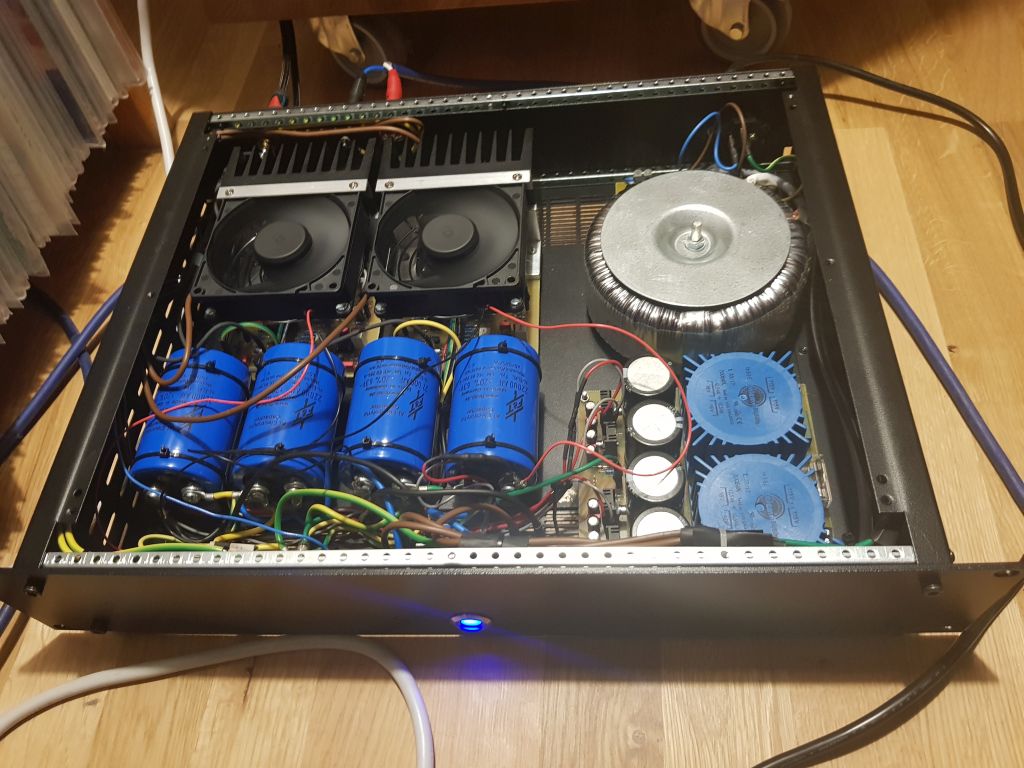
I am about to assemble the power supply for the output stage. It is based on a 500 watts toroid transformer and large rectifier capacitors.
It looks more like the power supply for a welding machine than for a 80 watts amplifier.
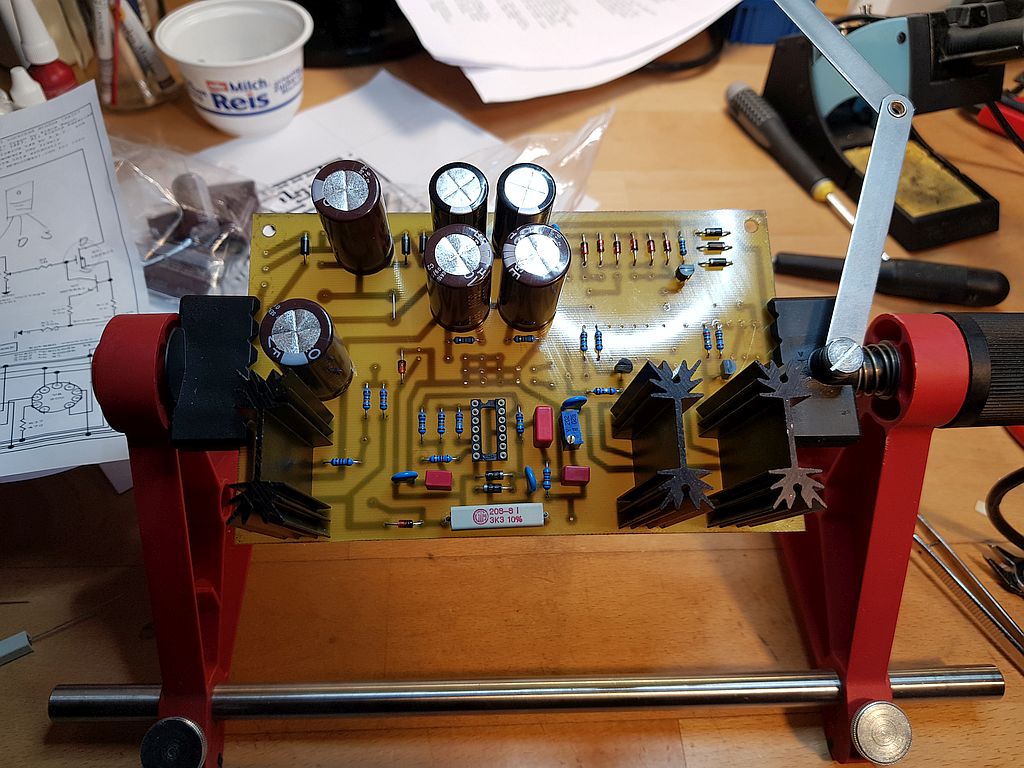
When dealing with tube based equipment it is equally important to be able to test tubes, and I realized I was in need of a tube tester. Back in the 50's and 60's, tube testers were commercially available, but nowadays they are an almost extinct species, which left me with two options. Either I had to buy a vintage tester and give it a major overhaul or build a new one from scratch. I opted for the latter as I found an excellent design done by Steve Bench. I used his basic design and modified it to my own needs.

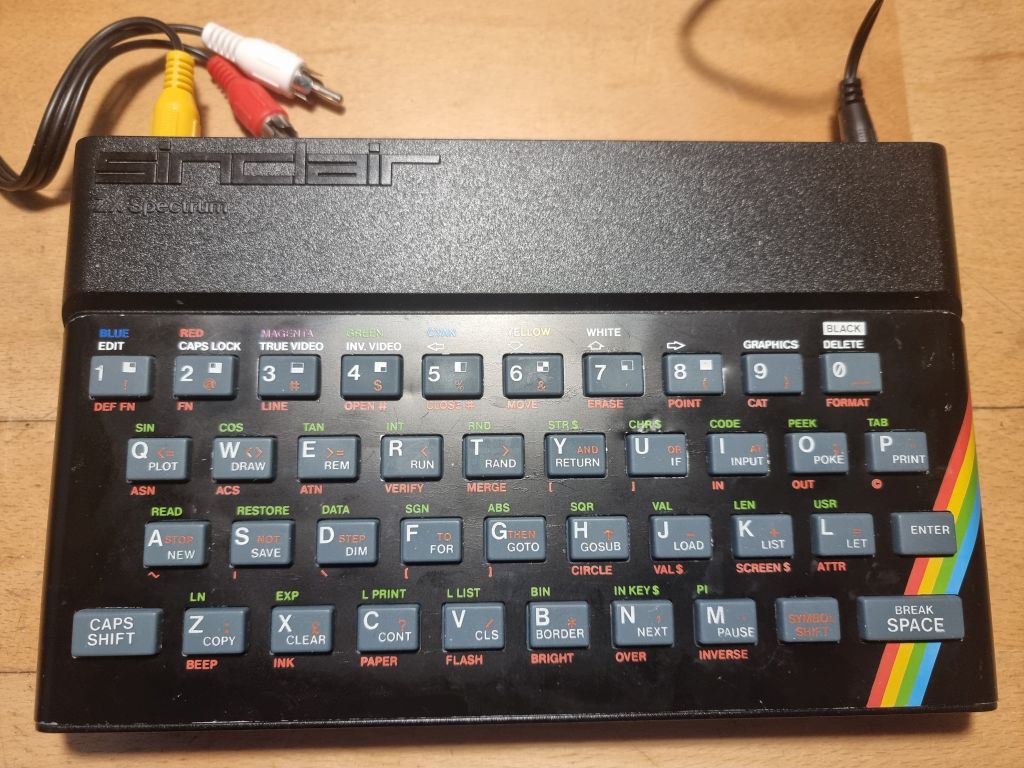
When the genius Clive Sinclair back in the early 1980s designed a series of low-cost and easy to use Z80 based computers,
it was a dream. I started out on simple homemade 8008 and 8080 computers, and when the ZX Spectrum arrived in 1982,
it was nothing less than a revolution.
I was only a schoolchild when I got a ZX 81. The ZX 81 was a novelty in the sense it worked, out of the box.
When the ZX Spectrum arrived about a year later, it remedied many of the shortcomings of the ZX 81.
It supported 8 colors, it had plenty of RAM storage and it added lower case letters and sound.
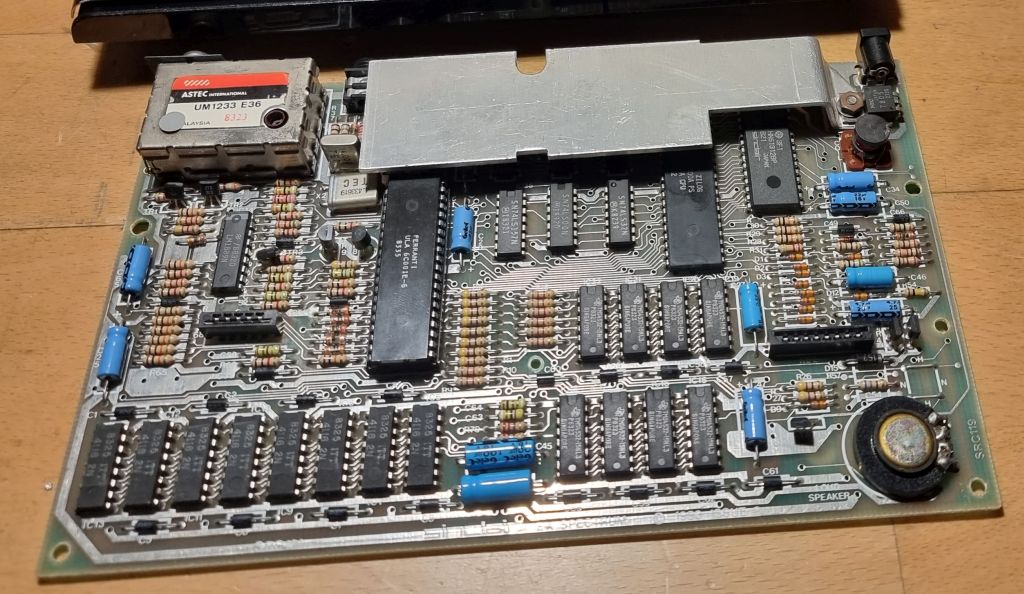
The design of the ZX Spectrum is both interesting and quirky.
The way the RAM is configured is nothing less than a conundrum as the Spectrum came in both a 16KB and 48KB version.
The 16KB is a conventionally configured with 8 pcs. 4116 DRAM chips, that were pretty much the gold standard.
The 48KB version of the Spectrum added 8 pcs. 4164 DRAM chips, which should give 64KB RAM.
But Sinclair only used the upper or lower parts of the 4164 chip, and thus added some 74LS157 multiplexors.
I had an old and very dead issue 3 board lying around, and after some tweaking I got it up and running.
The RF modulator is gone, the 7805 power regulator is gone, and new caps have been installed.
Both the ULA and the DRAMs worked, and the board fired up. The Z80 M1 line is dead, as often the case, but the computer still ran.
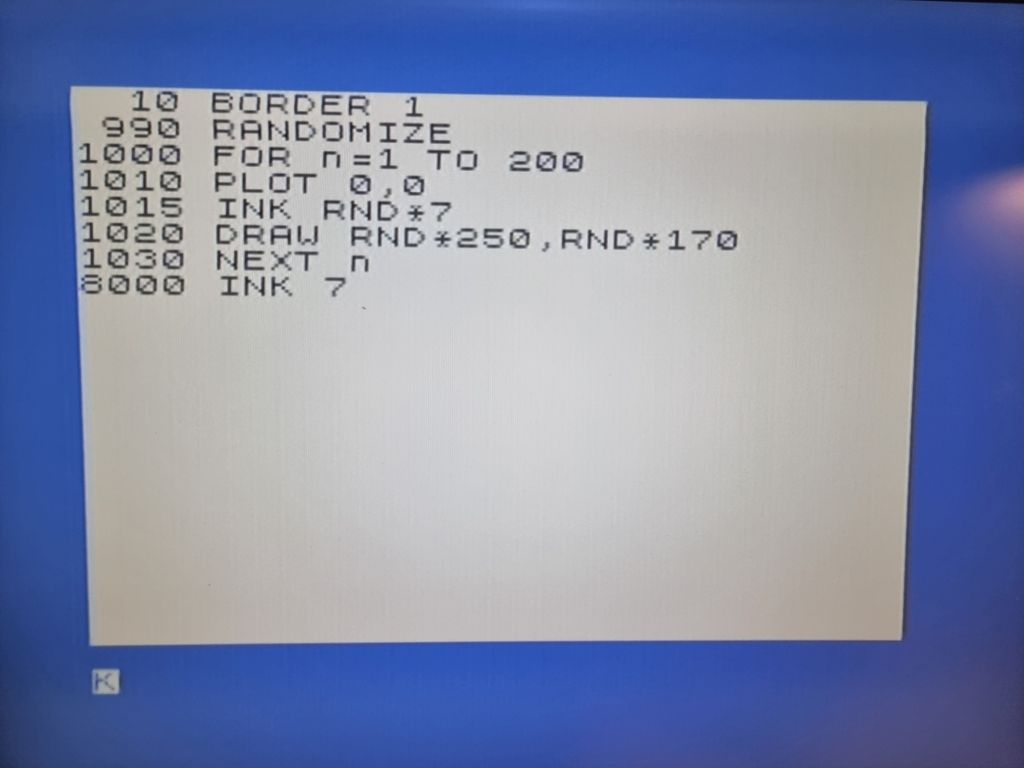
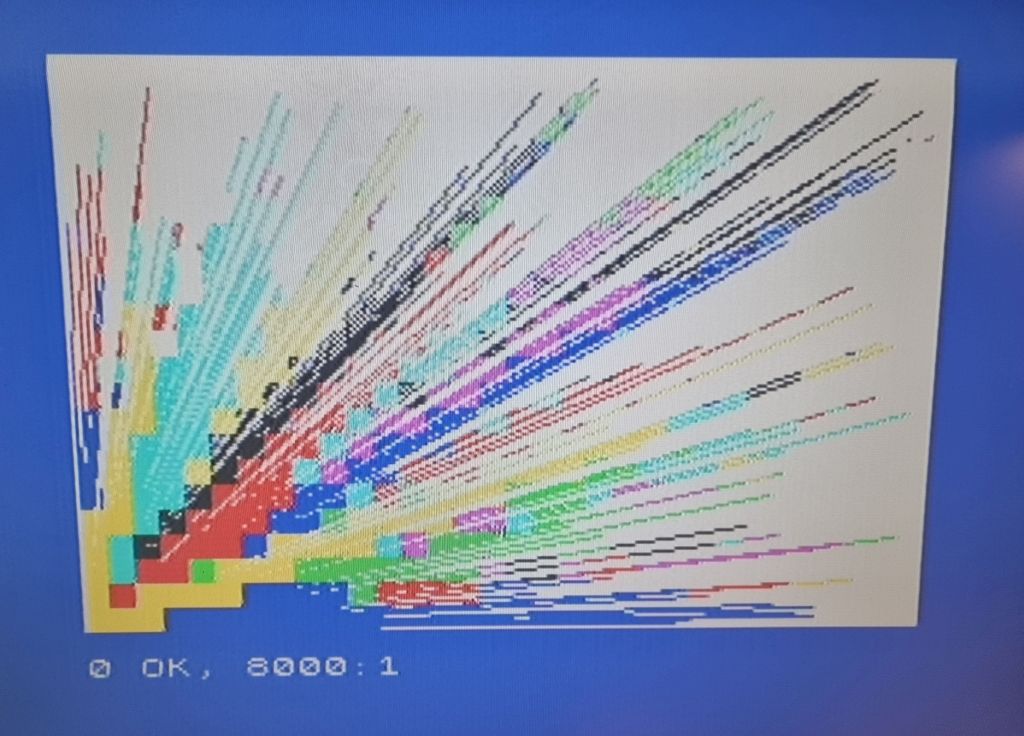
It was like time had stood still. I still remember how to program the Spectrum, both in BASIC and in Z80 machine code.
The days of PEEK, POKE and USR were back.
As I knew I had to replace the Z80 CPU with the faulty M1 line, I stood at a cross road.
The Spectrum is 40 years old, and the chips are bound to break.
The DRAMs and the ULA are not in production anymore, so getting spares will be increasingly difficult.
Searching the internet, I found out that some smart people had reverse-engineered the Spectrum ULA and devised a ZX spectrum with modern
components, called Harlequin.
I decided to build a new Harlequin Spectrum and also got an eloquently designed cartridge that enables storage of programs on a flash card.
After a life-long career as software designer, I am back where I started. I understand how the ZX Spectrum works.
It is in sharp contrast to modern computers, based on operating systems that require more gigabyte of disk space,
and many megabytes of RAM to run, and with tens of thousands of files.
Operating systems that are so elaborate that nobody really understands how they work,
are full of bugs and require constant and time consuming updates. It has taken the joy out of computing, at least for me.
The Z80 has always been a love story for me, as it is so elegant and made Zilog a successful company. It was, and still is,
a processor that is Good Enough to solve so many tasks and is easy to program.
After having refurbished a couple of old ZX Spectrum boards, I got hold of a second-hand extension cartridge, called DivMMC.
I had never heard about it, but plugged it in and was amazed about how some clever individuals had managed to build a simple OS
for this iconic computer.
As began my software career with homebrewn 8080 and Z80 computers, I was curious about the workings of this device. Sadly there
was no information available on-line, so I had to do some detective work. I attached a bus analyzer, and quickly found out how
the hardware itself was designed. A 28C64 EEPROM that maps at $0000, and some RAM banks that map at $2000. No surprise here.
I then took a look at the Z80 program stored in the 8KB EEPROM and found out how it worked. I finally found some references on-line,
and it seems to be some free software that is not developed anymore, but in the information were additional
clues to important hardware trapped addresses. A crude Z80 assembler file was part of the info.
Now I was able to make my own improved version of the OS that runs on the same hardware, but solves some of the issues in the
software that already was on the cartridge.
As the DivMMC cartridge RAM is paged, it was necessary for me to develop an overlay loader, that could load segments on-demand.
As I had already done a modified version of the ZX BASIC ROM, I had to make a common module that defined addresses of important ZX BASIC
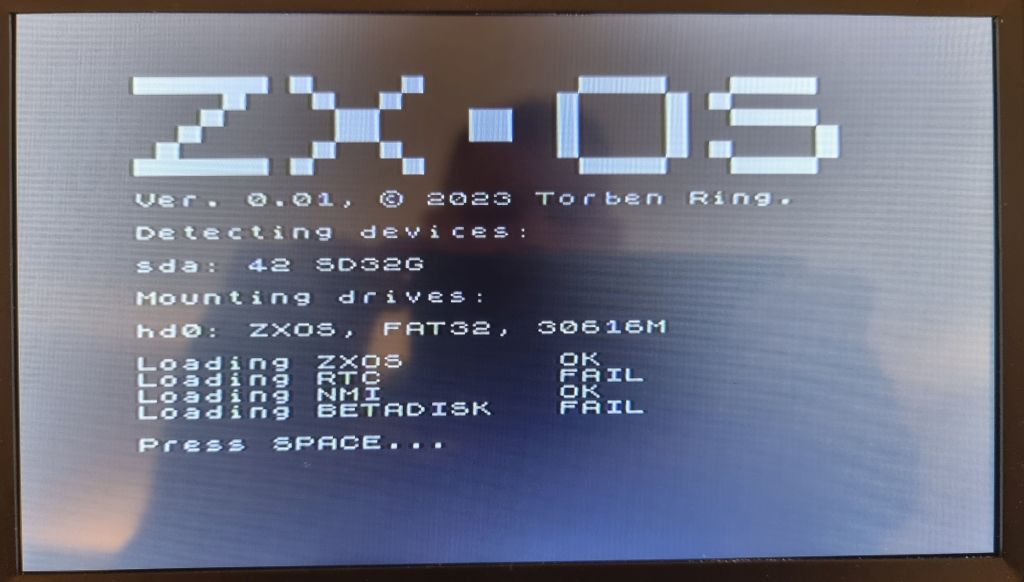
routines, as I had to use them for the ZXOS interface. I reused the NMI and BETADISK modules that were already on the DivMMC cartridge,
and as it has no real-time clock, I simply made a dummy RTC program and will hard-link it.
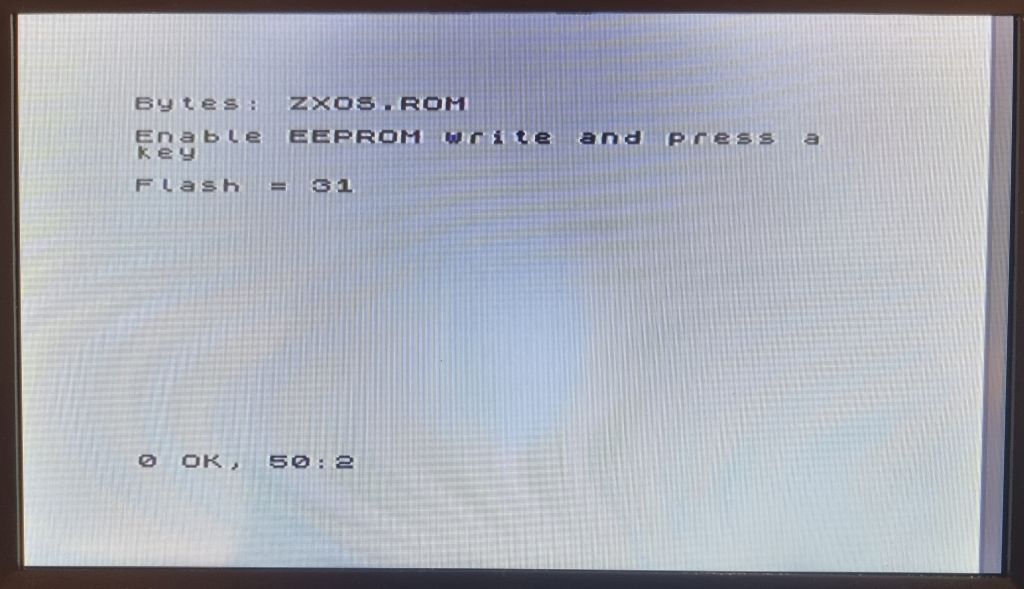
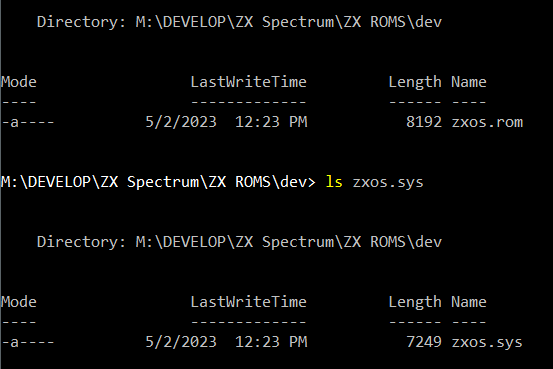
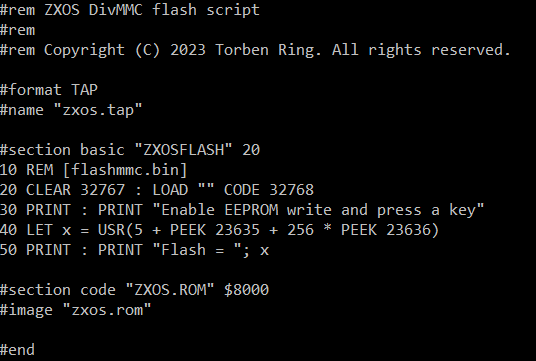
In the process, I developed my own Z80 macro assembler and a host of tools to install software onto the DivMMC cartridge. A lot of Z80
assembler programming with bit and byte counting.
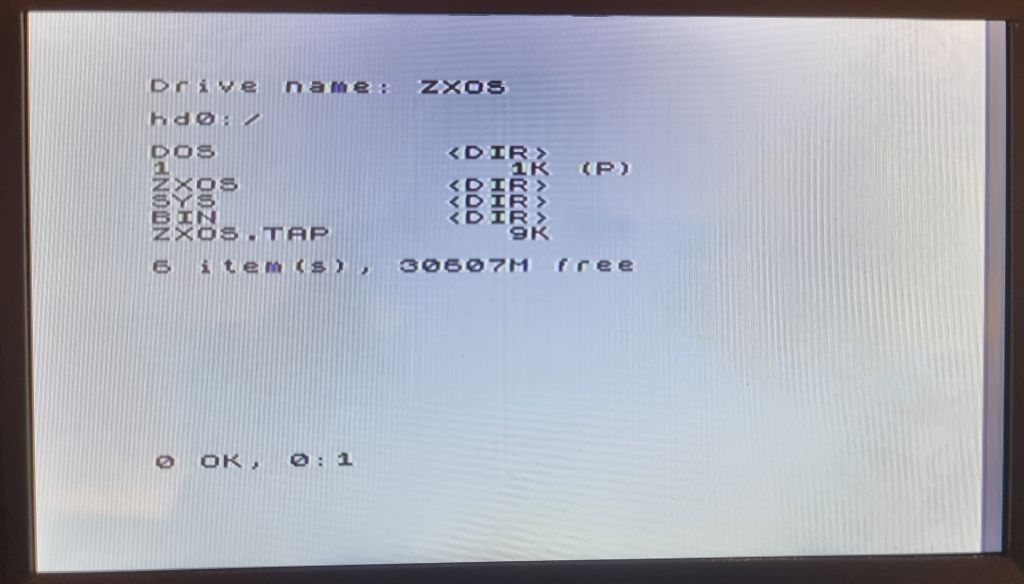
I decided to call it ZXOS, as it runs on the 48KB ZX Spectrum.
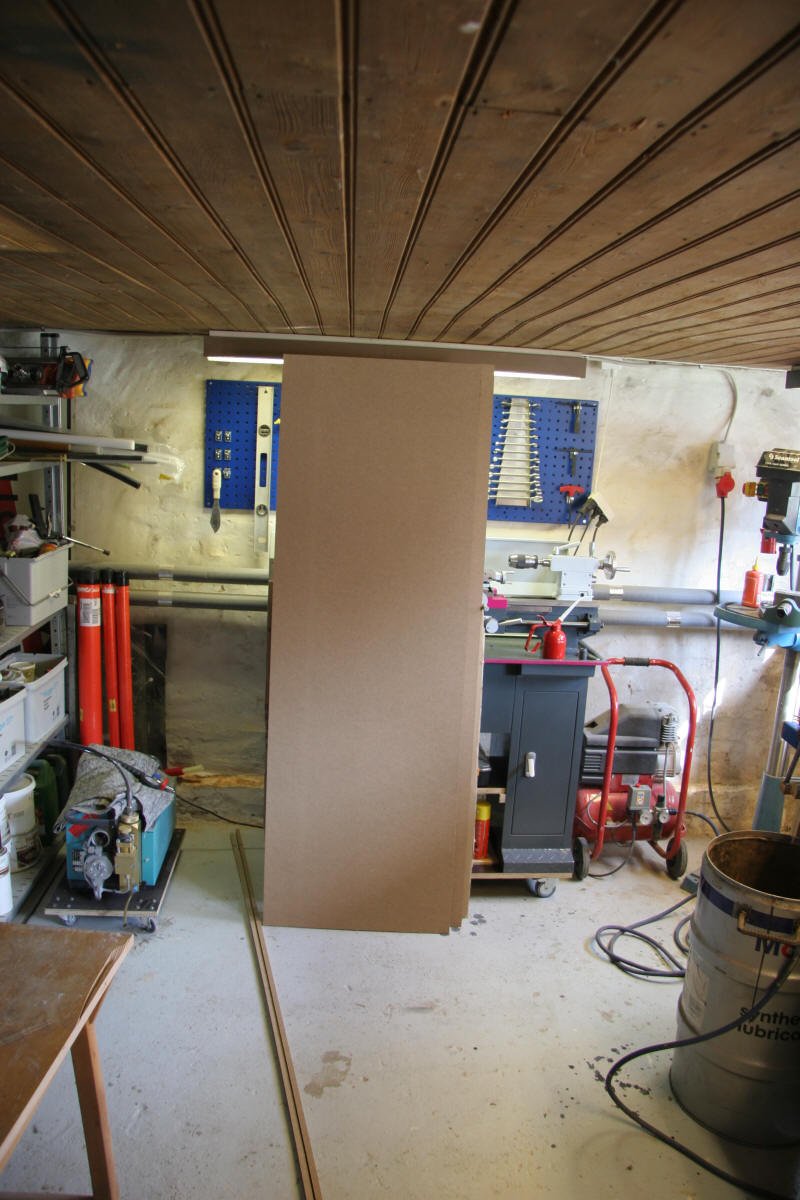
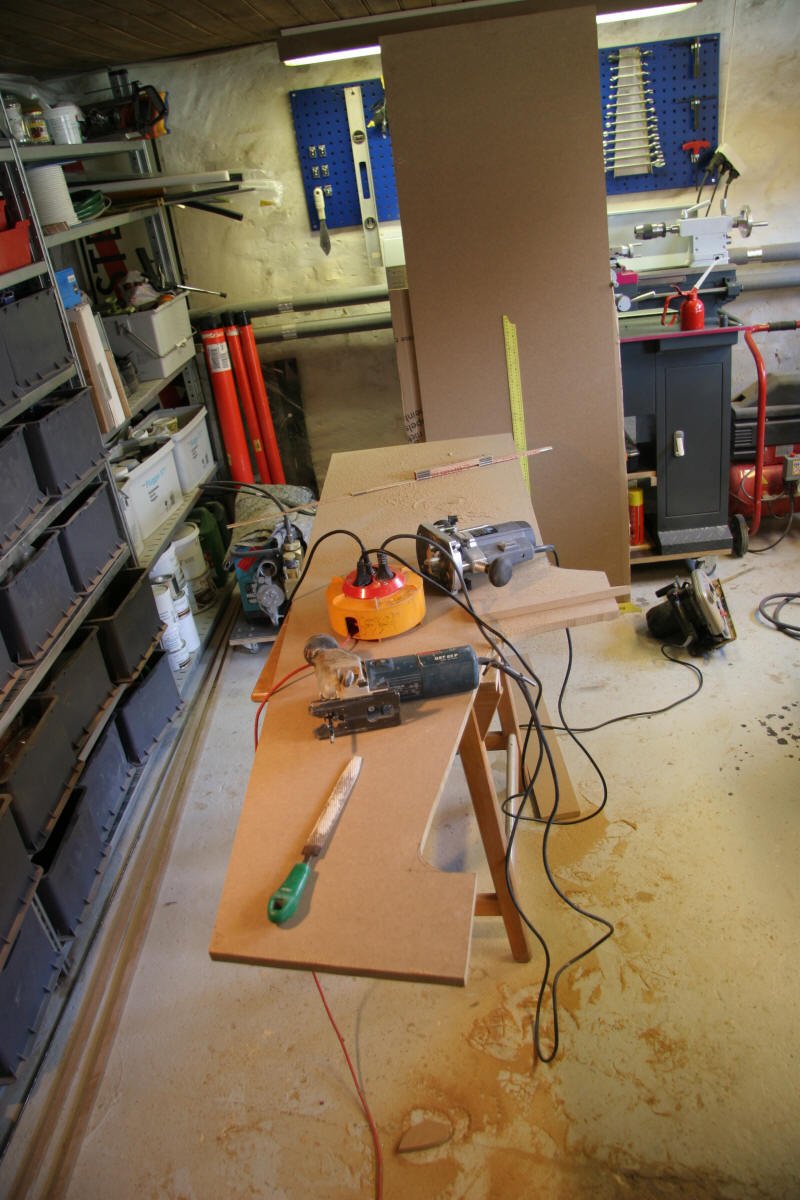
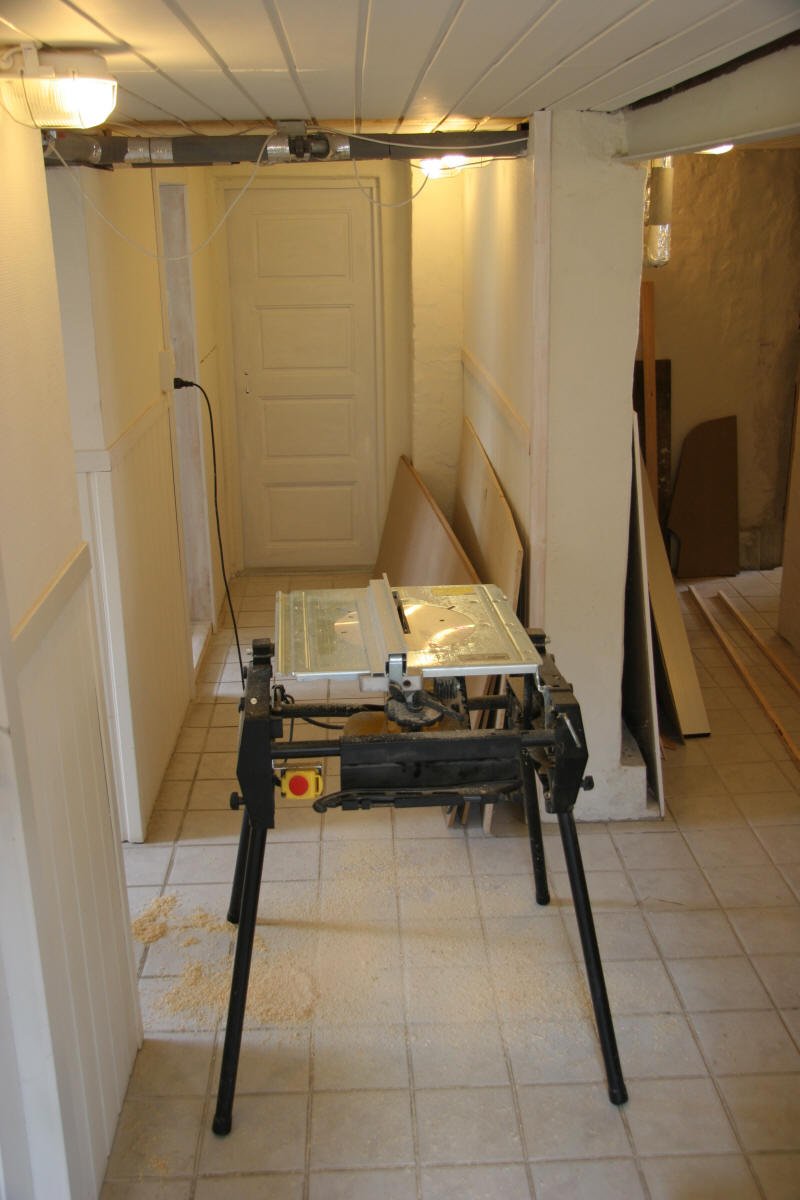
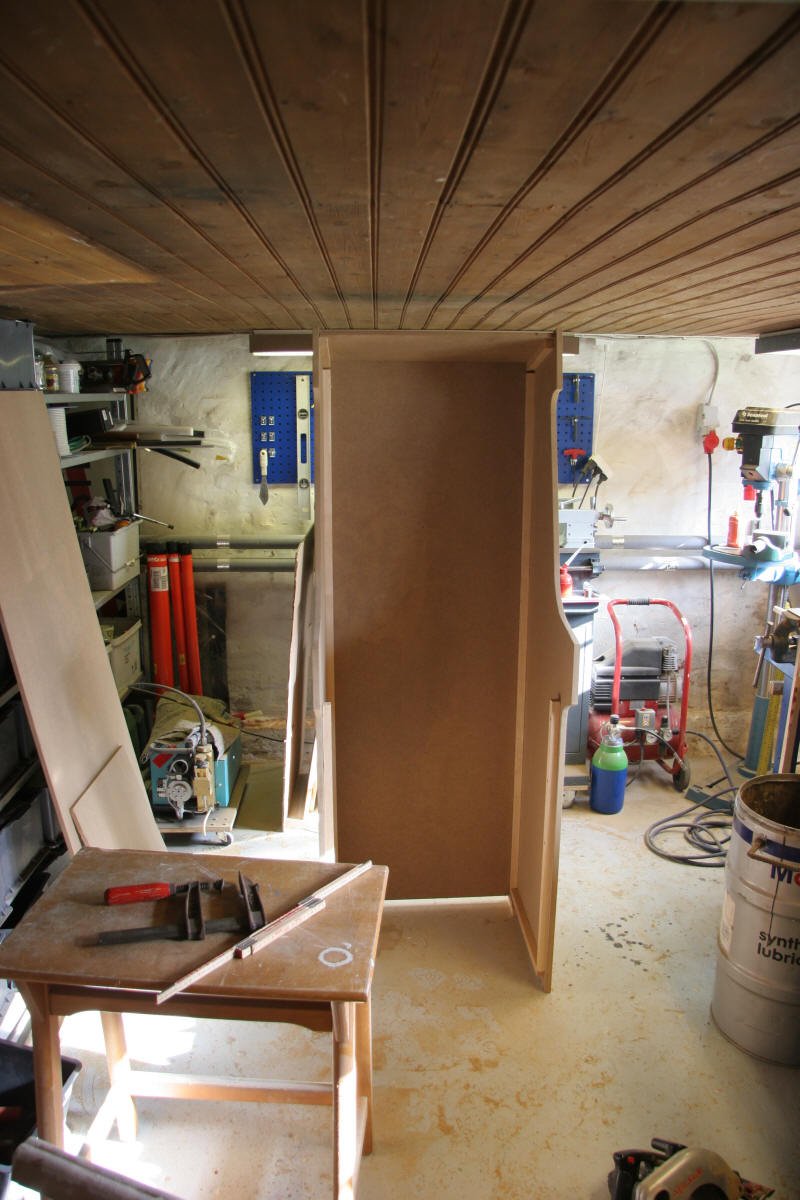
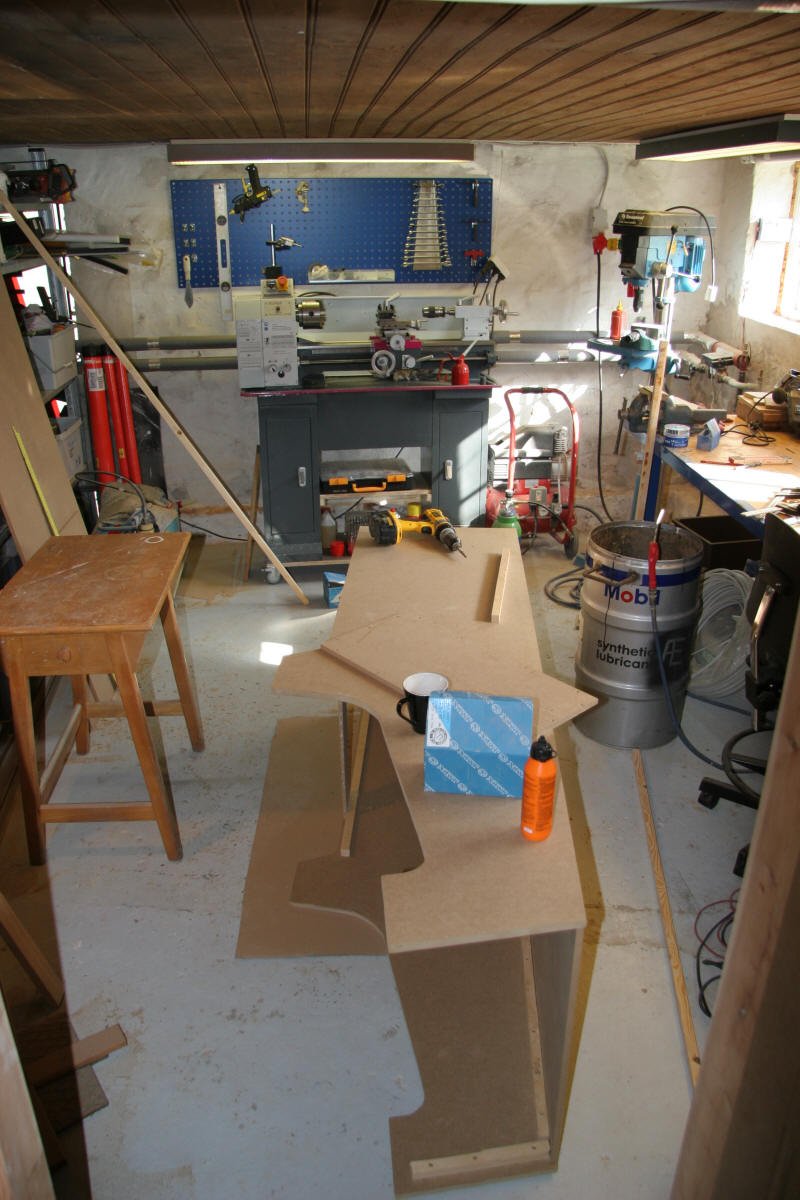
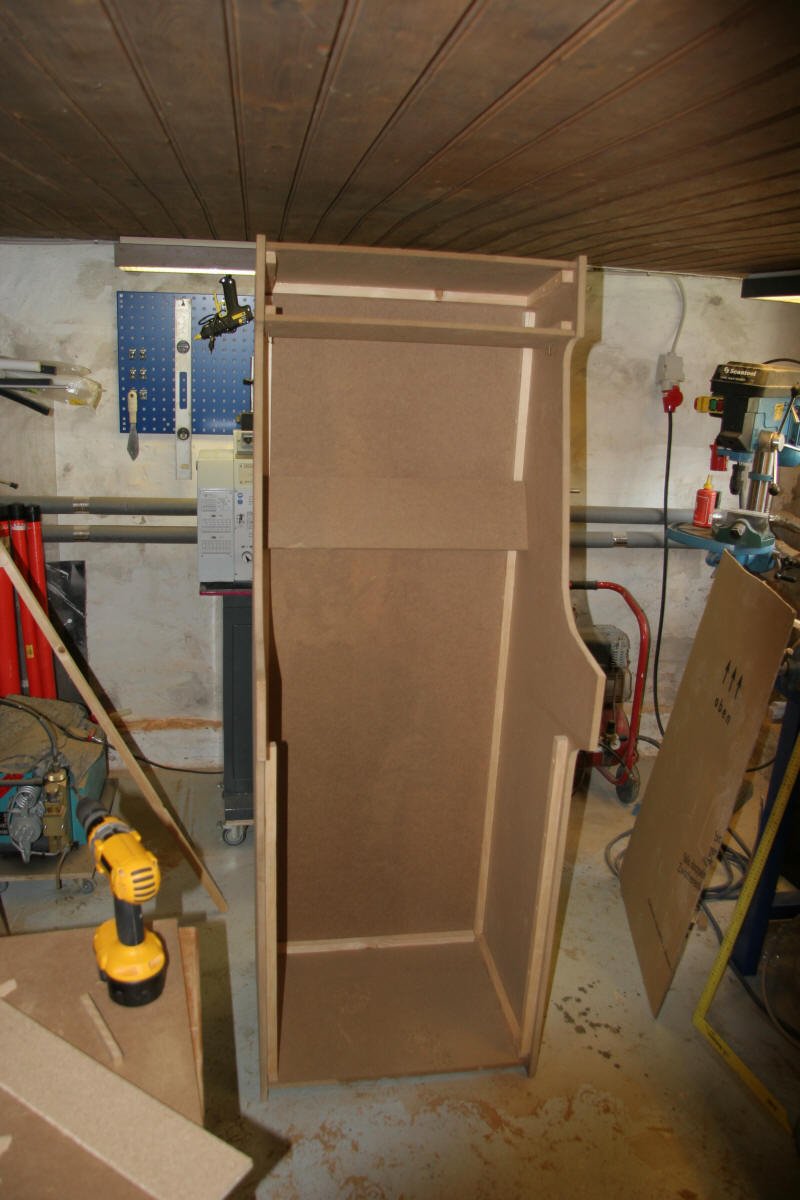
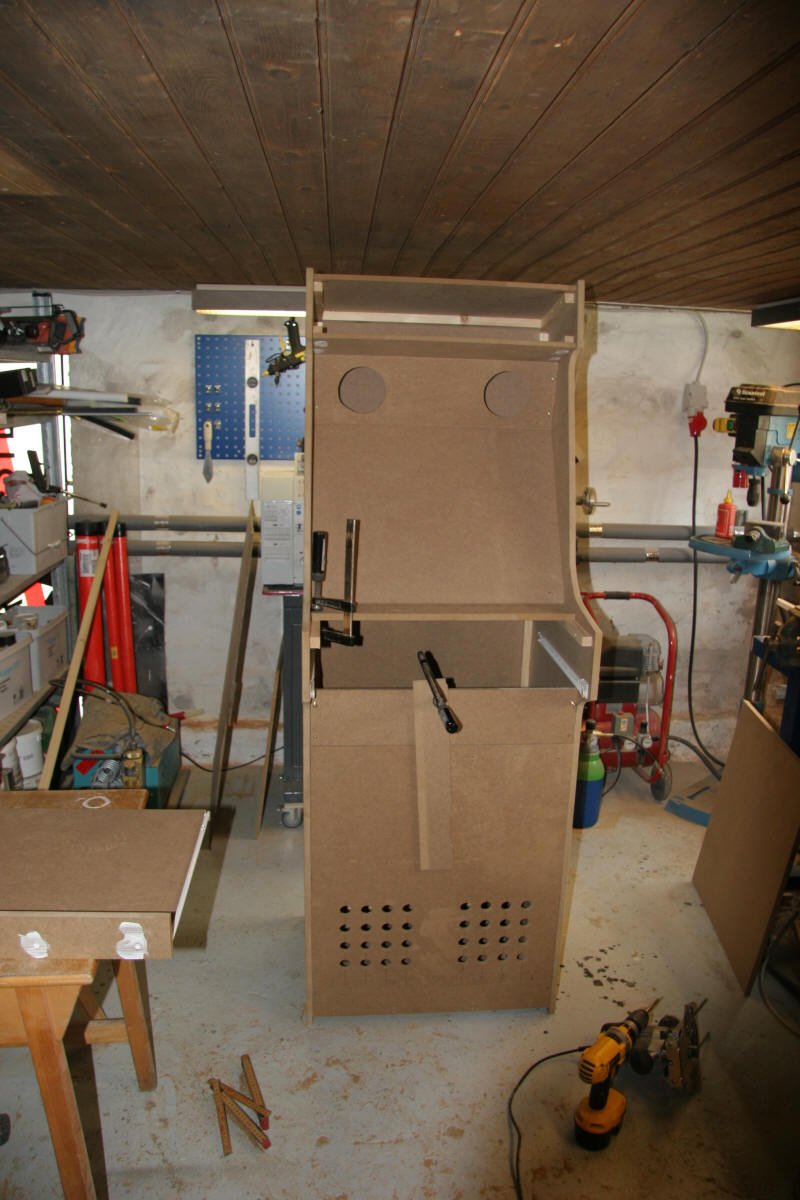
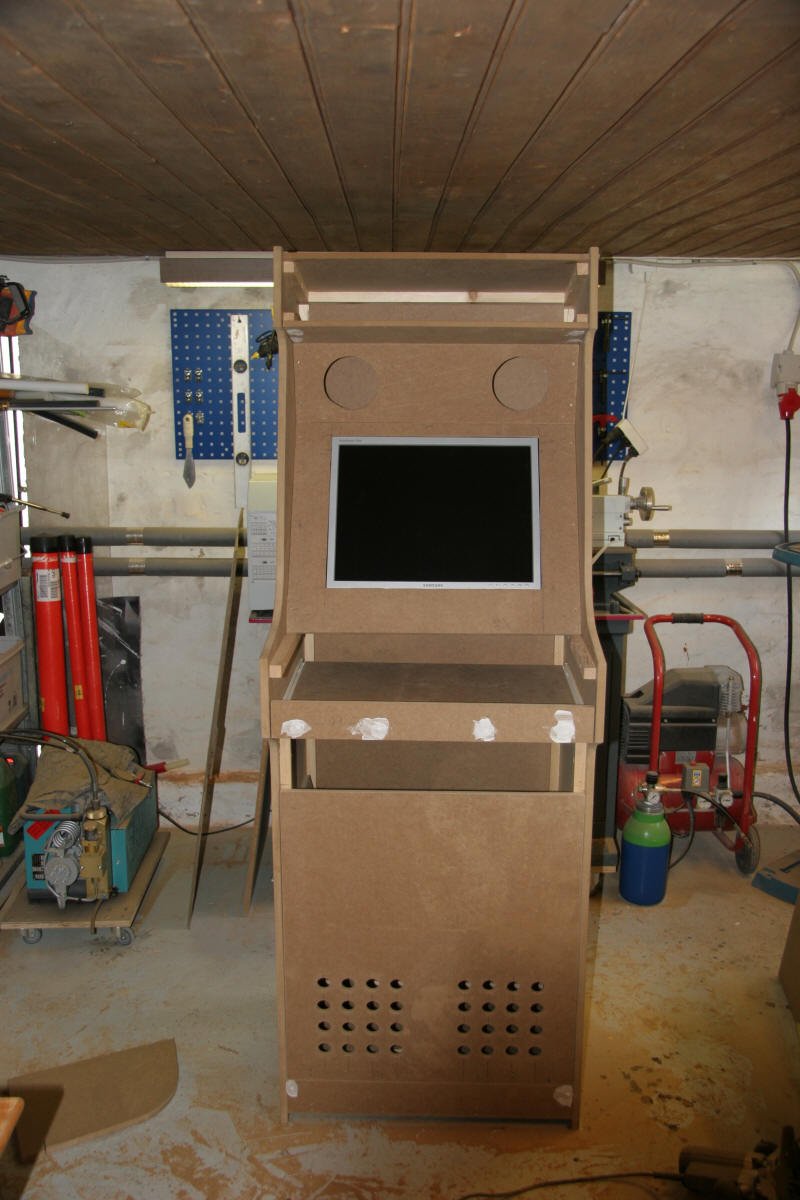
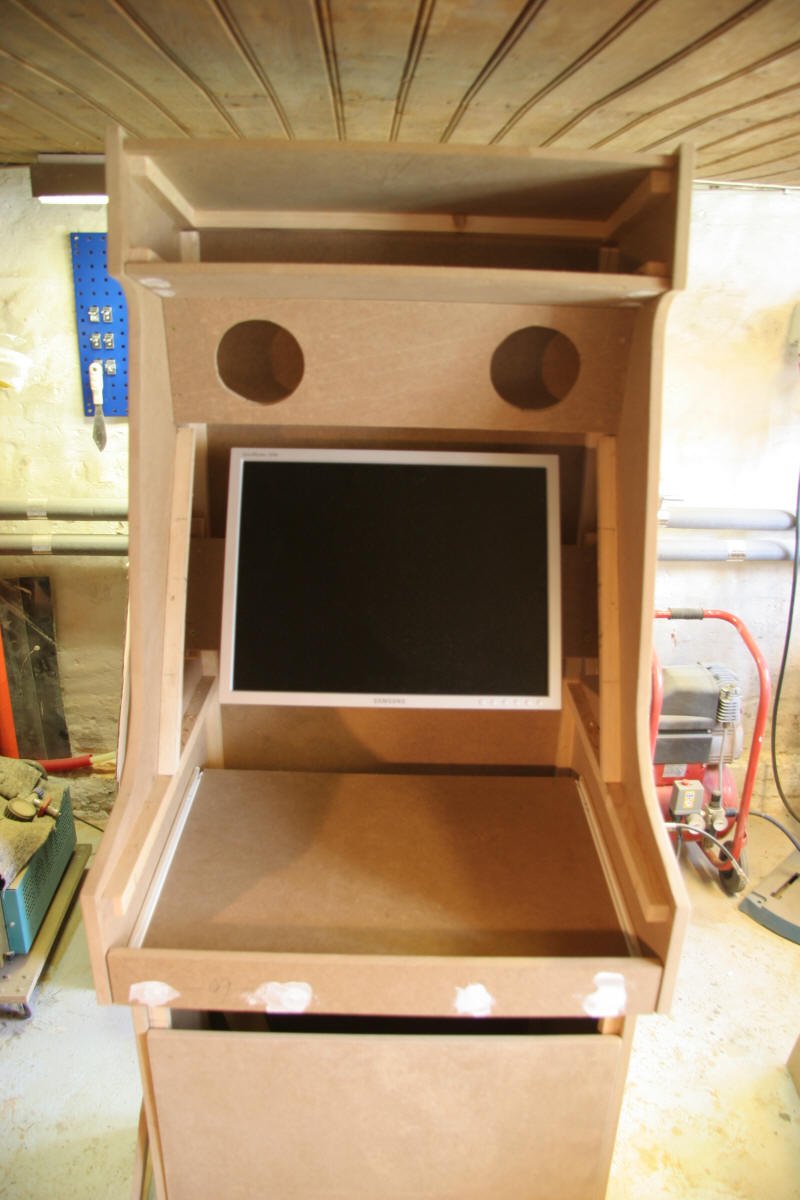
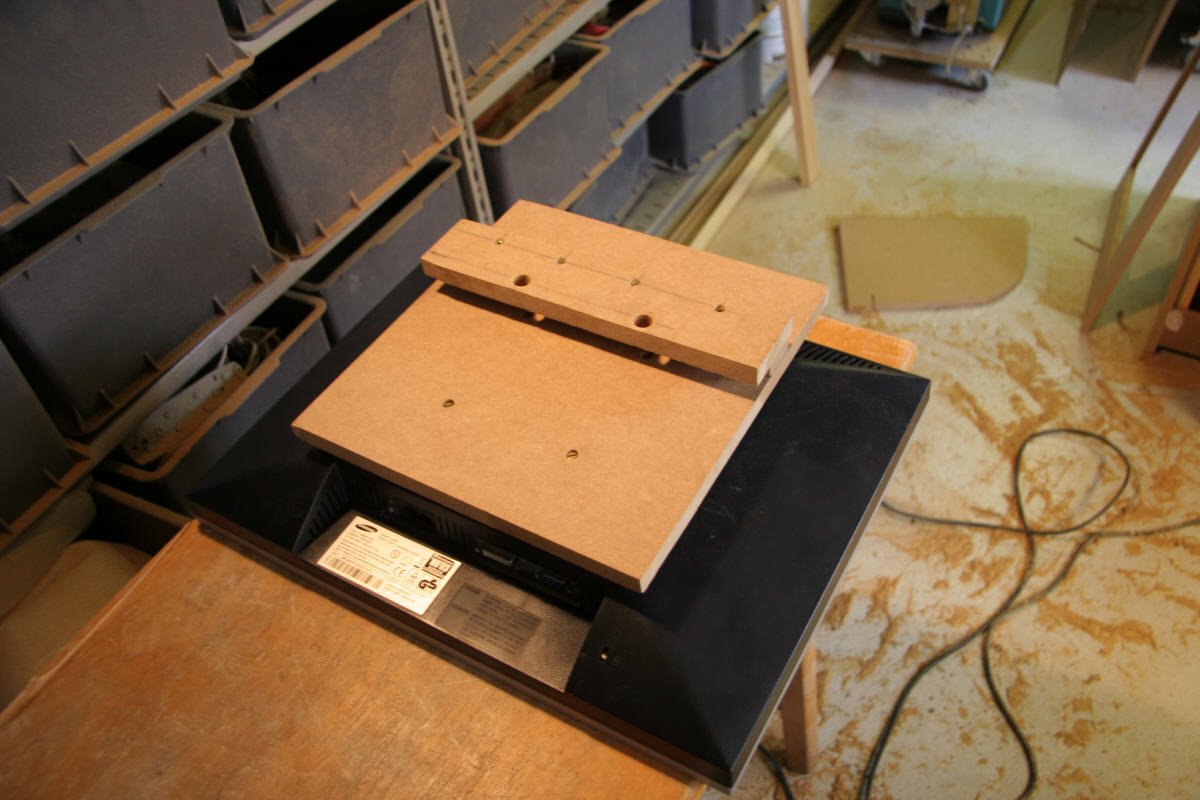
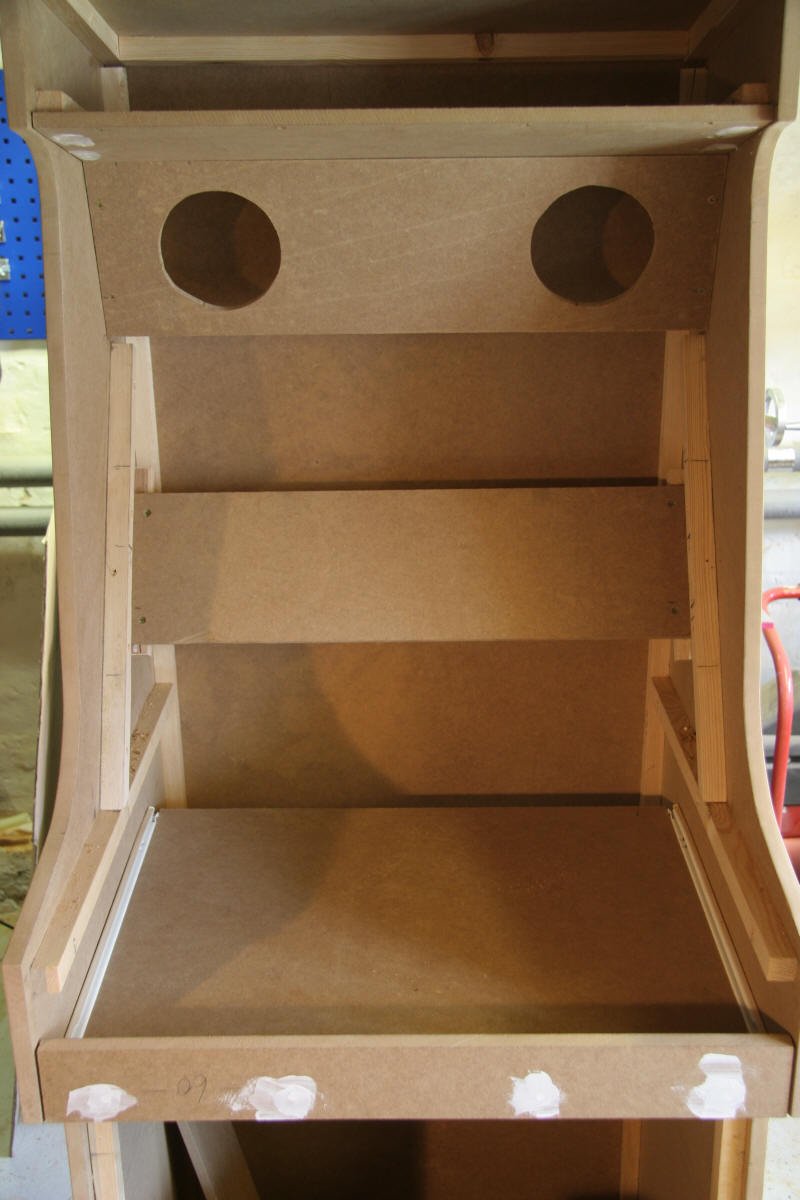
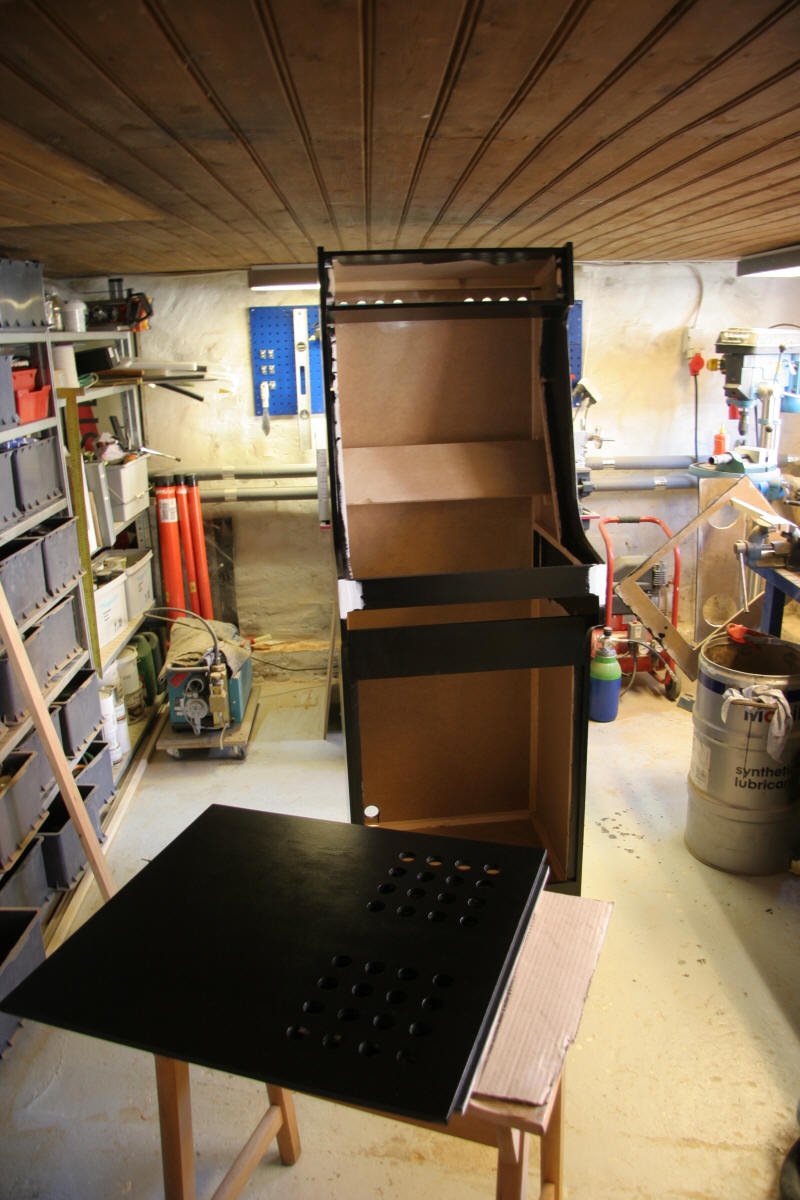
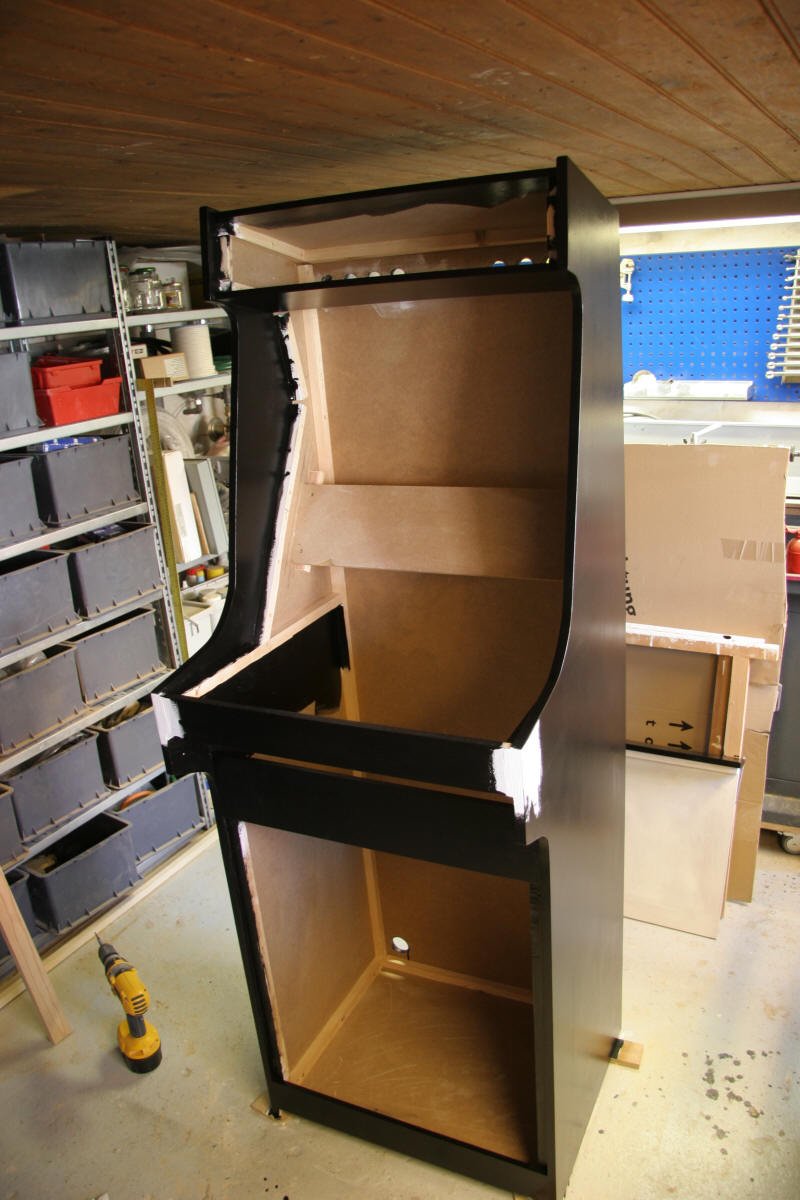
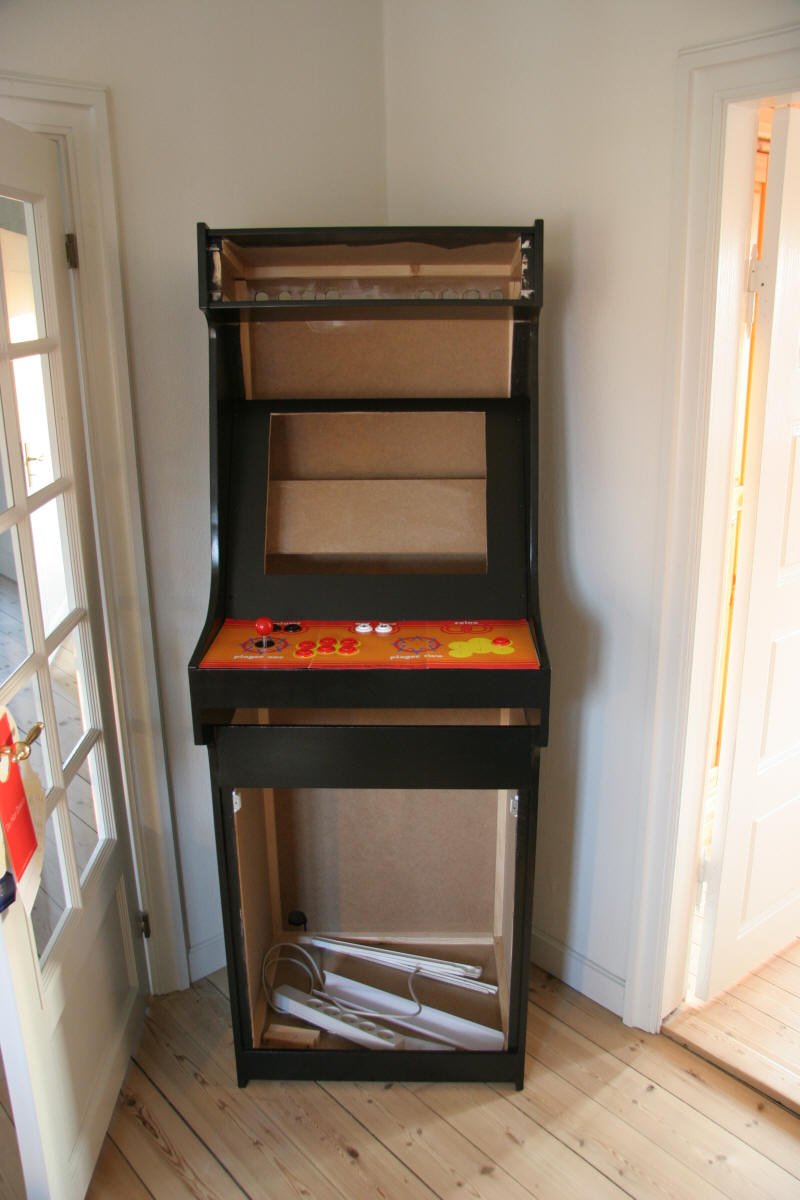
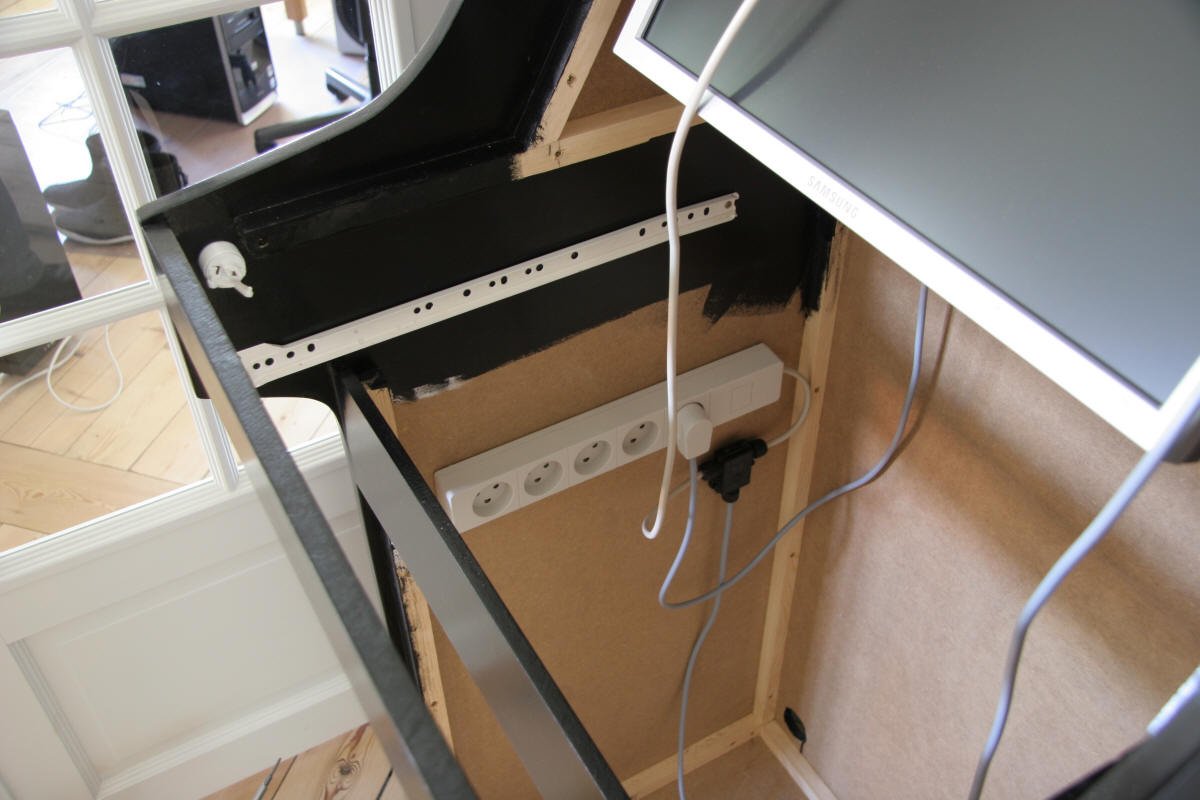
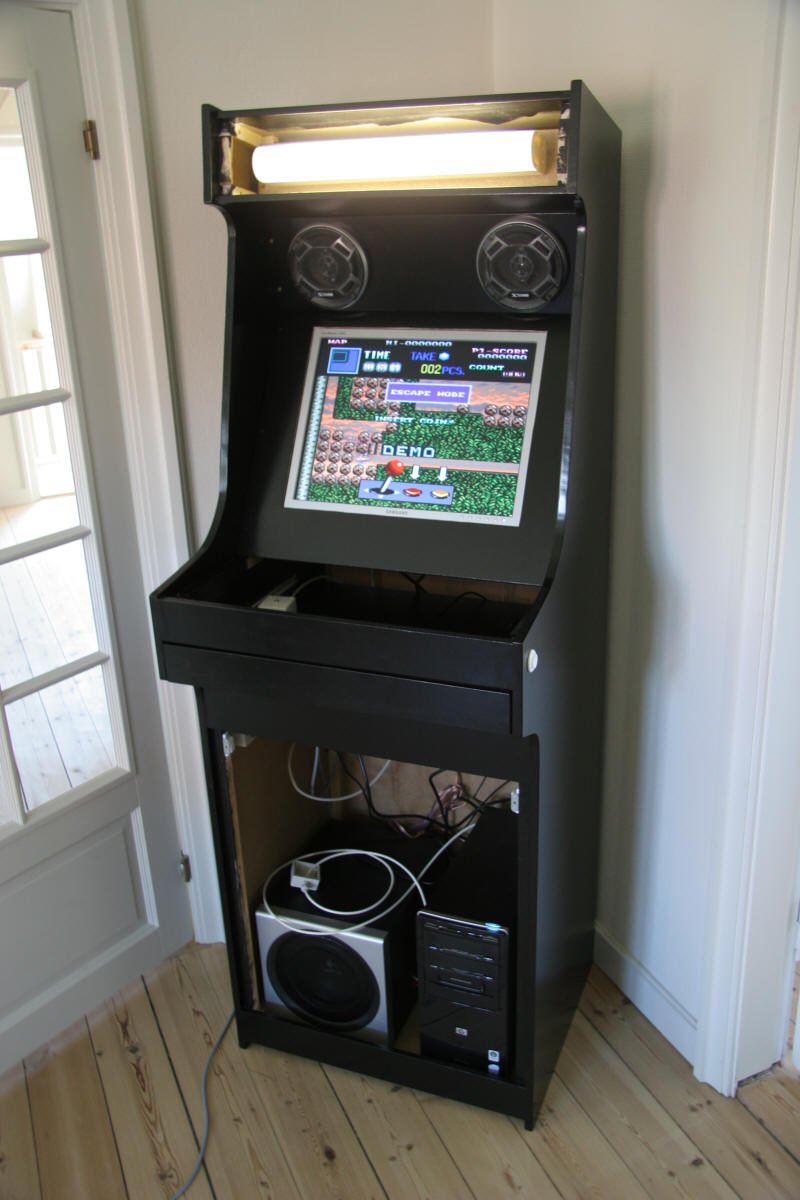
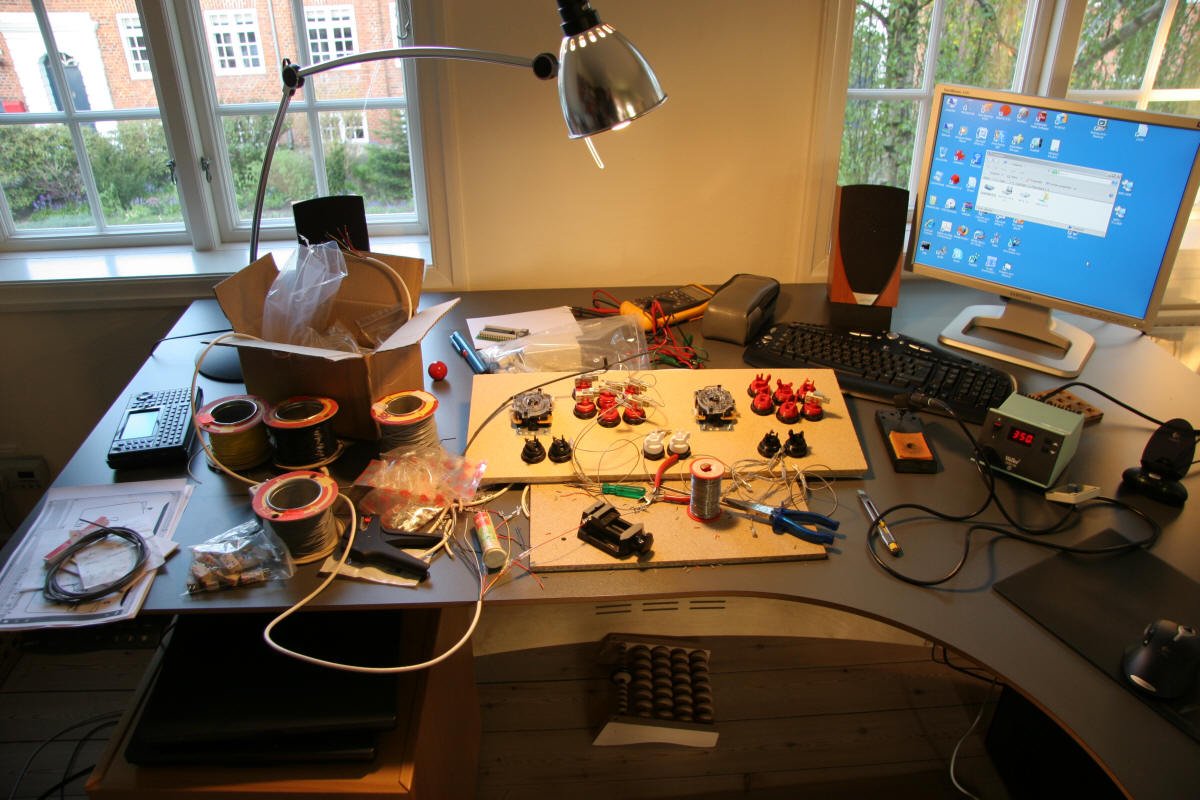
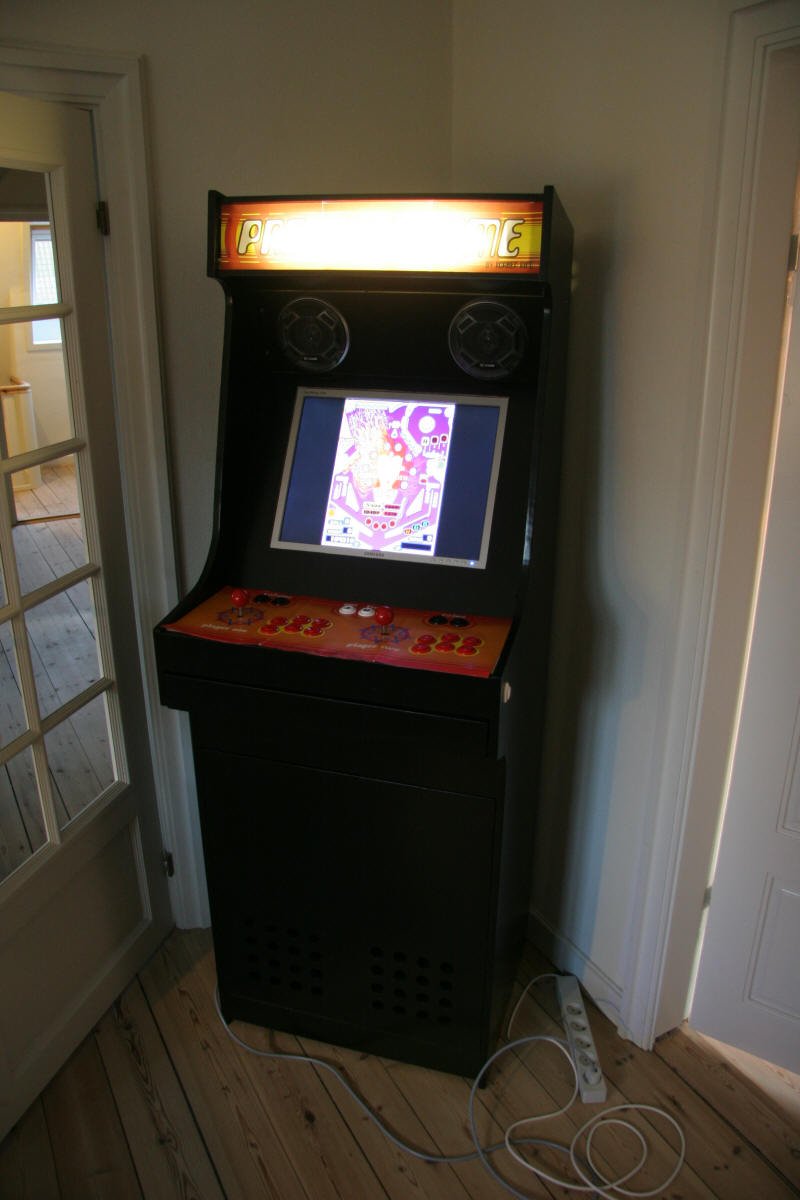
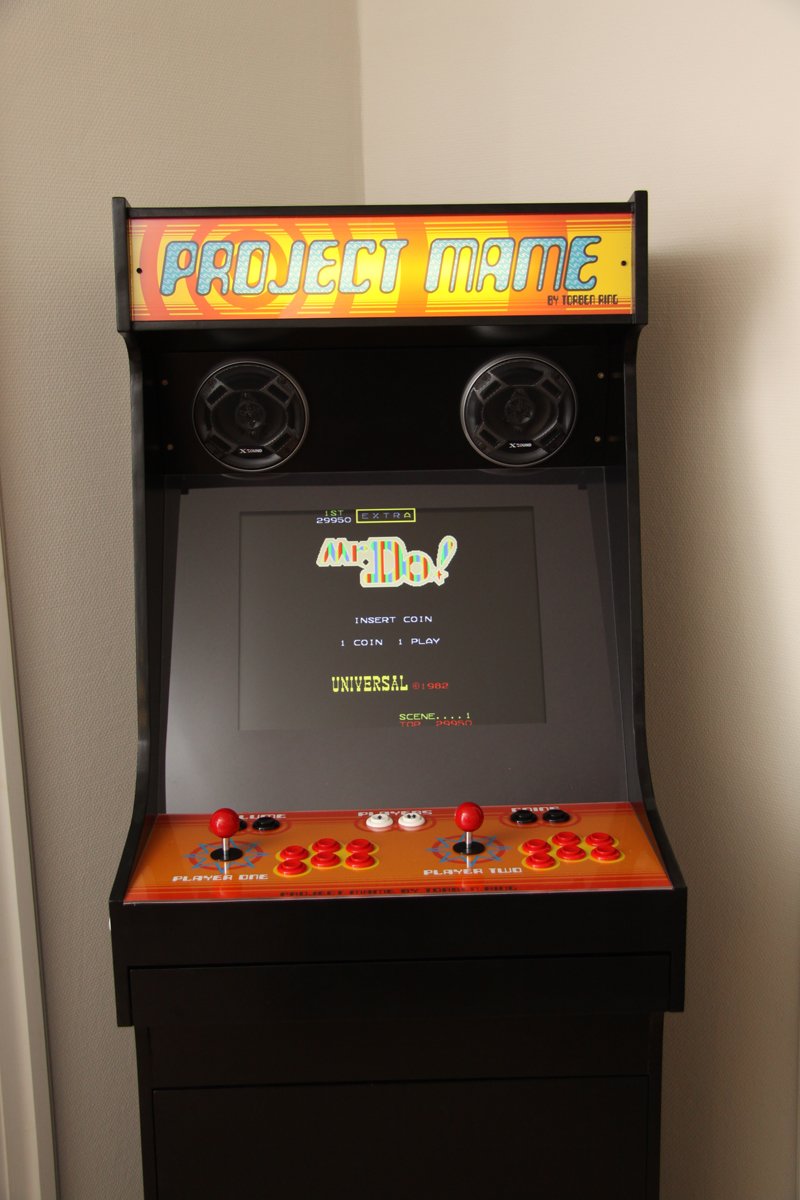
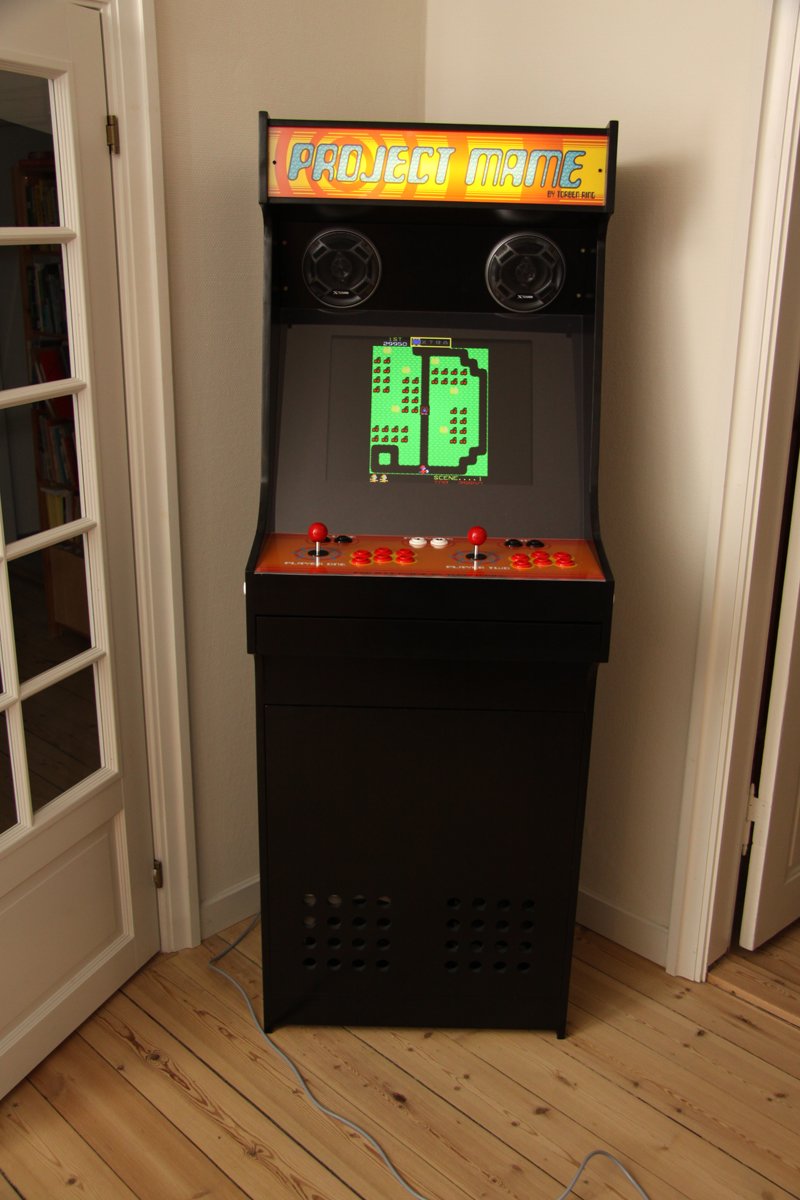
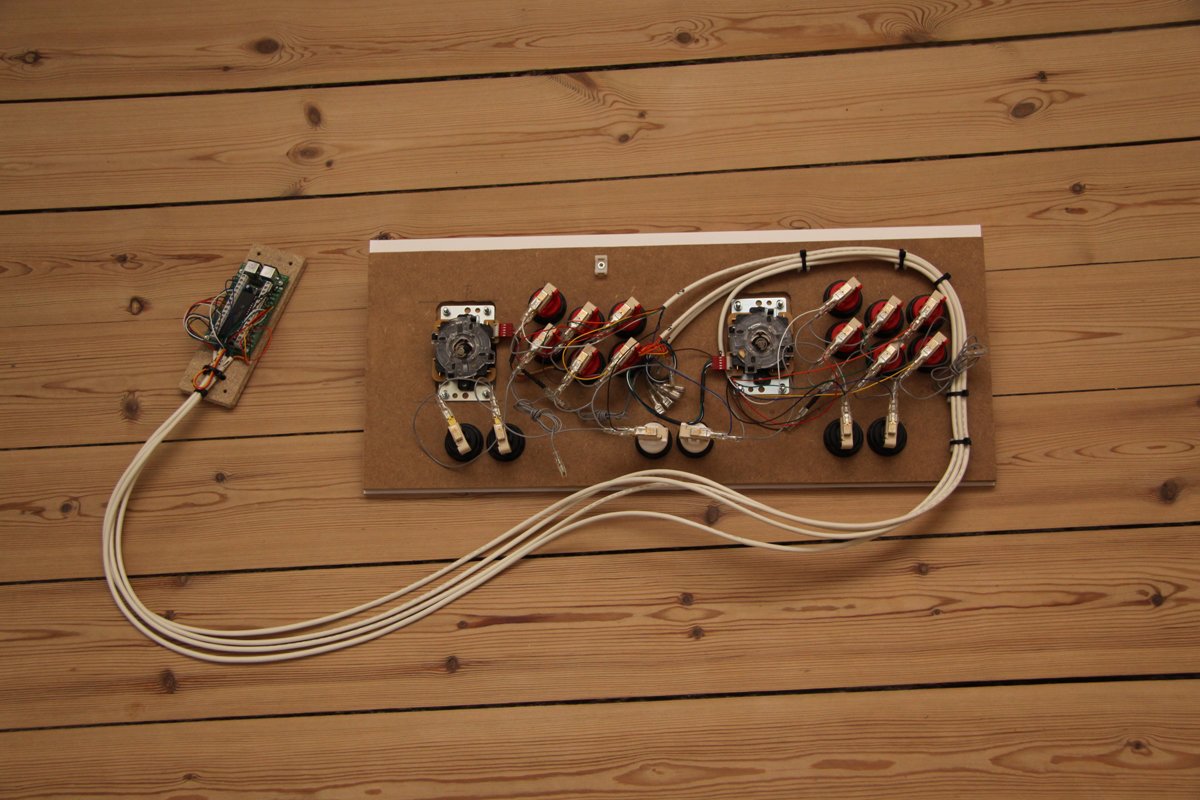
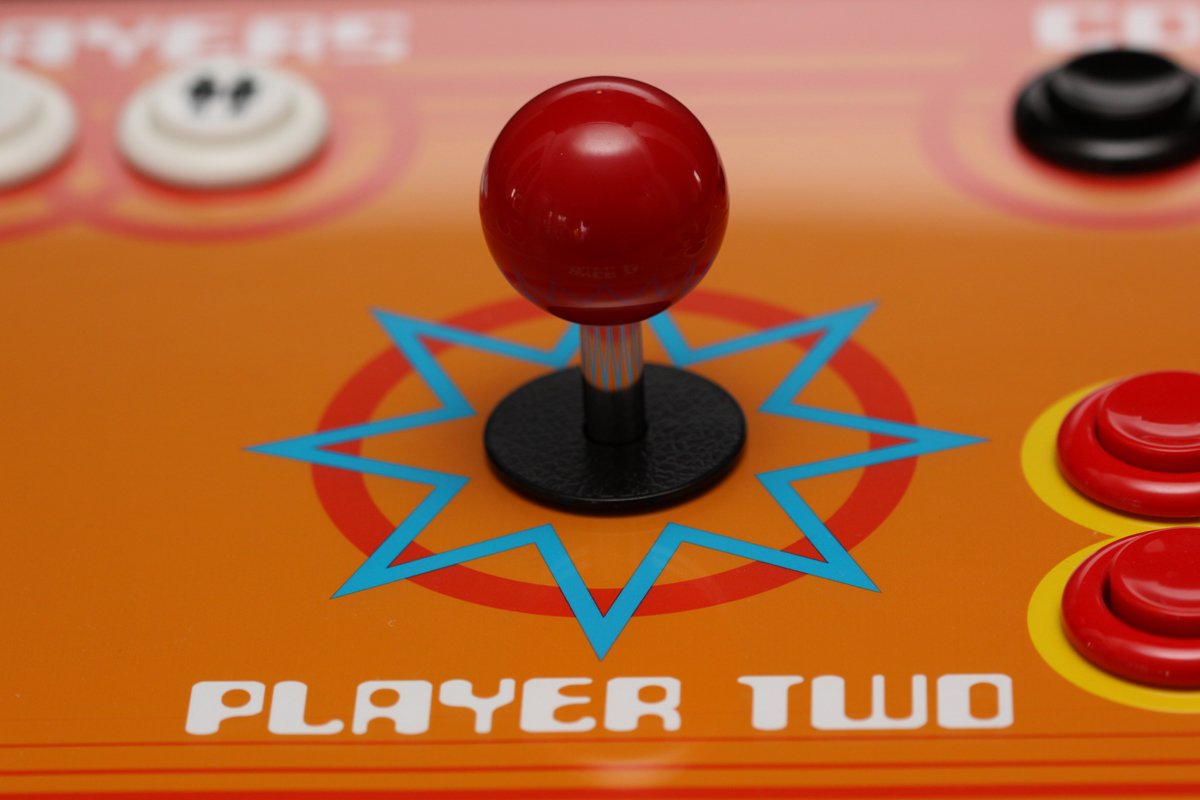
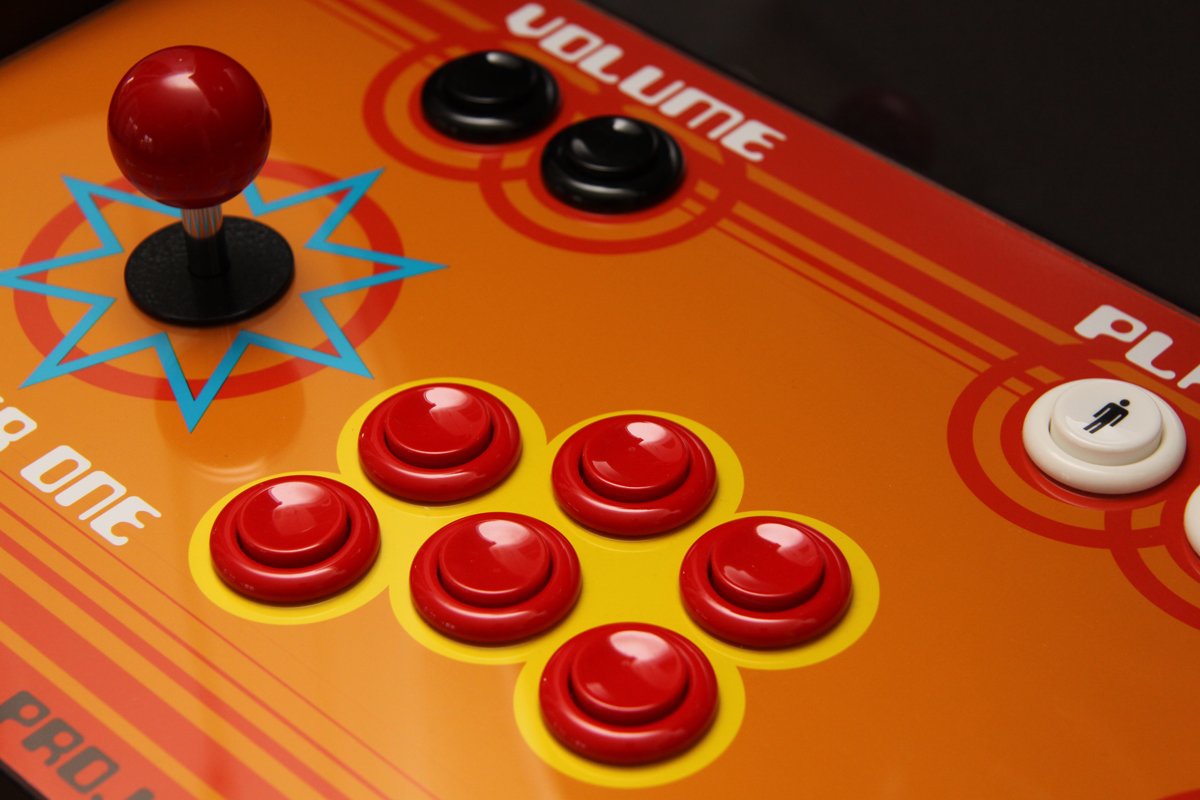
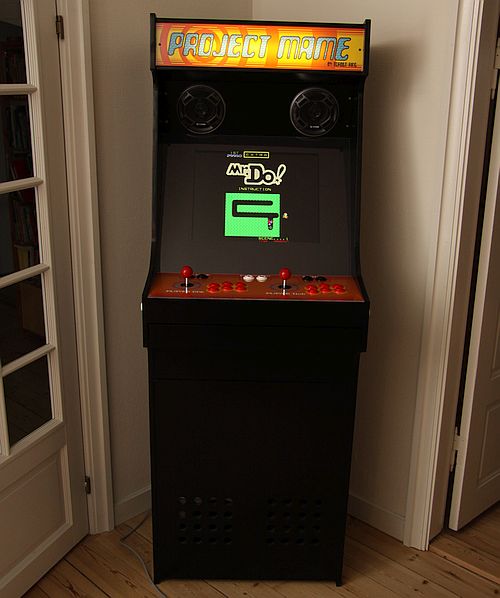
This album shows the Step by Step process that I went through when I was building my arcade cabinet. The cabinet is used for both real arcade games where I have bought the entire electronics (boards, EPROMs etc.) from scrapped arcade machines, and for MAME. But as it takes time to change boards, I've dumped the EPROMs and use them with MAME instead. Further, I can avoid the use of the special graphics adapter that is needed when I run the original boards with a modern monitor. It was somewhat problematic to dump the very old EPROMs (eg. 2708), as they needed more voltages - often negative - than their modern counterparts that run off a single 5 volts supply.